

Protect Paint While Removing Truck Vinyl With Clay Bar Aftercare
Posted by Deeder Dandenhorf on Sep 21st 2026
Protect Paint While Removing Truck Vinyl With Clay Bar Aftercare
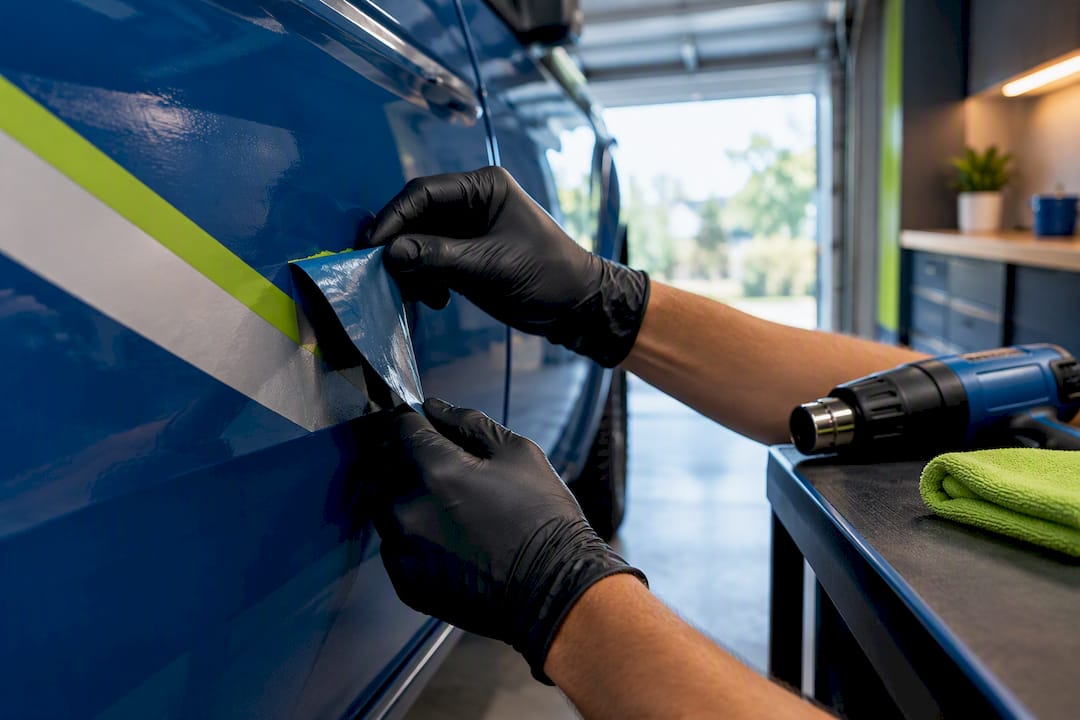
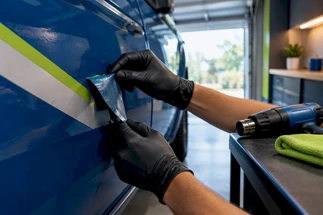
The safest way to remove vinyl lettering from a truck is to warm it with a heat gun or hair dryer, peel it at a low angle with a plastic tool, dissolve the leftover adhesive with a citrus-based remover, then clean the panel with isopropyl alcohol and reseal it with wax or paint sealant. Test a hidden spot first, skip the metal scrapers, and keep the heat moving so you never scorch the clear coat.
TL;DR:
- Vinyl lettering aged more than three years or baked in direct sunlight tends to fragment and may require longer, more careful reheating during removal.
- Cooler weather below 50°F stiffens the adhesive, making removal more prone to tearing and increasing the risk of paint damage if not properly warmed beforehand.
- Using metal tools or excessive force can gouge the paint and should be avoided, with plastic wedges and wrapped cards being the safest options for lifting vinyl.
- Citrus-based degreasers and 70% isopropyl alcohol are effective for residue removal, but should be applied carefully to avoid damaging the clear coat or leaving oily films.
- Professional removal is recommended for full wraps, decals older than three years, or on textured surfaces, as these cases often require industrial tools beyond DIY capabilities.
Table of Contents
- Tools and Supplies You Need to Remove Vinyl Lettering From a Truck
- Step-by-Step Removal: How to Peel Vinyl Lettering Without Damaging Paint
- Adhesive Residue Removal: Solvents That Dissolve, Not Scrape
- Decontaminate and Protect: Clay Bar, Polish, and Reseal the Area
- When to Call a Pro for Truck Decal Removal
- Steps to Protect the Vehicle’s Paint During Removal
- How Sun and Temperature Affect Vinyl Removal
- Handling Stubborn Adhesive Spots
- What to Do With the Vinyl You Remove
- Why Arrowhead Sign Company Weighs In on Decal Care
- Ready to Refresh Your Truck’s Signage?
- Sources
- FAQ
Tools and Supplies You Need to Remove Vinyl Lettering From a Truck
Grabbing the wrong tool is the fastest way to turn a Saturday project into a paint repair bill. Before you touch a single edge of that lettering, lay out everything you’ll need so you’re not improvising with a butter knife halfway through the job.
Heat sources. A hair dryer works fine for small decals or lettering on plastic trim, but a heat gun cuts the job time dramatically on larger graphics and older vinyl. Keep the heat gun moving in short passes and hold it at the distance the manufacturer recommends for your model, since holding it too close for too long can scorch paint or warp plastic panels. If you’re working near trim, badges, or plastic bumper covers, drop down to a hair dryer or the lowest heat setting.
Lifting tools. Soft plastic trim wedges, plastic scrapers, or even a credit card wrapped in a microfiber towel will lift softened vinyl without biting into the clear coat. Metal scrapers, razor blades, and putty knives are off the list entirely. They’re the number one cause of gouged paint on DIY decal jobs.
Residue removers. Once the vinyl is off, you’re left with a sticky adhesive ghost. Citrus-based degreasers break that down chemically rather than through abrasion, and a 70% isopropyl alcohol wipe finishes the job before you seal the paint.
Cleaning and protection supplies. Stock up on microfiber towels, a clay bar or decontamination product, and a quality car wax or paint sealant for aftercare.
Safety gear and conditions. Wear gloves and eye protection, work in the shade rather than direct sun, and aim for an ambient temperature in the 60 to 80°F range. Cold surfaces below roughly 50°F make adhesive rigid and more likely to tear during peeling, which raises your odds of pulling up paint along with the vinyl.
- Heat gun or hair dryer
- Plastic trim tools or wrapped card edge (no metal)
- Citrus-based degreaser or automotive adhesive remover
- 70% isopropyl alcohol
- Microfiber towels
- Clay bar with lubricant
- Car wax or paint sealant
- Gloves and eye protection
Step-by-Step Removal: How to Peel Vinyl Lettering Without Damaging Paint
This is where patience pays off more than muscle. Vinyl lettering removal from a truck rewards a slow, methodical approach far more than it rewards force, and most paint damage happens when someone tries to rush a stubborn corner.
-
Wash the panel first. Dirt, road grime, and grit trapped under the decal edge act like sandpaper once you start peeling. A quick wash and dry gives you a clean surface to work on and lets you spot any existing paint chips before you start, so you don’t mistake old damage for new.
-
Warm the vinyl in sections. Hold the heat gun or hair dryer six to eight inches from the surface and keep it moving in slow, steady passes. You’re aiming for warm to the touch, not hot enough to blister your fingers. Skipping the heat step entirely is the leading cause of paint damage during removal, because cold vinyl resists and tears rather than releasing cleanly.
-
Lift a corner with a plastic tool. Once the vinyl feels pliable, work a plastic trim wedge or wrapped card under one corner and start lifting.
-
Peel at a low angle. Pull the vinyl back on itself at roughly 15 to 30 degrees, moving slowly rather than yanking. A low, controlled angle spreads the stress across the adhesive layer instead of concentrating it on one point, which keeps the clear coat from lifting along with the letters.
-
Reheat as you go. If you feel resistance building, stop pulling and warm that section again rather than pulling harder. Reheating costs you thirty seconds. Tearing a paint chip costs you a repaint.
-
Work aged or brittle vinyl in small sections. Lettering that’s been baked by sun for a few years turns brittle and tends to snap into pieces rather than peel in one long strip. Slow down, work two or three inches at a time, and reheat far more often than you think you need to.
Pro Tip: Keep a heat gun on the lowest setting that still softens the vinyl. You can always dial it up gradually, but you can’t undo a scorch mark on factory paint.
Time expectations vary depending on decal age and size. A small decal or letter applied within the last couple of years usually comes off quickly once you’ve got a rhythm going. A full set of aged truck lettering or a partial wrap that’s been baking in the sun for several years can require several hours of patient reheating and peeling, most of which is patient reheating rather than active peeling.
Adhesive Residue Removal: Solvents That Dissolve, Not Scrape
The letters are gone, but you’re staring at a ghostly outline of tacky adhesive residue and that’s a chemistry problem, not a scrubbing problem. Reaching for a razor blade or a stiff scrub pad at this stage is exactly how DIYers who did everything right on the peel still end up with swirl marks or scratches in the clear coat.
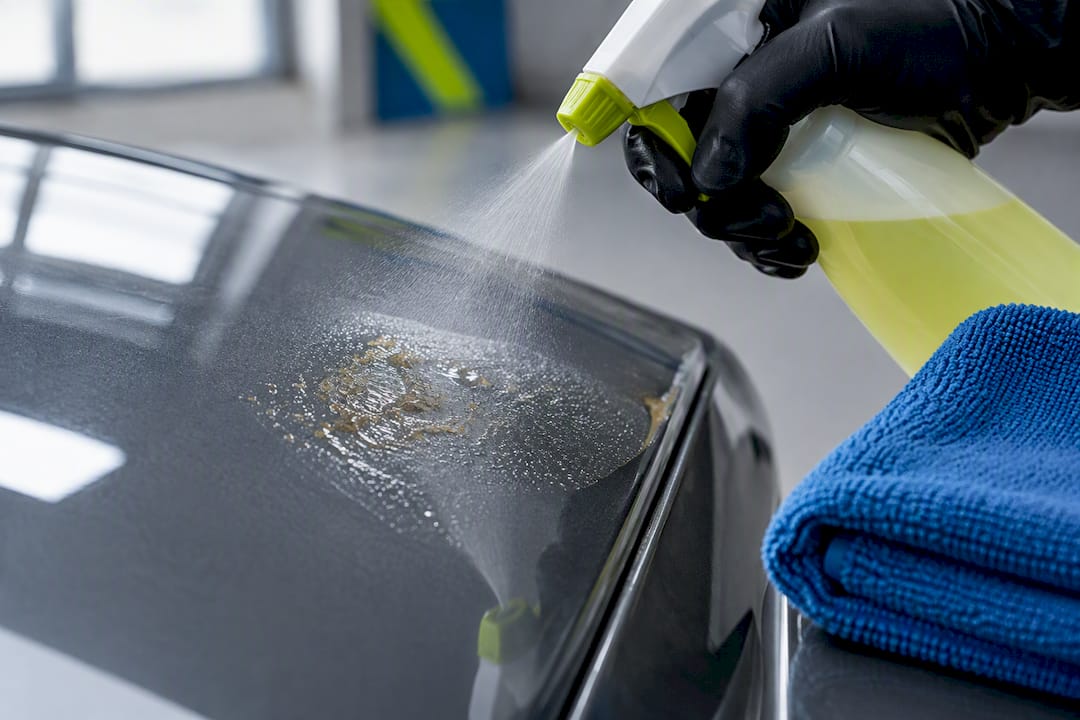
Citrus-based degreasers work because their surfactants and natural extracts penetrate petroleum-based adhesives without attacking the clear coat the way acetone or household solvents like nail polish remover can. Skip anything labeled as a paint thinner, brake cleaner, or generic “goo remover” you’d find at a hardware store. Automotive-specific adhesive removers and citrus degreasers are formulated to be paint-safe in a way general solvents aren’t.
Application method:
- Dilute the product if the label calls for it, then spray a light, even coat over the residue.
- Let it sit for 30 to 60 seconds. This dwell time is what actually breaks down the adhesive bond, so don’t wipe it away immediately.
- Wipe with a clean microfiber towel using straight, overlapping passes rather than a circular scrubbing motion.
- Repeat on stubborn spots rather than pressing harder. Light, repeated applications beat one aggressive pass every time.
Once the panel feels smooth to the touch, finish with a 70% isopropyl alcohol wipe to strip away any oily residue or solvent film left behind. Check your work under angled light, ideally direct sunlight or a shop light held at a low angle across the panel. Leftover haze that’s invisible under overhead light often shows up clearly the moment the sun hits it sideways, and that’s your cue to go back over the area with the clay bar step covered next.
Decontaminate and Protect: Clay Bar, Polish, and Reseal the Area
Adhesive removal doesn’t end when the sticky residue disappears. Microscopic bonded contamination can remain embedded in the clear coat even after the panel looks and feels clean, and skipping this decontamination step is what causes the faint “ghosting” outline some people notice weeks later where the old lettering used to sit.
- Run a clay bar with plenty of lubricant spray over the treated area, using light, straight passes.
- Feel the surface with your fingertips through a thin towel. If it still feels gritty rather than glass smooth, clay it again.
- If you notice slight UV shadowing or a dull patch where the vinyl blocked sun exposure for years, a light machine or hand polish evens out the sheen before you seal.
- Wipe the area one more time with isopropyl alcohol to remove any clay lubricant residue, then apply car wax or a paint sealant right away to protect the freshly exposed paint.
Inspect the panel in full daylight after the sealant cures. A properly decontaminated and resealed area should blend into the surrounding paint with no visible outline, no dullness, and no tackiness left behind.
When to Call a Pro for Truck Decal Removal
Some jobs are DIY territory. Others aren’t, and knowing the difference upfront saves you from a paint correction bill that costs more than a professional removal would have.
Red flags include full vehicle wraps, lettering or graphics that have baked on for three or more years, and decals applied over riveted or corrugated panels common on box trucks and trailers. Avery Dennison’s own removal guidance points professionals toward industrial steamers and controlled pressure washing for these harder cases, tools that go well beyond what a home garage setup can safely deliver.
- Full or partial wraps rather than simple lettering
- Graphics older than three years, especially on sun-exposed panels
- Riveted, corrugated, or heavily textured surfaces
- Any existing paint damage, bubbling, or peeling clear coat you notice before you start
If any of those apply, wash the truck and clear the bed or cab of loose items before the appointment, and describe the job specifically: decal age, surface type, and square footage. A detail and wrap specialist can quote more accurately with that information upfront than with “just take the stickers off.”
Steps to Protect the Vehicle’s Paint During Removal
Every step in this process is really one long paint-protection strategy, but a few habits make the biggest difference in whether you finish with clean paint or a repair estimate.
Test first, always. Pick a hidden spot, like inside a door jamb edge or under the lettering itself, and run your full heat-and-peel method there before touching the visible panel. Older factory paint, repainted panels, or areas with existing clear-coat wear are more sensitive to both heat and solvents, and a thirty-second test tells you what your specific truck can handle.
Never force a peel that’s fighting you. If vinyl starts to tear or resist, that resistance is the paint telling you it’s not warm enough yet, not a sign to pull harder.
Keep your plastic tools at a shallow, gliding angle against the surface rather than pressing straight down, which spreads pressure across a wider area instead of concentrating it at one scraping edge. And resist the temptation to speed up the adhesive removal step with a stiffer pad or extra pressure. Chemistry, not friction, is what’s supposed to do the work there.
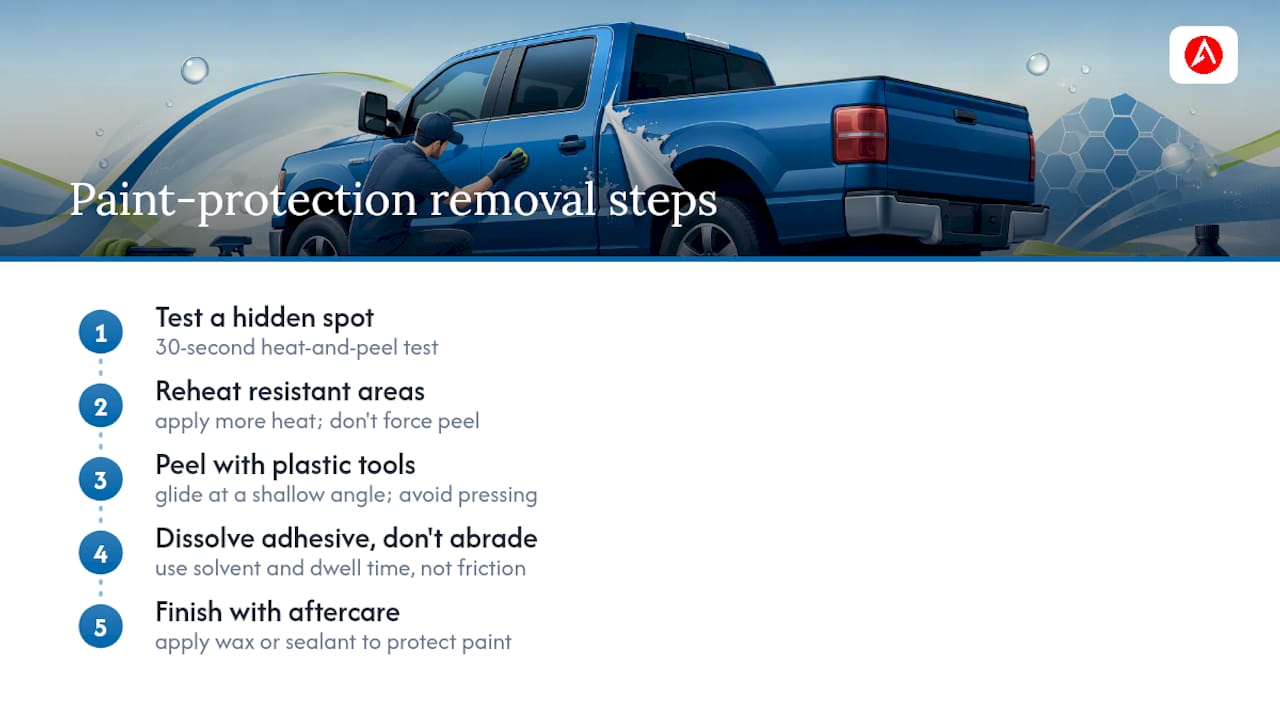
Finally, don’t skip the aftercare. Removal without a wax or sealant afterward leaves bare, stripped paint exposed to sun and road grime with zero protection, which is how a clean removal job still ends up looking worse six months later.
How Sun and Temperature Affect Vinyl Removal
Weather conditions change this job more than most people expect. Vinyl lettering that’s spent years baking under direct sun behaves completely differently from lettering that’s lived in a garage.
Heat and UV exposure over time make adhesive cure harder and more brittle, which is why a three-year-old decal often snaps and flakes rather than peeling in a satisfying single strip the way a six-month-old one does. Sun-exposed panels also tend to show more UV shadowing once the vinyl comes off, since the paint underneath the lettering aged differently than the surrounding exposed paint.
Ambient temperature while you’re working matters just as much as the decal’s history. Working on a cold panel, especially below roughly 50°F, makes the adhesive stiffer and more prone to tearing during the peel, which increases the odds of paint lifting along with it. If you’re removing lettering in cooler weather, warm the panel a little longer than usual before you start pulling, and consider moving the truck into a garage or a sunny spot for an hour first.
Direct sun while you’re actively working creates a different problem: it heats the panel unevenly and can make your heat gun readings misleading, since a sun-baked hood might already be near your target temperature before you even turn the tool on. Work in shade when you can, and let a sun-heated panel cool slightly before applying additional heat on top of it.
Handling Stubborn Adhesive Spots
Every removal job has that one patch that just won’t let go, usually near an edge, a rivet, or a spot that got extra sun exposure. Trying to power through it with more pressure is how otherwise-careful DIYers end up with a scratch right at the finish line.
Stop and reheat first. A stubborn patch is almost always an under-heated patch, and thirty more seconds with the heat gun solves more stubborn spots than any amount of scraping. If it’s adhesive residue rather than vinyl film that won’t budge, increase your dwell time with the citrus degreaser instead of switching to a stronger chemical. Leave it on for a full 60 seconds, sometimes even a second application, before you wipe.
For genuinely tough spots, layering technique works better than force: warm it, apply degreaser, let it dwell, wipe with light pressure, then repeat the cycle rather than pressing harder on any single pass. A worn microfiber towel folded to a fresh, clean section for each pass also matters more than people realize, since a towel already saturated with dissolved adhesive just redeposits grime instead of lifting it.
If a spot still won’t clear after two or three cycles, check whether it sits over a seam, rivet, or body line where adhesive pools thicker than on a flat panel. Those spots sometimes need a slightly longer dwell time and more patience, but they almost never need more force.
What to Do With the Vinyl You Remove
Old vinyl lettering and backing paper aren’t hazardous waste, but they’re also not something your regular curbside recycling stream wants. Most vinyl decal material is a PVC-based film, and standard curbside recycling programs typically don’t accept it, so the simplest and most responsible route is bagging it with regular household trash once you’ve peeled it free.
If you removed a large graphic or a partial wrap, check whether your local waste service has guidance on vinyl or plastic film disposal, since some municipalities handle flexible plastics differently from rigid plastics. Any adhesive remover rags or degreaser-soaked towels should be allowed to fully dry outdoors before disposal, since solvent-soaked rags in an enclosed trash bin carry a small fire risk until the solvent evaporates.
Why Arrowhead Sign Company Weighs In on Decal Care
A company specializing in signs, banners, and trade show displays produces vehicle lettering, window graphics, and event signage regularly, which means insight into how vinyl ages, how it’s meant to be removed, and where DIY jobs typically go wrong. Many products ship quickly, so when a customer’s truck lettering is ready to come off, replacing it with a fresh design doesn’t mean a long wait. If you’re planning ahead for what goes back on the truck, it’s worth thinking about signage that’s easier to swap out next time around.
Ready to Refresh Your Truck’s Signage?
Once that old lettering is off and the paint is clean, a lot of business owners realize the smarter long-term move is signage that’s easy to update without ever touching the truck’s paint again. Some signage providers offer quick shipping and direct delivery options for local customers.

If your business is heading to a trade show or local event next, a Signicade Deluxe A-Frame Sidewalk Sign sets up curbside in minutes and swaps prints just as fast. For a bigger presence at booths or storefronts, the 10 ft stretch fabric display delivers a large, wrinkle-free graphic without the upkeep vinyl lettering demands. And if you need messaging that can move outdoors between locations, the Outdoor Banner Frame from The Banner Bar holds up to wind and weather while letting you change the banner whenever your promotion changes.
Browse the full lineup of trade show products and displays or reach out directly to get a quote on custom signage that’s ready to ship in two days.
Sources
The guidance in this article draws on manufacturer instructions and professional detailing technique rather than guesswork.
- How to Remove Vinyl Decals From Your Car Without Ruining the Paint — Stellantis Hub
- How to remove decals from car paint safely — Chemical Guys
- Removal of pressure sensitive adhesive decals — Avery Dennison instructional bulletin
FAQ
Will WD-40 Remove Vinyl Decals?
WD-40 can loosen some adhesive residue in a pinch, but it’s not the recommended tool because it can leave an oily film that interferes with wax or sealant adhesion later. A citrus-based degreaser or dedicated automotive adhesive remover is the safer, paint-friendly choice for both the vinyl and the finish underneath it.
Can Vinyl Lettering Be Removed From a Truck?
Yes, vinyl lettering can be removed from most truck panels using heat, a plastic lifting tool, and a low peel angle. Removability depends on the vinyl film, adhesive type, and how long it’s been exposed to sun and weather, which is why manufacturer guidance recommends testing a small area first.
What Is the Safest Way to Remove Vinyl Decals From a Vehicle?
The safest method warms the vinyl with a heat gun or hair dryer, lifts it with a plastic trim tool rather than metal, and peels at a low angle of roughly 15 to 30 degrees. Follow up with a citrus-based degreaser for residue, then clean with isopropyl alcohol and reseal the paint with wax or sealant.
What Dissolves Vinyl Adhesive?
Citrus-based degreasers and dedicated automotive adhesive removers dissolve vinyl adhesive effectively because their surfactants break down petroleum-based bonds without attacking clear coat. Isopropyl alcohol at 70% concentration finishes the job by lifting any remaining oily film, while acetone and general household solvents should be avoided since they can damage the paint’s finish.
Should I Hire a Professional Instead of Removing Truck Lettering Myself?
Hire a professional if you’re dealing with a full wrap, lettering older than three years, or graphics on riveted or corrugated panels, since these often need industrial steamers or controlled pressure equipment. For a single set of lettering in reasonable condition, the DIY heat and peel method described above is typically enough for most truck owners.