

How Outdoor Event Banners Are Made: a 2026 Guide
Posted by Deeder Dandenhorf on May 27th 2026
How Outdoor Event Banners Are Made: a 2026 Guide
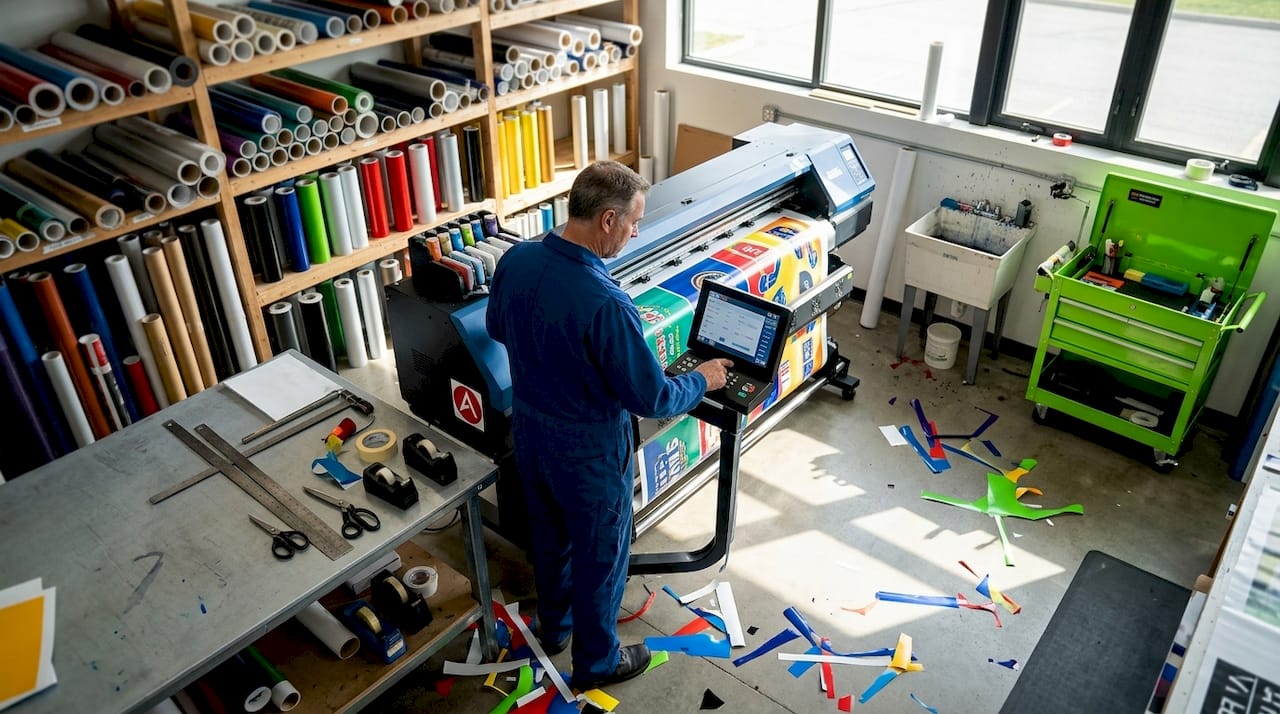
Most people think outdoor event banners are just printed sheets of plastic. In reality, understanding how outdoor event banners are made reveals a multi-step production process that combines material science, digital design, industrial printing, and precision finishing. Get any of those steps wrong, and you end up with a banner that fades after one weekend, tears in moderate wind, or has your logo half-hidden behind a grommet. This guide walks you through every stage of outdoor banner production so you can make smarter decisions for your next event, trade show, or outdoor promotion.
Table of Contents
- Key takeaways
- How outdoor event banners are made: the materials
- Preparing your artwork for outdoor banner printing
- The printing process: technology and quality control
- Finishing touches that make banners last
- Choosing the right banner for your event
- My perspective on where outdoor banner production is heading
- Get professional outdoor banners with fast turnaround
- FAQ
Key takeaways
| Point | Details |
|---|---|
| Material choice matters most | Solid vinyl suits stable conditions; mesh vinyl with 37% perforation handles windy outdoor venues better. |
| Design safe zones prevent wasted prints | Keep all text and logos at least 2 inches from edges to avoid cropping during hemming and grommet placement. |
| Ink quality determines longevity | UV-resistant solvent inks keep colors vibrant and fade-resistant for years of repeated outdoor exposure. |
| Finishing reinforces every banner | Reinforced hems and nickel grommets protect your investment and make installation flexible across event types. |
| Reusable banners deliver better ROI | Designing for multiple events reduces waste and cost per use, a trend now standard among major event campaigns. |
How outdoor event banners are made: the materials
The substrate you print on determines everything else. Making outdoor banners starts with choosing between two primary vinyl types, and that choice should be driven by your event environment, not budget alone.
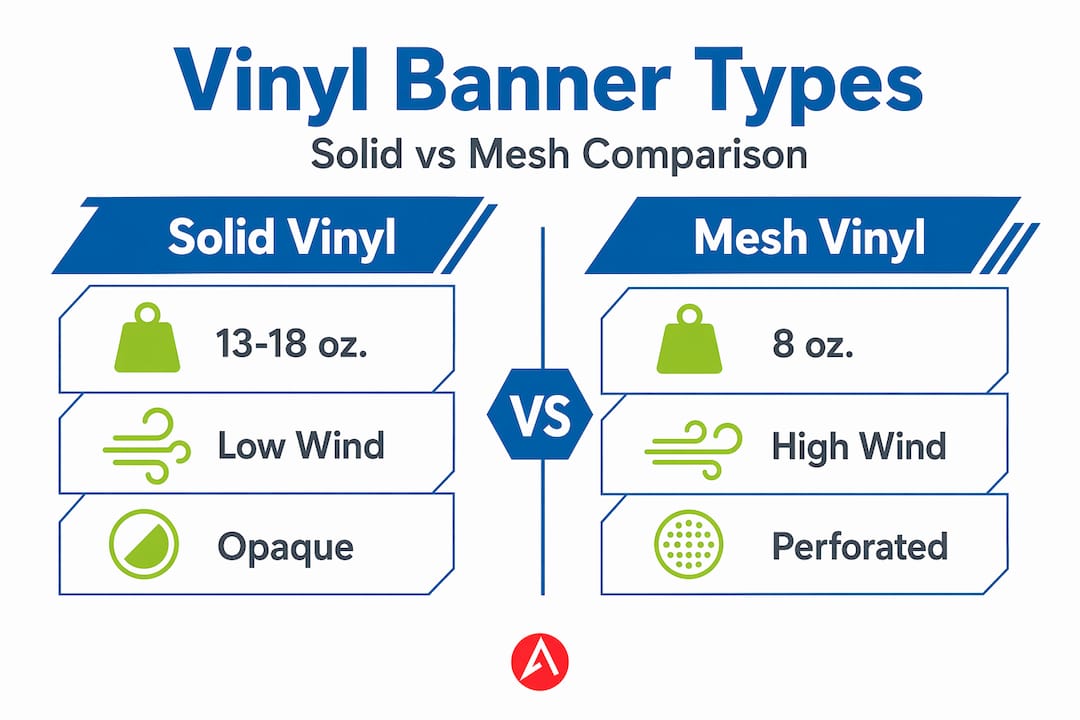
Solid vinyl is the industry workhorse. It ranges from 13oz to 18oz scrim vinyl, with a woven polyester mesh sandwiched between layers of PVC to resist tearing. The heavier the weight, the more rigid and durable the banner. An 18oz banner at an outdoor festival will hold its shape far better than a lighter 13oz version under the same conditions.
Mesh vinyl is the right call for high-wind environments. It uses an 8oz perforated material with 37% airflow perforation, which lets wind pass through instead of pushing against the banner like a sail. If your event is near a highway, on a rooftop, or in an open field, mesh is not optional. It is the responsible choice.
Comparing solid vs. mesh vinyl
| Feature | Solid Vinyl (13oz–18oz) | Mesh Vinyl (8oz) |
|---|---|---|
| Wind resistance | Low to moderate | High (37% air flow) |
| Image clarity | Sharper, more vivid | Slightly reduced due to perforations |
| Best use | Covered stages, walls, fences | Open fields, bridges, high-traffic outdoor areas |
| Weight | Heavier | Lighter and easier to transport |
Beyond the substrate, the finish and ink coating matter just as much. Outdoor banner production uses UV-resistant, solvent-based inks that are formulated to resist sun degradation. A matte finish reduces glare and improves readability in direct sunlight, which is a detail most first-time buyers miss entirely. Semi-gloss finishes look great in photography and indoor settings but can wash out on a bright day.
Pro Tip: If your event runs more than two days in direct sun, always specify a matte or anti-glare finish when ordering. The difference in readability from 20 feet away is significant.
Preparing your artwork for outdoor banner printing
Designing event banners for outdoor use is not the same as designing a social media graphic. The scale, the print method, and the finishing process all demand specific file preparation that most non-specialists skip.
Start with resolution. Your file must be at full scale and at least 300 dpi in CMYK color mode. RGB files look fine on screen but shift unpredictably when converted to print. CMYK is the standard for physical print production, and submitting an RGB file often results in colors that look duller or slightly off compared to your original design. For trade show printing specifics, banner print file prep covers the resolution and format requirements in detail.
Safe zones are where most first-time buyers make a costly mistake. After printing, banners go through a finishing process that includes folding and sewing the edges into hems and punching grommets for hanging hardware. Critical elements kept 2 inches from edges survive this process intact. Anything closer risks being folded under, partially cut, or hidden behind a grommet ring.
Here are the key file preparation requirements to follow before submitting your artwork:
- Set your canvas to the final banner size at 300 dpi in CMYK mode
- Add a minimum 0.5-inch bleed on all edges so background color extends past the cut line
- Keep all text, logos, and critical graphics at least 2 inches inside every edge
- Flatten all layers and embed all fonts before exporting
- Save as a PDF or high-resolution TIFF for cleanest results
- Avoid small fonts below 24pt at large banner sizes — they become unreadable from a distance
Pro Tip: Send a low-resolution proof to a print vendor before submitting your final file. Many print shops will flag layout issues before production begins, saving you a costly reprint.
Overcrowding your design is the other common mistake. Outdoor event banners are read from a distance, often by people in motion. One core message, your brand name, and a single call to action will outperform a banner packed with bullet points and fine print every time. Less copy, larger type, and bold contrast win outdoors.
The printing process: technology and quality control
Outdoor banner production today relies almost entirely on wide-format digital printing. This technology prints directly onto the vinyl substrate using piezoelectric inkjet heads that deposit ink at extremely fine resolution across large widths, often up to 16 feet or wider in a single pass.
The ink chemistry is what separates a professional outdoor banner from a budget one. UV-resistant solvent inks bond directly with the vinyl surface and resist fading for years of outdoor display. These inks also enable edge-to-edge printing, meaning your design reaches every corner of the banner without white borders that would look unfinished on a finished product.
Quality control during outdoor banner production typically includes:
- Color calibration checks before the print run begins to match your submitted CMYK values
- Mid-run visual inspections to catch ink banding or clogged print heads early
- Final dimension checks to confirm the printed piece matches the ordered size
- Surface inspections for bubbles, streaks, or ink pooling before finishing begins
Production timelines vary widely. A small batch of event banners can be produced and shipped within one to two business days at quality print facilities. Large-scale outdoor signage manufacturing for international campaigns is a different story entirely. Olympic Games banner production began 10 months before the event to accommodate design approvals, production at scale, and international shipping logistics. Your local trade show timeline will not be that extreme, but building in at least a week of lead time is standard practice.
Finishing touches that make banners last
Printing is only halfway through the process. The finishing stage is where outdoor banners get the physical reinforcement they need to survive real conditions.
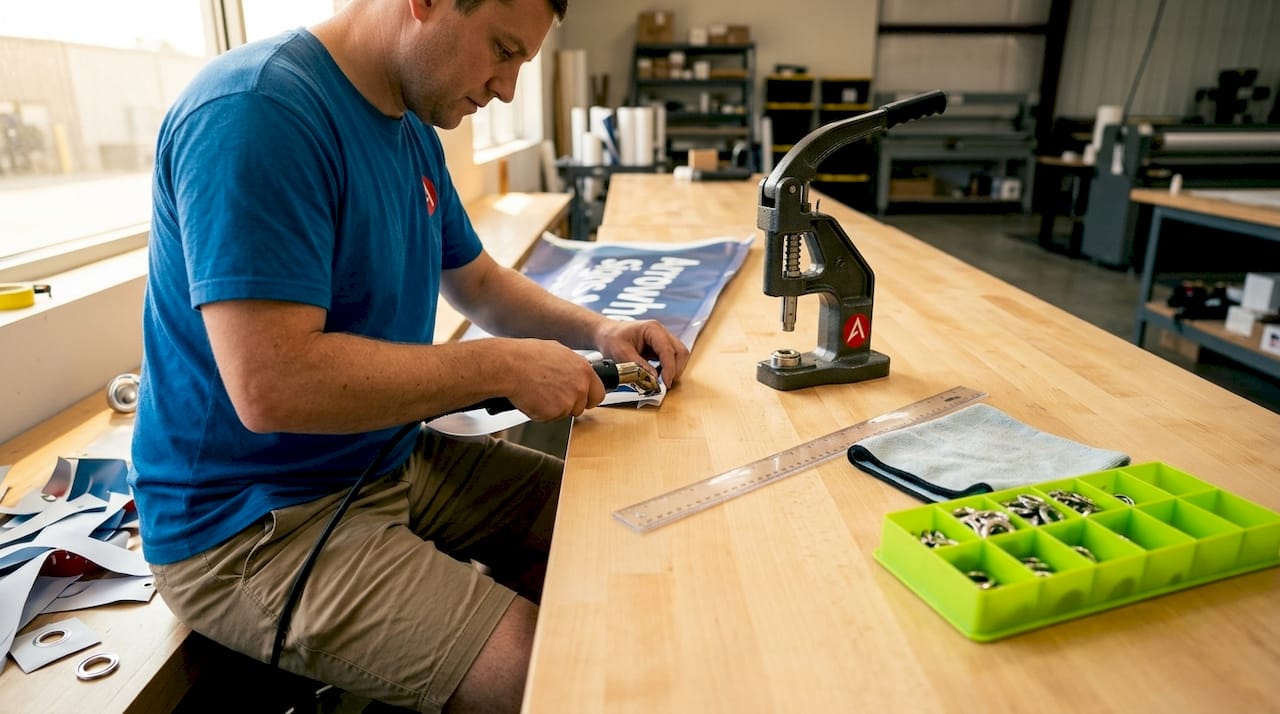
Hems are the first line of defense. After printing, the edges of the banner are folded over and heat-welded or sewn to create a thick, reinforced border. This prevents the vinyl from fraying, tearing along the edge, or unraveling when tension is applied during installation. Without hemming, even a high-quality 18oz vinyl banner will develop tears at the corners within a few uses.
Grommets are metal rings, typically nickel, punched through the hemmed edges at regular intervals. Reinforced hems and nickel grommets allow you to hang banners securely using rope, zip ties, or bungee cords without tearing. Standard grommet spacing runs every 2 feet along the top and bottom edges, with corner grommets on all four corners as a baseline.
Here are the primary finishing options available for outdoor event banners:
- Standard hem and grommet: The most common setup, works for fences, walls, and event structures
- Pole pockets: A folded sleeve along the top or bottom edge that accepts a horizontal pole for freestanding or hanging displays
- Wind slits: Vertical cuts in the banner body that allow air to pass through on solid vinyl where mesh is not used
- Reinforced corner patches: Extra layers of vinyl at the corners for heavy-duty applications like prolonged outdoor installations
Pro Tip: If you plan to reuse a banner across multiple events, opt for corner reinforcement patches and pole pockets in addition to standard grommets. The extra cost is minimal, and the added durability extends your banner’s usable life significantly.
Choosing the right banner for your event
Understanding how to print banners is one thing. Applying that knowledge to your specific event conditions is where the real return on investment shows up. Here is a practical sequence to follow when planning your banner order:
- Assess your environment. Will the banner be indoors, in a partially covered outdoor space, or fully exposed? Wind, rain, and UV exposure each demand different material and finishing choices.
- Determine your viewing distance. A 3x6 foot banner works well at 10 feet. A 4x8 foot or larger banner is more readable from 20 to 30 feet. Size your banner to your expected audience distance.
- Plan for reuse. Reusable outdoor banners are now standard practice for major campaigns because they reduce waste and lower cost per event. If you attend more than two events per year, design a banner that is evergreen and avoid printing dates or specific pricing.
- Build in flexibility. Outdoor event setups increasingly treat signage as dynamic rather than fixed. Grommets and pole pocket options let you repurpose the same banner across different mounting configurations at different venues.
- Store correctly after each event. Roll banners around a cardboard tube rather than folding them. Folding creates permanent creases that show up clearly in print. Store in a cool, dry space away from direct sunlight.
For more guidance on how different backdrop display options compare across event formats, that resource covers material and size selection in detail.
| Event Type | Recommended Material | Key Feature |
|---|---|---|
| Trade show booth wall | Solid vinyl 13oz | Sharp print quality, indoor use |
| Outdoor festival/fair | Mesh vinyl 8oz | Wind resistance with clear messaging |
| Street-facing storefront | Solid vinyl 18oz | Heavy-duty, long-term durability |
| Multi-event marketing tour | Solid vinyl 13oz, pole pocket | Easy reuse, quick setup |
My perspective on where outdoor banner production is heading
I’ve watched outdoor signage production shift dramatically over the past several years, and the trend that stands out most is the move away from single-use disposable banners toward banners treated as long-term marketing assets. That shift is driven partly by sustainability goals and partly by simple economics. When you run the numbers, a durable 18oz banner used at six events costs a fraction per use compared to printing a new one each time.
What I find underappreciated is the value of designing for flexibility from the start. A banner with both grommets and pole pockets can hang on a fence at an outdoor market in the morning and stand in a pop-up tent frame that afternoon. That versatility does not cost much extra at production, but it multiplies the practical value of a single piece. The brands that treat their outdoor signage as part of a flexible system are consistently getting more out of every dollar they invest in print.
My honest advice: stop thinking about banners as a one-time print expense. Design them like you would a brand asset, specify materials for your worst-case conditions, and plan for at least three to five uses before you consider reprinting. The upfront cost is higher, but the value compounds every time you set up at a new event.
— Dan
Get professional outdoor banners with fast turnaround

When you know exactly how outdoor event banners are made, you can have a much more informed conversation with your print partner and set realistic expectations for quality and timeline. Arrowheadsigncompany makes that conversation simple. Their team specializes in custom outdoor banners and event signage built for real event conditions, from retractable banner stands and pop-up displays to heavy-duty vinyl banners designed for outdoor durability. Most products ship within two business days, which matters when your event timeline is tight. For businesses in Arizona, Arrowheadsigncompany also offers direct venue delivery, so your signage arrives exactly where you need it. If you want event signage that performs, explore their full product catalog and get started with a custom order today.
FAQ
What materials are outdoor event banners made from?
Outdoor event banners are made from PVC vinyl substrates ranging from 13oz to 18oz for solid banners, or 8oz perforated mesh vinyl for high-wind environments. The choice depends on your event’s exposure to wind and weather.
What resolution should banner artwork be submitted at?
Banner artwork should be submitted at full scale and at least 300 dpi in CMYK color mode to achieve sharp, accurate color output during production.
Why do outdoor banners need grommets and hems?
Reinforced hems prevent the vinyl edges from tearing under tension, while nickel grommets provide secure attachment points for rope, zip ties, or bungee cords during installation.
How far in advance should I order outdoor event banners?
For standard event banners, ordering at least one week in advance is recommended. Large-scale outdoor signage campaigns for major events can require months of lead time due to design approvals and logistics.
What is the difference between mesh and solid vinyl banners?
Solid vinyl delivers sharper print quality and is best for sheltered or low-wind locations. Mesh vinyl uses perforations to allow airflow, making it the right choice for open-air or high-wind outdoor installations.
Recommended
- Types of Promotional Backdrop Displays: 2026 Guide - Arrowhead Sign Company
- Custom Pop Up Signs | Outdoor Banner Stands | Retractable Banner Stands | Arrowhead Signs and Displays
- Assembling Retractable Banner Stands Correctly - Arrowhead Sign Company
- How Trade Show Printing Works: A Planner’s Guide - Arrowhead Sign Company