

Exhibitors' 10x10 Booth Layout: 3 Priorities, Quick Ship Backwalls
Posted by Deeder Dandenhorf on Sep 19th 2026
Exhibitors’ 10x10 Booth Layout: 3 Priorities, Quick Ship Backwalls
Most exhibitors overthink their 10x10 booth layout when the winning formula is simple: keep the front portion open, put one readable headline on the backwall, and give visitors a single clear demo or focal point. An inline layout works for most sales and demo setups, while a corner or L-shape gives you extra visibility if your show floor plan allows it. Get those three elements right and the rest of your 100 square feet falls into place.
TL;DR:
- The most effective 10x10 booth layout keeps the front open, features a single clear focal point or demo, and uses an inline or corner setup for visibility.
- Organizers typically restrict backwall height to 8 feet and front elements to 4 feet, requiring high-contrast, readable signage visible from 15 to 30 feet.
- Use furniture with built-in storage and opt for versatile pieces like counters, plinths, or tuckable stools to maximize space and functionality.
- Position your staff roles strategically with one greeter at the aisle, one running demos, and keep the back zone for signage and storage to ensure smooth flow.
- Focus on simplicity and rehearsed presentations, as fewer booth elements and clear staff roles tend to generate more leads than visually cluttered setups.
Table of Contents
- Common 10x10 Booth Layout Templates and When to Use Each
- Zone and Flow: Arranging Entry, Demo, and Storage
- Signage and Sightlines: Height Limits and Readability
- Furniture, Storage, and Multi-Functional Pieces
- Lighting and Digital Accents That Add Depth
- Three Example 10x10 Setups You Can Copy
- Day-Of Setup Checklist for Your 10x10 Booth
- What Actually Wins Repeat Leads at a 10x10 Booth
- Space-Efficient Displays Built for a 10x10 Footprint
- Sources
- FAQ
Common 10x10 Booth Layout Templates and When to Use Each
Six templates cover almost every 10x10 exhibition space you’ll encounter, and each one solves a different problem.
- Inline (linear): One open side facing the aisle, backwall opposite. Best for product demos and quick conversations. Mistake: crowding the entry with a table. Fix: pull furniture back 3 feet from the aisle line.
- Corner: Two open sides at a corner location. Best for higher foot traffic and better sightlines from two directions. Mistake: leaving one open side unused. Fix: angle signage to catch both approaches.
- Perimeter: Shelving or displays along the back and side walls, open middle. Best for gallery-style product display with lots of small items. Mistake: overcrowding shelves. Fix: rotate stock and leave visual breathing room.
- L-shape: Counter or wall forms an “L,” creating a semi-private zone. Best for booths that mix quick browsing with short meetings. Mistake: blocking the sightline into the private zone. Fix: keep the L’s short leg low.
- U-shape: Walls or counters on three sides. Best for maximum display area when meetings matter more than walk-up traffic. Mistake: feels closed off. Fix: keep the opening wide and well-lit.
- Center island: Rare in a true 10x10 but occasionally used with freestanding kiosks. Best for 360-degree visibility. Mistake: no clear “front.” Fix: pick a dominant sightline and anchor your signage there.
Each template changes how visitors read your space from the aisle, so pick the one that matches your goal rather than what looks nice in a catalog photo.
Zone and Flow: Arranging Entry, Demo, and Storage
Divide your 10x10 exhibition space into three bands and assign each one a job.
- Front zone: open and inviting. Keep this zone free of tables or counters. A counter parked at the aisle edge reads as a barrier and discourages visitors from entering.
- Middle 4 feet: your engagement zone. This is where your greeter stands and where your demo or product sample lives. Visitors should be able to interact without stepping deeper into the booth.
- Back zone: backwall, storage, and staff retreat. Your signage lives here, along with any counter storage or seating for scheduled meetings.
For staffing, two people usually cover a standard 10x10 marketing booth well: one greeter positioned near the aisle, one running the demo or qualifying leads further in. A third staffer earns their spot only during peak traffic hours or scheduled appointment blocks, not as a permanent fixture. Rotate roles every couple of hours so energy stays high.
Signage and Sightlines: Height Limits and Readability
Most event organizers cap backwall height at 8 feet, with a 4-foot restriction on anything positioned forward, closer to the aisle, so it doesn’t block sightlines to neighboring booths. That 8-foot rear and 4-foot front rule shows up across most convention centers and trade organizations, though exact numbers vary by event.
Statistic Callout: Floor plans are typically designed in 10-foot increments, and organizers commonly restrict tall elements near side aisles to protect sightlines for every exhibitor on the row.
For readability, your headline should use bold, high-contrast lettering large enough to read from 15 to 30 feet away, since that’s the range where a passing visitor decides whether to stop. Keep taller elements centered rather than at the edges of your space, so you stay compliant without blocking the booth next door.
Furniture, Storage, and Multi-Functional Pieces
Your furniture choices determine whether visitors can actually move through your booth or feel boxed in the moment they step off the aisle.
- Choose counters with built-in internal storage and a fabric skirt to hide boxes, extra literature, and personal bags.
- Swap full-size tables for plinths or pedestals. They take up less floor space and double as demo risers.
- Use tuckable stools instead of chairs when seating is occasional rather than constant.
- Keep giveaways and printed handouts off the main walking path. Store them behind the counter and hand them out directly instead of setting out a self-serve pile.
Pro Tip: A single counter with a locking cabinet underneath solves two problems at once: it hides your bags and backstock, and it gives your demo person somewhere to stand without crowding the middle zone.
Lighting and Digital Accents That Add Depth
A 10x10 exhibition space reads as larger or smaller depending on how you light it, not just how you furnish it.
- Use a single spotlight on your demo area or featured product to draw the eye without adding visual noise.
- A backlit or stretch fabric backwall creates the illusion of depth while leaving your floor space untouched, since the display panel itself takes up almost no room.
- If you’re running a monitor, mount it at eye level and default to muted video with captions. Sound competing with the booth next door annoys everyone, including your own staff.
- Plan power needs before you arrive. Request electrical placement near your backwall so cables run behind furniture, not across the aisle-facing walkway.
Three Example 10x10 Setups You Can Copy
These three configurations map directly onto the templates above, adjusted for specific goals.
- Retail or demo booth: Inline layout with a full backwall graphic, a demo plinth in the middle zone, a greeter near the aisle, and hidden storage behind a skirted counter. Best when your product needs a hands-on moment to sell itself.
- Gallery display booth: Perimeter layout with shelving along the back and side walls, focused spotlighting on featured pieces, and minimal staff, often just one person available to answer questions. Best for artists, makers, and craft fair vendors with a visual product line.
- Meeting-focused booth: L-shape counter creating a semi-private appointment area, two trained staff (one greeting walk-ups, one running scheduled conversations), and a small screen for portfolio or proposal review. Best for service businesses and B2B exhibitors booking on-site consultations.
Each setup keeps the same bones. A visible headline, one focal point, and a defined role for every staffer on the floor.
Day-Of Setup Checklist for Your 10x10 Booth
Run through this sequence when you arrive and you’ll avoid the scramble that eats into your first hour of show time.
- Arrive early enough to measure your actual footprint and confirm the aisle isn’t narrower than expected.
- Confirm power drops and any rigging points with show staff before you start building.
- Hang or place your backwall graphic, then walk 15 to 30 feet into the aisle to check readability and alignment.
- Straighten any crooked graphics now. A five-degree tilt is invisible up close and glaring from the aisle.
- Brief your staff on roles: who greets, who demos, who handles overflow traffic.
- Rehearse your demo out loud once, timed to 60 to 90 seconds.
- Keep a small fix kit on hand. Zip ties and gaffer tape solve most hardware wobbles, and a spare tote handles unexpected storage overflow.
Pro Tip: Walk your own booth as if you were a visitor before doors open. You’ll spot the one thing blocking your sightline that you missed while building it.
What Actually Wins Repeat Leads at a 10x10 Booth
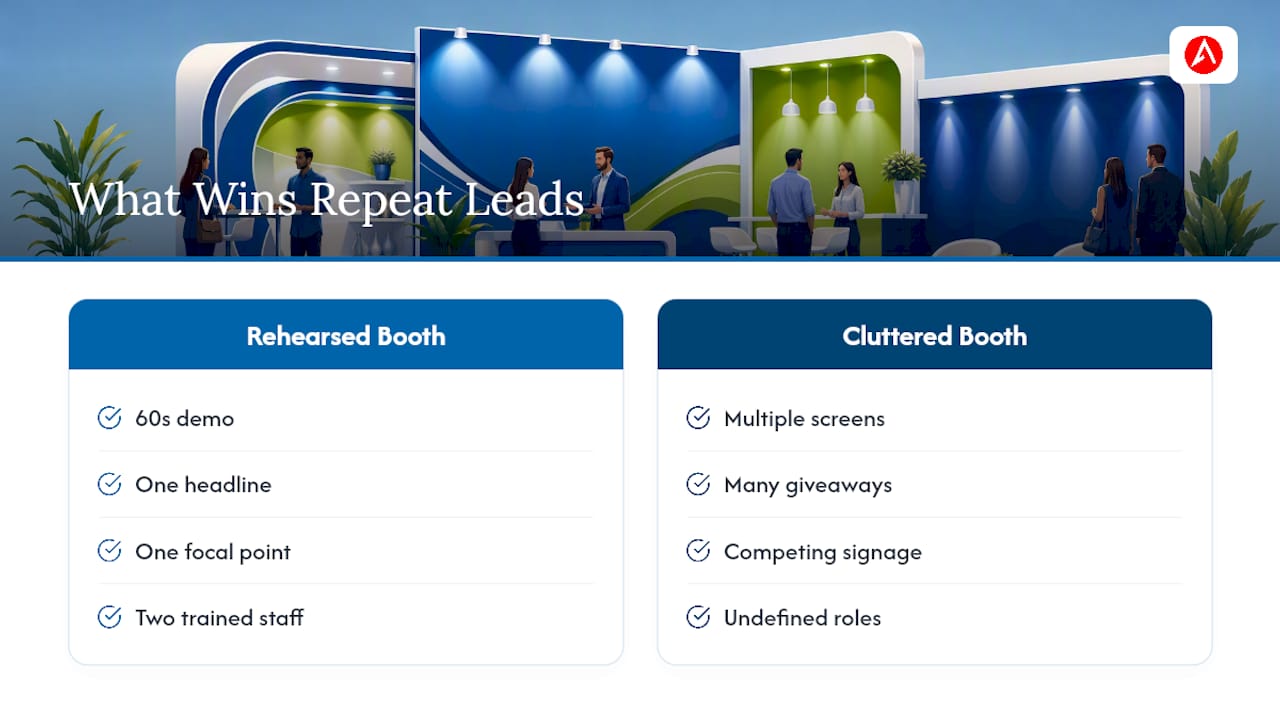
Flashy booths get photographed. Simple, rehearsed booths get leads. The exhibitors who come back year after year with a full pipeline aren’t the ones with the most screens or the tallest tower display. They’re the ones whose staff can run a tight 60 second demo without stumbling, because a rehearsed demo and clear staff roles consistently outperform clutter.
Here’s the part most exhibitors underestimate: fewer elements almost always beat more. One headline, one demo, one focal point, and two staff who know their jobs will out-convert a booth stuffed with monitors, giveaways, and signage competing for the same three seconds of attention. And when something breaks the week before your show, quick-ship displays matter more than a perfect custom build you ordered eight weeks too late.
— Dan
Space-Efficient Displays Built for a 10x10 Footprint
A leading sign company gets most orders shipped within two business days, which matters when your show is next week and your booth still needs a backwall. For a compact backwall that adds visual depth without eating floor space, the 10 ft stretch fabric display fits the inline and corner layouts covered above almost exactly.

If your setup needs tall, stable graphics without hauling in rigging hardware, the Outdoor Banner Frame (The Banner Bar) adjusts to fit height rules while staying easy to break down between shows. Need something even faster to turn around? Browse Quick Ship Displays or the full range of trade show products and displays built for exhibitors on a tight timeline. Arizona clients also get direct delivery to their venue, no shipping guesswork required. Check product availability and place your order today.
Sources
- IAEE Display Guidelines (event organizer PDF)
- Guidelines for display rules and regulations (organizer PDF)
- 10x10 trade show booth guide 2026 | ExhibitionsVoice
FAQ
What Is the Best Layout for a 10x10 Trade Show Booth?
An inline layout with an open front 3 feet, a readable backwall, and one demo or focal point works for most exhibitors. If your booth location is a corner, use the extra open side to widen your sightlines and catch traffic from two directions.
How Big Is a 10x10 Booth Space?
A standard 10x10 booth covers 100 square feet, typically measured as a 10 foot by 10 foot square. Most convention floor plans are built in 10 foot increments, so your neighbors’ booths will match that same footprint.
What Size Banner Do You Need for a 10x10 Booth?
A backwall banner or graphic sized to your full 10 foot width works best, paired with headline text large enough to read from 15 to 30 feet away. Options like the 10 ft stretch fabric display or standard printed banners both fit that width without special ordering.
What Is the Standard Size of a Trade Show Booth?
The most common standard is 10 feet by 10 feet, though many shows also offer 10x20 or larger footprints for exhibitors who need more room. Always confirm your exact assigned dimensions with the show organizer since booth numbers on a floor plan don’t always match your expected size.
How Tall Can My Backwall Display Be in a 10x10 Booth?
Most organizers cap backwall height at 8 feet, with a 4 foot limit on anything placed toward the front near the aisle. Check your specific show’s display rules before ordering, since limits vary by venue and event.