

Connecting Banner Stands for Large Exhibit Impact
Posted by Deeder Dandenhorf on Jun 15th 2026
Connecting Banner Stands for Large Exhibit Impact
Connecting banner stands into a large exhibit means linking individual portable display units into one continuous, branded wall using magnetic linking plates, snap-lock profiles, or modular frame connectors. Done right, this approach transforms a collection of separate stands into a single visual statement that commands attention across a crowded trade show floor. The difference between a scattered booth and a cohesive display often comes down to connector selection and layout planning. This guide covers compatible systems, step-by-step assembly, common pitfalls, and safety requirements so your next large exhibit banner setup lands with real impact.
How to connect banner stands for a large exhibit
Connecting banner stands for a large exhibit is the practice of joining retractable, roll-up, or modular banner stands side by side to create a unified display wall. Industry professionals call this a “linked banner system” or “joined banner display.” The goal is visual continuity: your brand graphics flow across panels without visible gaps or misalignment.
The three most common connector types are:
-
Magnetic linking plates: Attach to the top rails or cassette bases of roll-up stands. They snap together without tools and hold panels flush against each other.
-
Snap-lock profiles: Rigid channel connectors that slide over the edges of adjacent frames, locking them into a straight or angled configuration.
-
Modular frame connectors: L-shaped, T-shaped, and roof construction variants that allow flexible exhibit layouts including corners, alcoves, and overhead structures.
Magnetic linking plates and snap-lock profiles are the most popular choice for portable trade show setups because they require no tools and can be assembled by a single staff member. That speed matters when you are setting up before an 8 a.m. show open.
What banner stand types and connectors work best?

Not every banner stand is designed to link with its neighbors. Choosing compatible systems from the start saves you from improvising on the show floor.
Retractable and roll-up banner stands
Retractable banner stands are the most common format at trade shows. The graphic rolls into a base cassette for transport and extends upward on a support pole. Many manufacturers now build linking hardware directly into the cassette or top rail. When you buy a set of retractable stands designed for linking, the magnetic or snap-lock connectors are already integrated. Buying mismatched brands often means the connector heights do not align, which creates visible steps between panels.
Modular banner stand systems
Modular banner stands use aluminum extrusion frames that accept fabric or PVC graphic panels. These systems are purpose-built for large exhibit banner setups. Connectors come in L-shaped, T-shaped, and roof variants that let you build corners, straight walls, and even overhead canopy structures from the same hardware kit.
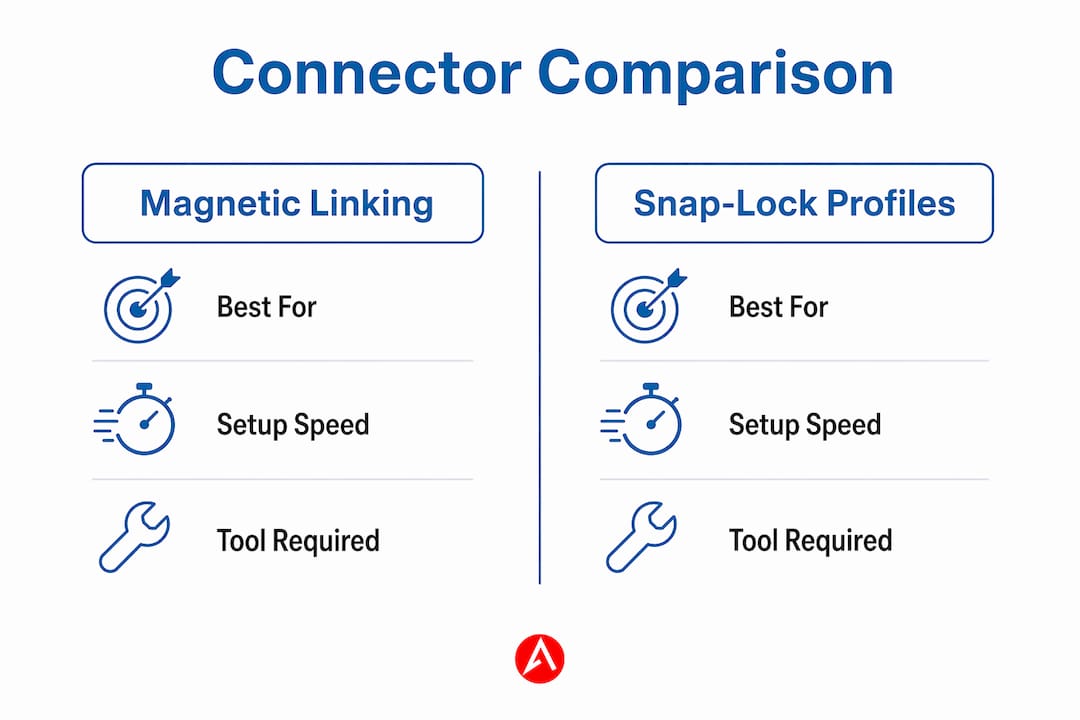
Connector comparison at a glance
| Connector Type | Best For | Setup Speed | Tool Required |
|---|---|---|---|
| Magnetic linking plates | Roll-up and retractable stands | Very fast | No |
| Snap-lock profiles | Straight modular walls | Fast | No |
| L-shaped frame connectors | Corner configurations | Moderate | Sometimes |
| T-shaped frame connectors | Multi-panel junctions | Moderate | Sometimes |
| Roof connectors | Overhead canopy structures | Slow | Yes |
One important constraint to plan around: illuminated modular systems like the Brightbox Pro Flex have power supply placement limits that restrict direct linking to a maximum of two frames. Larger configurations require separate power runs. This is a system design issue, not a graphic issue. Plan your electrical access points before you finalize your layout.
Step-by-step setup for connected trade show banner displays
A structured approach to assembly prevents the two most common problems: misalignment and sagging. Follow these steps for a professional result every time.
-
Measure your booth space. Confirm the exact width and height available. Account for aisle clearance requirements set by the venue. Proper measurement and layout planning before you touch a single stand reduces errors and rework significantly.
-
Sketch your layout. Draw the panel arrangement to scale on paper or a simple app. Mark where connectors will sit, where power access is needed for illuminated panels, and where foot traffic will flow around the display.
-
Assemble each stand individually first. Extend each retractable stand or build each modular frame before attempting to link them. Confirm each unit is stable and the graphic is properly tensioned.
-
Link from one end to the other. Start at the left or right anchor point of your display. Attach the first connector, confirm alignment, then move to the next panel. Never try to link all panels simultaneously. Sequential linking keeps the wall straight.
-
Apply magnetic or snap-lock connectors at top and base. Connecting only at the top allows the bases to splay outward. Secure both ends of each joint for a rigid, professional finish.
-
Check graphic alignment across the full display. Step back 10 feet and look for seam gaps, height differences, or graphic mismatches. Minor height adjustments are possible on most retractable stands by extending or retracting the support pole slightly.
-
Verify stability before the show opens. Apply light lateral pressure to the linked wall. A properly connected system should not sway or shift. If it does, check that all connectors are fully engaged.
Pro Tip: Bring two extra magnetic linking plates and one spare snap-lock connector to every show. Connectors are small and easy to lose during transport. Having spares on hand means a missing piece does not derail your setup.
Tool-free connectors and snap-lock systems make it possible for one person to assemble a linked banner wall efficiently. For displays wider than 12 feet, two people working from opposite ends toward the center is faster and more accurate.
How do you troubleshoot and stay safe with large banner exhibits?
Large connected banner displays introduce challenges that single-stand setups do not. Knowing what to watch for keeps your exhibit safe and looking sharp.
Common problems and fixes
-
Misalignment between panels: Usually caused by uneven floor surfaces or stands set at different heights. Use a level during setup and adjust pole heights before linking.
-
Sagging graphics: Results from improper tensioning during installation. Re-tension the graphic by fully retracting and re-extending the stand, or tighten fabric panels at their attachment points.
-
Connector failures mid-show: Magnetic connectors can disengage if the display is bumped. Reinforce high-traffic areas with snap-lock profiles instead of magnets alone.
-
Overhead banner instability: Any banner display that extends overhead or exceeds floor-standing height requires additional rigging hardware and venue approval.
Safety requirements for large overhead displays
Banner installations exceeding 100 square feet require mechanical assistance and specialized rigging due to wind load and weight physics. This is not optional. Venues and insurers treat these as engineered lifts.
“Experienced event producers approach large overhead banner installations as engineered lifts requiring certified rigging hardware and venue code compliance to mitigate safety risks.”
OSHA crane standard 29 CFR 1910.179 requires qualified personnel for overhead lifting and rigging operations. Employers must designate qualified riggers with sufficient training or experience. This applies directly to large trade show banner installations that use overhead rigging points. Confirm with your venue whether a house rigger is required or whether you can bring your own certified team.
Using certified rigging hardware and coordinating with venue-approved riggers is standard practice for very large overhead banner setups. Always request the venue’s structural load specifications before finalizing your display design.
Modular banner stands vs. custom exhibit displays: which scales better?
Exhibitors planning large-scale presentations face a real choice between modular banner stand systems and fully custom exhibit displays. Both can achieve impressive results. The right pick depends on your budget, transport logistics, and how often your exhibit configuration changes.
Modular banner stand systems
Modular systems win on flexibility and cost. You can reconfigure the same hardware into a straight wall for one show and an L-shaped corner display for the next. The limiting factor in large connected exhibits is often system constraints like power supply layouts and connector types, not just physical panel count. A 20-foot modular wall is achievable, but you need to plan power runs and connector compatibility carefully before you commit to a layout.
Custom exhibit displays
Custom exhibit displays are purpose-built for a specific booth size and configuration. They typically integrate connectors, power distribution, and lighting into the structure itself. This removes the guesswork from large exhibit banner setup but adds cost and reduces flexibility. Custom builds also take longer to produce and require more labor to install and strike.
Side-by-side comparison
| Factor | Modular Banner Stands | Custom Exhibit Displays |
|---|---|---|
| Upfront cost | Lower | Higher |
| Reconfigurability | High | Low |
| Setup time | Moderate | Longer |
| Visual impact | Strong | Very strong |
| Transport | Easy, cases included | Requires freight |
| Power integration | Add-on required | Built-in |
For most small and mid-size exhibitors, modular banner stands with integrated connectors offer the best balance of visual impact and practical flexibility. Custom builds make sense when you exhibit at the same show format repeatedly and need maximum brand presence. Arrowhead Sign Company’s retractable banner design guidance covers how graphic choices affect the overall impact of both system types.
Key takeaways
Connecting banner stands into a large exhibit requires compatible connector systems, sequential assembly, and safety planning scaled to the size of your display.
| Point | Details |
|---|---|
| Choose compatible systems | Buy banner stands from the same product line to guarantee connector alignment and height matching. |
| Link sequentially | Assemble each stand first, then connect from one end to the other for accurate alignment. |
| Plan power early | Illuminated modular systems have connector limits; map power access before finalizing your layout. |
| Scale safety with size | Displays over 100 square feet require certified rigging hardware and venue compliance review. |
| Modular beats custom for flexibility | Modular systems allow reconfiguration across shows; custom builds suit fixed, high-frequency formats. |
What i’ve learned setting up large connected banner exhibits
After working with exhibitors across dozens of trade shows, the connector decision is where most people underestimate the details. Everyone focuses on the graphic design and forgets to ask whether the stands they ordered actually link together. I have seen booths where two brand-new sets of retractable stands arrived on the show floor with incompatible connector heights. The exhibitor ended up with a visible two-inch step between panels right at eye level.
The second mistake I see constantly is skipping the sequential assembly process. People try to link all the panels at once and end up with a bowed wall that no amount of adjusting will straighten. Start at one end, confirm each joint before moving to the next, and the wall builds itself straight.
On the safety side, the 100-square-foot threshold for overhead banners is not a guideline. It is the point where venues and insurers start asking for documentation. If your display goes overhead at all, contact the venue’s rigging coordinator before your show date. Showing up with an overhead banner and no approved rigger is a fast way to have your display pulled before the show opens.
The best exhibitors I have worked with treat their banner system like a piece of equipment, not just a graphic. They know their connector types, they bring spares, and they have a setup sequence written down. That preparation is what separates a polished exhibit from a stressful morning.
— Dan
Build your large exhibit display with arrowhead sign company
Planning a large connected banner display does not have to be complicated when you start with the right products.
Arrowhead Sign Company - Signs, Banners and Trade Show Displays carries a full range of display solutions built for trade show environments. The 10 ft stretch fabric display is a strong anchor for any large exhibit banner setup, offering a clean, wrinkle-free graphic surface that pairs well with adjacent banner stands. The adjustable outdoor banner frame works for exterior event setups where you need a connected solution that holds up in varied conditions. Most products ship within two business days, and Arizona clients receive direct venue delivery. Visit Arrowhead Sign Company to explore the full product range or get a custom consultation for your next show.
FAQ
What connectors work best for joining banner stands?
Magnetic linking plates and snap-lock profiles are the most practical connectors for portable trade show setups. They require no tools and allow a single staff member to assemble a linked display quickly.
How many banner stands can you connect in one row?
The number depends on your system’s connector compatibility and, for illuminated displays, power supply placement. Some modular illuminated systems limit direct linking to two frames before requiring a separate power run.
Do large connected banner displays require special permits?
Displays exceeding 100 square feet, especially overhead installations, require certified rigging hardware and compliance with local structural codes. Always confirm requirements with your venue coordinator before the show date.
What causes sagging in a connected banner wall?
Sagging results from improper graphic tensioning during installation. Re-extend retractable stands fully or re-tension fabric panels at their attachment points to correct the issue.
Are modular banner stands better than custom exhibits for large shows?
Modular banner stands offer more flexibility and lower cost for exhibitors who change configurations between shows. Custom exhibits deliver higher visual impact for fixed, recurring booth formats but require greater investment and longer lead times.