

Exhibitors: Order Event Safe Trade Show Floor Decals in 2 Days
Posted by Deeder Dandenhorf on Sep 6th 2026
Exhibitors: Order Event Safe Trade Show Floor Decals in 2 Days
For most trade show booths, order removable cast vinyl with a textured polycarbonate overlaminate, which grips well underfoot and pulls up clean at teardown. Heavy equipment lanes or outdoor shows call for heavier-duty or rigid alternatives instead. Request a sample swatch first and plan on a professional installer for any single panel larger than about 5 square feet.
TL;DR:
- Use cast vinyl with textured polycarbonate overlaminate for high-traffic booth floors, requesting a sample and professional installation for panels over 5 square feet.
- Choose removable adhesive to avoid floor damage and verify slip resistance with DCOF or PTV ratings, testing samples underfoot beforehand.
- Match decal material and adhesive to your floor type and traffic pattern, especially avoiding standard decals on carpets without specialized backing or alternative signage.
- Proper surface preparation, including cleaning and using installer techniques like hinge method, significantly improves decal durability and clean removal.
- Expect quick turnaround times, with small decals shipping within days and larger orders taking one to two weeks; prioritize early proofing and samples to avoid delays.
Table of Contents
- What Materials and Safety Specs Should You Require From Your Floor Decal Vendor?
- How Do You Choose the Right Decal for Your Booth and Venue?
- What’s the Right Way to Prep and Install Trade Show Floor Decals?
- How Do You Clean and Remove Floor Decals Without Damaging the Venue?
- How Much Do Custom Floor Decals Cost and How Fast Can You Get Them?
- Why Fast Fulfillment Matters More Than Most Exhibitors Realize
- Do Removable Decals Actually Come Off Cleanly After a Multi-Day Show?
- What Exhibitors Get Wrong About Floor Decals
- Ready to Order? Here’s How Arrowhead Makes It Simple
- Sources
- FAQ
What Materials and Safety Specs Should You Require From Your Floor Decal Vendor?
Vinyl comes in two families, and the difference decides how your graphic behaves under 10,000 pairs of shoes. Cast vinyl is thinner, more flexible, and conforms to seams and slight surface texture, which makes it the better pick for curved logos or booth floors with minor imperfections. Calendered vinyl is stiffer and cheaper. It works fine for flat, short-run jobs but tends to shrink or curl at the edges over a multi-day event.
Adhesive choice matters just as much as the vinyl itself. Convention centers almost always require removable adhesive rather than permanent, because permanent adhesive risks leaving residue or damaging leased flooring, which can trigger venue cleanup fees. Removable floor decals are built specifically to release cleanly after days or months of use, depending on adhesive strength and foot traffic.
The overlaminate is where slip resistance lives. Textured polycarbonate laminates outperform standard gloss coatings on scratch and impact resistance, and they hold traction even when the aisle gets tracked with rain or spilled coffee. Look for laminate thickness in the 5 to 20 mil range, with heavier mil counts reserved for high-traffic main aisles.
Statistic Callout: Avery Dennison’s floor marking bulletin rates properly laminated floor graphics at roughly six months of durability, which is more than enough runway for a multi-show season if you store and reapply the decal between events.
Before you commit to an order, ask your vendor:
- What DCOF or PTV rating does the overlaminate carry?
- Is the adhesive removable or permanent, and rated for which floor types?
- What mil thickness is the laminate, and is it textured or smooth?
- Does the film meet relevant ANSI or ASTM slip-resistance benchmarks?
Pro Tip: Ask for a physical swatch, not just a spec sheet. Slip resistance is one of those things you need to feel under your shoe before you trust it on a show floor.
How Do You Choose the Right Decal for Your Booth and Venue?
Start with the job the decal has to do, because that decision drives everything downstream.
- Logo or photo-op graphics call for cast vinyl with a textured polycarbonate laminate. These get walked on, photographed, and scrutinized up close, so color accuracy and slip resistance both matter.
- Directional arrows and wayfinding can use lighter laminates since they carry less foot traffic concentration, but keep the removable adhesive if you’re on carpet tile or sealed concrete you don’t own.
- Sponsor badges and partner logos on dense expo floors benefit from a slightly heavier mil laminate, since these tend to sit in high-traffic zones near registration.
Surface compatibility narrows your options fast. Sealed concrete and polished tile hold removable adhesive well. Carpet and carpet tile are trickier: standard floor decals won’t adhere reliably to carpet fibers, so you may need a carpet-specific adhesive backing or a different signage format altogether, like a sidewalk sign placed at the aisle entrance instead of a floor graphic.
Size and shape create a real trade-off. A single large panel reads better from across the hall, but anything over roughly 4 by 4 feet usually needs to ship as multiple panels, and multi-panel jobs introduce seam registration risk. Smaller, simpler shapes install faster and hide seams better; oversized custom shapes look striking but demand more precise alignment.
Before you place the order, request:
- A printed proof, not just a digital mockup
- A physical sample swatch of the laminate
- DCOF or PTV data for the specific finish
- Recommended install method and removal instructions
- Warranty terms covering the printed graphic, not just the substrate
What’s the Right Way to Prep and Install Trade Show Floor Decals?
Surface prep decides whether your decal survives day one or starts peeling at the corners by lunch. Most installation failures trace back to a surface that wasn’t properly cleaned, de-waxed, or checked for trapped moisture before the vinyl went down.
- Clean the floor with isopropyl alcohol to strip oils, wax, and residue, then let it dry fully.
- Test a small section for moisture if the venue floor has been recently mopped or waxed.
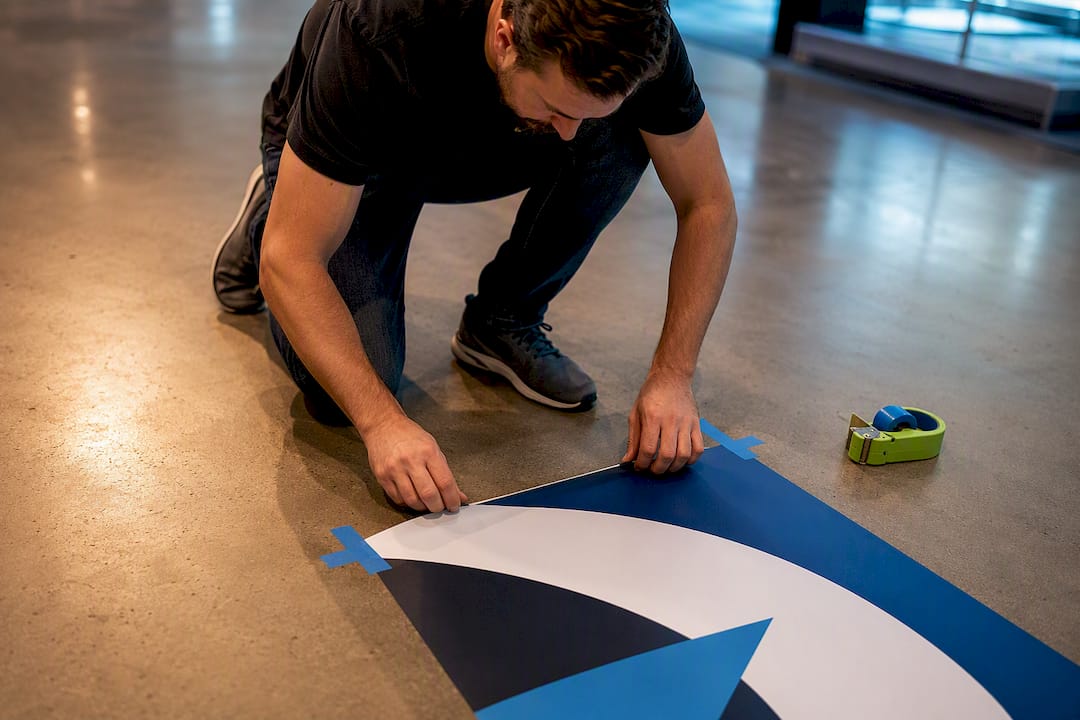
- Use the hinge method: tape the decal in place, peel back the liner halfway, apply, then release the rest while smoothing forward.
- Squeegee from the center outward in overlapping strokes to push out air bubbles, working larger panels in sections.
- Avoid placing graphics directly in main doorways where constant foot traffic and door swing stress the edges.
- Let the decal sit undisturbed for at least 8 hours before heavy traffic crosses it, so the adhesive fully bonds.
Anything larger than about 5 square feet, or any multi-panel layout, is worth handing to a professional installer. Registration errors on seams are hard to fix once the adhesive sets, and a crooked seam near your entrance undercuts the polish you paid for elsewhere in the booth.
Pro Tip: Mark your alignment points with painter’s tape before you remove any liner. It takes thirty extra seconds and saves you from a lopsided logo nobody can un-see for three days.
How Do You Clean and Remove Floor Decals Without Damaging the Venue?
During the show, wipe decals with a damp mop and a neutral, low-alkaline cleaner. Skip harsh solvents and high-alkaline floor strippers. They can break down the laminate finish and dull the graphic faster than normal foot traffic ever would. Textured overlaminates hide scuffs better than gloss finishes, so a textured decal generally needs less frequent touch-up cleaning across a multi-day event.
When the show ends, use the fold-back method: lift one corner and peel at roughly a 180 degree angle back over itself, rather than pulling straight up. This reduces peel force and adhesive transfer, which matters most on softer tile finishes that scratch easily.
- Warm the edge slightly with a hair dryer if the adhesive resists.
- Use a low-solvent adhesive remover on any residue, never a harsh scraper.
- Test removal on a small section first if you’re unsure how the venue floor will react.
Removable trade show decals typically last anywhere from a few days to several months depending on adhesive and traffic, while heavy-duty industrial floor graphics can run into years under proper maintenance.
How Much Do Custom Floor Decals Cost and How Fast Can You Get Them?
Price scales with substrate grade, laminate type, custom-cut shapes, print resolution, and order quantity. A single small directional decal costs far less per square foot than a large custom-shaped centerpiece graphic, and multi-panel jobs add cost for seam registration and extra material waste.
- Expect a price range rather than a flat rate. Larger, simpler shapes cost less per square foot than intricate custom cuts.
- Rush production is available on most simple decals but adds a fee, especially inside a one-week window.
- Small, single-panel decals often ship within days.
- Large or multi-panel layouts can take one to two weeks, so order proofs early.
Ask for your proof and sample swatch as soon as artwork is ready, since sign-off delays are the most common reason exhibitors miss their install window before move-in.
Why Fast Fulfillment Matters More Than Most Exhibitors Realize
Some sign companies ship most products within two business days, and that speed covers more than convenience. It’s the difference between catching a last-minute artwork correction and showing up to move-in with a decal that’s slightly wrong.
The most common mistakes are avoidable: ordering the wrong laminate for the venue floor, skipping surface prep, or approving artwork without seeing a physical proof. Arrowhead coordinates decals alongside displays and banners so your booth reads as one consistent brand, not a mismatched pile of vendor orders.
- Ship orders quickly
- Offer direct venue delivery in some locations
- Coordinate decals with banners and displays for consistent branding
- Request samples and proofs early, well before your move-in date
Do Removable Decals Actually Come Off Cleanly After a Multi-Day Show?
Yes, when you pick the right adhesive class from the start. The residue horror stories exhibitors trade after a show almost always trace back to permanent adhesive applied where removable adhesive belonged, not a failure of vinyl in general.
Fold-back removal at a shallow angle is the technique that matters most. Pulling a decal straight up concentrates stress on one point and increases the odds of tearing the film or leaving adhesive behind on tile grout lines. Peeling at roughly 180 degrees back over itself spreads that stress across the length of the pull, which is why installers rely on it for fragile finishes.
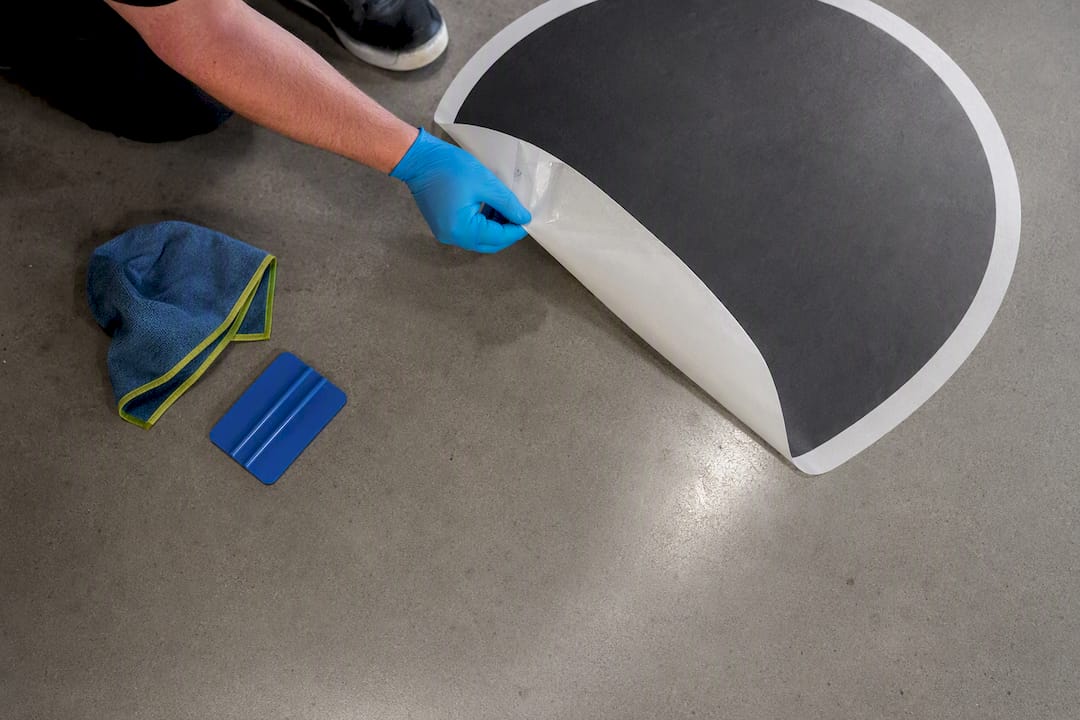
If residue does remain, don’t reach for a metal scraper first. A low-solvent adhesive remover, applied with a soft cloth, breaks down the bond without scratching sealed concrete or polished tile. Light heat from a hair dryer softens stubborn adhesive on cooler show floors, particularly in convention centers where the HVAC keeps aisles chilly.
Timing affects residue risk too. Decals left down for months develop stronger bonds as adhesive cures fully into the substrate, so a graphic that’s been on the floor for a three-day show pulls up easier than one left for a full quarter. If you’re running the same decal across a multi-show season, plan for a slightly harder removal each time and budget a few extra minutes per panel.
One more thing worth flagging to venue staff before move-out: sealed concrete generally releases removable adhesive without incident, but older or unsealed floors can be more porous and hold residue longer. When in doubt, test a small edge before you commit to pulling the whole panel.
What Exhibitors Get Wrong About Floor Decals
Most advice on this topic treats floor decals like a design problem. Pick a bold color, make the logo big, done. That’s backwards. The material spec decides whether the design survives the show, and most exhibitors never ask their vendor a single question about laminate thickness or adhesive class before placing an order.
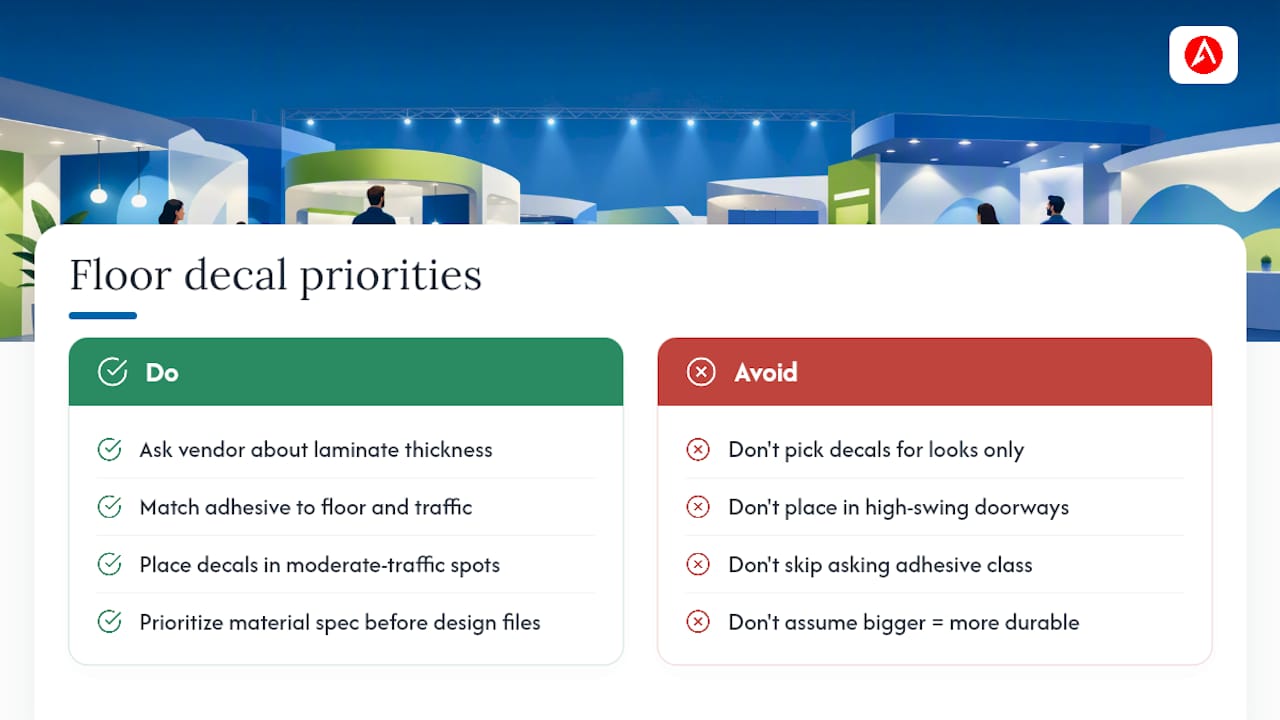
The bigger blind spot is placement. Exhibitors obsess over where the decal looks best in a rendering, then install it in a doorway or high-swing traffic zone where it takes the most abuse and lifts first. A decal that survives three days in the right spot beats a bigger, flashier one that curls by lunch on day one.
If there’s one thing worth prioritizing above design, it’s this: match the adhesive and laminate to your actual floor and traffic pattern before you touch a single creative file. Everything else, color, shape, size, is easier to fix later than a decal that won’t stick or won’t come up clean.
— Dan
Ready to Order? Here’s How Arrowhead Makes It Simple
Ordering custom floor decals shouldn’t mean juggling three separate vendors for your displays, banners, and graphics. Arrowhead Sign Company ships most products within two business days and delivers directly to venues across Arizona, so your decals, your stretch fabric display, and your aisle signage all arrive coordinated instead of scattered across delivery windows.

If you’re planning a full booth rollout rather than a single graphic, Arrowhead’s 10 ft stretch fabric display pairs well with floor decals for a matched brand presence from the aisle to the backdrop. For exterior aisle markers or sidewalk promotion outside the hall, the Signicade Deluxe A-Frame Sidewalk Sign covers what floor decals can’t reach. For exhibitors coordinating multi-location rollouts across several shows a year, a production partner like ALIGN can help keep quality consistent across venues.
The next step is simple: request a sample swatch and a proof before you finalize artwork, upload your files, and lock in an install quote. If your event falls in Arizona, ask about direct venue delivery so your decal arrives ready for move-in instead of sitting in a shipping dock.
Sources
- Conversion, Application and Maintenance of the Avery Dennison Ⓡ Floor Marking System (Instructional Bulletin #6.30)
- Heavy Duty Floor Decals: The 2026 Industrial Safety & Compliance Guide | Graphic Cabin
- Removable Floor Decals 101: A Complete Guide | AP Installations
- How to Install Floor Graphics: A Step-by-Step Guide | PrintPlace
FAQ
How Much Do Trade Show Floor Decals Cost?
Cost depends on size, substrate, laminate grade, and custom shape complexity, with simple single-panel decals costing far less per square foot than large custom-cut or multi-panel graphics. Request a quote based on your exact dimensions and laminate choice rather than relying on a generic per-square-foot number.
Where Can You Buy Vinyl Floor Stickers for an Event?
Order directly from a sign and display company that prints custom floor graphics, like Arrowhead Sign Company, rather than a generic sticker retailer, since event-grade decals need the removable adhesive and textured overlaminate that trade show floors require.
What Are Floor Stickers Called in the Signage Industry?
Industry professionals typically call them floor decals, floor graphics, or exhibition floor graphics, and the terms are used interchangeably across signage vendors and instructional materials like Avery Dennison’s floor marking bulletin.
Where Can You Get a Floor Sticker Made for a Convention?
A custom sign company that handles trade show displays and event signage can produce floor decals sized and shaped to your booth, typically turning around small orders within days and larger multi-panel jobs within one to two weeks.
How Long Do Removable Trade Show Floor Decals Last?
Removable decals used for events generally last anywhere from a few days to several months depending on adhesive strength, laminate, and foot traffic, while properly laminated floor graphics can hold up for roughly six months under normal conditions.