

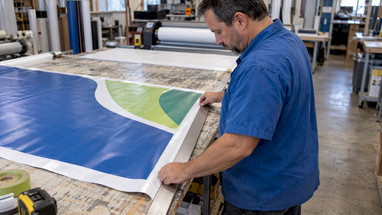
Banner Artwork Bleed: Add 0.5 Inch to Avoid Print Delays
Posted by Deeder Dandenhorf on Oct 15th 2026
Banner Artwork Bleed: Add 0.5 Inch to Avoid Print Delays

Build your banner file with 0.5" or more of bleed on every side and keep text, logos, and QR codes well inside the trim, with a larger safe margin depending on finishing. Before you send anything, confirm crop marks, CMYK color, effective resolution, and that the bleed is actually in the file. OAAA, Adobe, and our own team publish guidance worth keeping open.
TL;DR:
- Outdoor banners commonly need 0.5 to 1 inch of bleed, versus 0.125 inch for small prints; hems, pockets, or stretch may require more.
- Move text, logos, and QR codes away from hems and grommets, and ask the vendor how much the base hides before setting the bottom margin.
- Banners do not need the brochure resolution of 300 PPI, but check effective resolution after scaling and use CMYK; OAAA recommends rich black for large areas.
- In InDesign, export the PDF with crop marks and document bleed settings; retain editable InDesign or Illustrator files if the printer requests corrections.
Table of Contents
- What is bleed and why does it matter for banners?
- What bleed size should you use for banners?
- Where should text, logos, and QR codes go?
- How do you set bleed and crop marks in InDesign, Illustrator, Photoshop, and Canva?
- What resolution and color settings work for banners?
- How do finishing and hardware change your layout?
- What should you check before sending files to the printer?
- Why do we push these settings so hard?
- Where can you order banners and fast-ship displays from us?
- FAQ
- Sources
What is bleed and why does it matter for banners?
Bleed is the extra artwork that extends past the trim line, so a slightly shifted cut never leaves a white sliver at the edge. UVU’s print guidance describes it as the additional background area beyond the final trim size, and it is the reason edge-to-edge printing works at all.
Banners need more of it than a flyer or business card because the material moves and the finishing eats into the edges:
- Trimming variance: even a tiny shift in the cut shows up as a visible white border if the artwork stops exactly at the trim.
- Substrate stretch: vinyl and fabric can move slightly during printing and handling, so the image edge may not land exactly where your file says it should.
- Finishing tolerances: sewn or welded hems fold part of the edge under, which means your artwork needs room to wrap or be cut away.
- Scale: a small error on a 6-foot banner is easy to spot from across a room.
What bleed size should you use for banners?
Standard small print uses 0.125" of bleed. For banners, UVU notes that the typical requirement is 0.5" or greater to cover substrate stretching and finishing such as hems.
Banners often need 0.5" to 1" of bleed, or more, to account for finishing, compared with the standard 0.125" for small print. OAAA’s production specifications offer a similar rule of thumb of 1/2" to 1" for many outdoor products.

For banners, use 0.5" or more of bleed, and follow your printer’s specifications for sewn hems, pole pockets, stretching materials, or other edge finishing. Some outdoor formats call for far more. When you are unsure, ask your printer. Extra bleed is trimmed off, but missing bleed cannot be fixed after printing.
Where should text, logos, and QR codes go?
The safe area, also called the live area, is the internal margin where everything important must stay. UVU describes a typical margin of 0.125" to 0.25" inside the trim for standard projects, while banners often need a larger margin to stay clear of grommets, stitching, and hardware.
Think of the file as three nested boxes. The bleed edge sits outside, the trim line is where the banner is cut, and the safe area sits inside the trim. Crop marks sit in the slug area outside the bleed and show the printer exactly where the trim line falls.
- Grommets and hems: keep type and logos far enough inside that a grommet never lands on a letter.
- Roll-up bases: these commonly hide part of the bottom edge, so give the bottom a larger margin. Exact values depend on the stand, so confirm with the vendor. Our standard retractable banner stands are a good reference for how the base covers artwork.
- QR codes: treat them like text and keep them well inside the safe area so they stay scannable.
Pro Tip: Place your phone number, web address, and QR code well above the base and clear of any hem on a roll-up banner.
How do you set bleed and crop marks in InDesign, Illustrator, Photoshop, and Canva?
Each app handles bleed a little differently, but the goal is the same: artwork that extends past the trim, with crop marks showing where to cut.
- InDesign: open File > Document Setup, expand Bleed and Slug, and enter your bleed. Adobe’s InDesign lesson then has you export a PDF with Crop Marks and “Use Document Bleed Settings” selected so the trim lines up with the bleed area.
- Illustrator: set the bleed values in Document Setup, extend your background past the artboard edge to the bleed line, add crop marks, and outline fonts if the printer asks.
- Photoshop: there is no bleed field, so increase the canvas size to accommodate the bleed, add crop marks or guides, and export a high-resolution TIFF or PDF.
- Canva: use the built-in bleed option on products that support it. Otherwise enlarge the canvas by your bleed amount and add guides for the trim and safe area.
Also ask whether the printer wants native files. OAAA production guidance recommends building mechanical artwork in InDesign or Illustrator, because a flattened PDF limits what a printer can fix.
- Native files let the printer correct scaling or bleed problems without sending the job back.
- A print-ready PDF is fine when it is built correctly and includes bleed and crop marks.
What resolution and color settings work for banners?
Banners are viewed from a distance, so they do not need the 300 PPI you would use for a brochure. UVU explains that banners can print effectively at lower resolutions, but files should still be designed at scale or full size and the effective resolution checked when scaling.
For large-format work, OAAA recommends a rich black build such as 50C/50M/50Y/100K rather than 100K alone, which avoids washed-out blacks on vinyl or fabric. That advice comes from OAAA’s planning guide.
- Build the file at full size, or at a clean fraction of it, so you know what resolution you actually have.
- Check effective PPI after any scaling in a layout app, since a linked image can quietly drop below what you expect.
- Work in CMYK or process colors from the start so screen colors do not shift at print time.
- Use the rich black build for large solid black areas and keep small black text on plain K.
How do finishing and hardware change your layout?
The finishing method decides how much usable space you really have, so pick it before you finalize the design.
- Sewn hems: fold material under the edge, so keep important content inward and add extra bleed.
- Welded hems: similar in effect, with a slightly different tolerance. Ask your printer which one applies.
- Grommets: punched through the hem at corners or along the edges, so leave clear space around each location.
- Pole pockets: these wrap material around a rod, which removes visible area at the top or bottom.
- Stitched edges: thread and reinforcement reduce the clean visible area near the border.
- Roll-up bases: many hide a bottom strip, so a larger bottom margin keeps text readable. See the California Silver Retractable for a base example.
Always confirm the specific hem, grommet, or pocket details with the vendor, and ask for a template if one is available.
What should you check before sending files to the printer?
Run this list top to bottom. Most production delays trace back to one of these items.
- Final trim size is correct for your banner or stand.
- Bleed is added evenly on all four sides at your chosen value.
- Crop marks are included and sit outside the bleed.
- Fonts are outlined or packaged with the file.
- Images are at an acceptable effective resolution at final size.
- Color mode is CMYK, with rich black on large black areas.
- Job notes in the slug area describe the finishing, such as hems, grommets, or pockets.
- Native files are ready if the printer asks for them.
Pro Tip: Open your exported PDF and zoom to the edge. If you can see color running past the crop marks, your bleed made it into the file.
If you are ordering from us, you can upload artwork on the product page and our Quick Ship Displays are built around files that arrive ready to go. Planning the booth itself? ANT Management’s trade show staffing guide covers the people side of show day.
Why do we push these settings so hard?
Because clean files are the fastest way to a fast order. When artwork arrives with bleed, crop marks, and CMYK color already in place, we skip the back and forth, helping us process orders more smoothly. In Arizona, where we can deliver directly to your venue, that saved time can be the difference between a banner hanging on opening morning and one still on a truck.
If you are unsure about a hem, a stand, or a margin, ask us before you finalize the file. We are happy to help with production questions.
— Dan
Where can you order banners and fast-ship displays from us?

When you want the production handled for you, our Printed Banners come with a standard banner layout for $35, and Next Day Air is available for $10. For outdoor use, see our Outdoor Banner Frame, The Banner Bar, and for indoor events our 10 ft stretch fabric display gives you a large, seamless graphic. Our Banner Stands round out the range. We offer production support, and we offer shipping options to suit different timelines. Request a quote or upload your artwork on any product page to get started.
FAQ
What does bleed mean in artwork?
Bleed is artwork that extends past the trim line so no white edge shows if the cut shifts slightly. UVU’s print file guide defines it as the additional background area beyond the final trim size.
How do you get a printer to print full bleed?
Build the file with bleed on all sides and include crop marks. Then export using settings that keep the bleed, such as “Use Document Bleed Settings” in Adobe’s InDesign workflow.
What does the bleed line mean?
The bleed line marks the outer edge of your extended artwork. Everything between the bleed line and the trim line is cut away, while everything inside the trim stays on the finished banner.
How much bleed do banners need compared with small prints?
Small prints use a standard 0.125", while banners typically need 0.5" or more because of stretch and finishing. OAAA’s production specs suggest 1/2" to 1" for many outdoor products.
Sources
- How to Set Up Print Files Correctly: Bleeds, Resolution, and Color Space | UVU
- PREPARING YOUR PRINT FILE
- Adobe Learn - Learn InDesign - Set a print bleed