

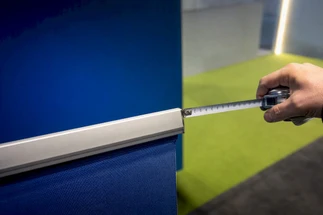
Measure First, Order Banners That Fit The Banner Bar, Ships in 2 Days
Posted by Deeder Dandenhorf on Aug 30th 2026
Measure First, Order Banners That Fit The Banner Bar, Ships in 2 Days
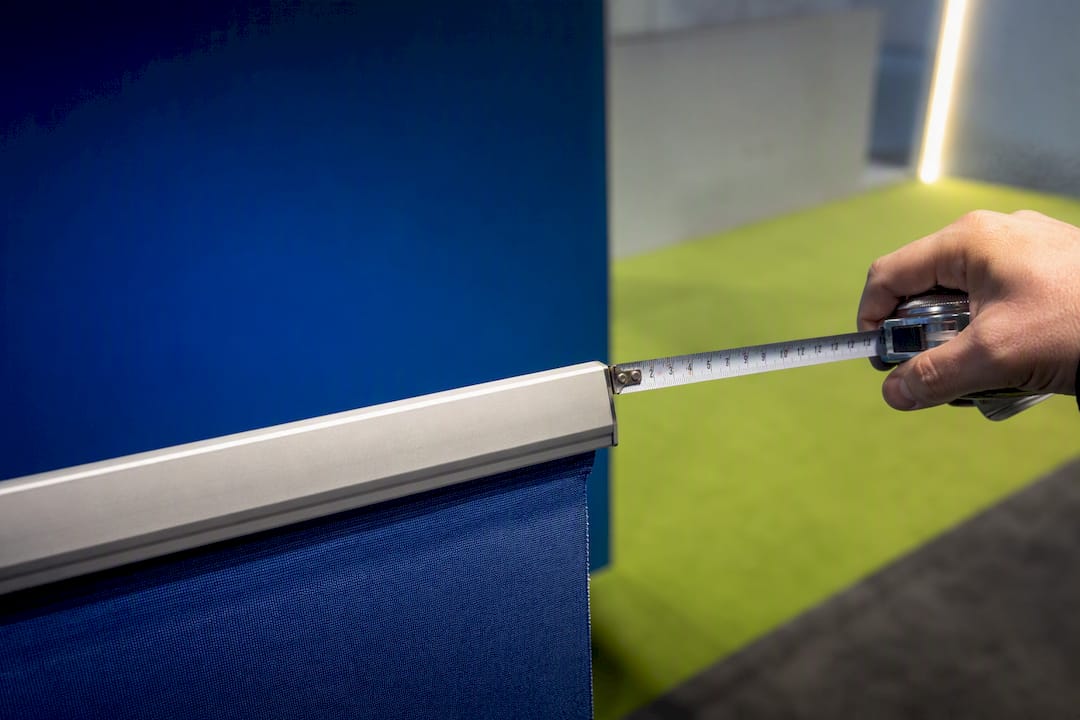
Submit the visible opening’s width and height plus roughly 1 to 2 inches of mounting allowance, not the outer dimensions of the frame itself, and tell your printer exactly how the banner will attach. Designing to the full frame size instead of the visible window is the single most common mistake buyers make, and it usually means wasted graphics or a banner that won’t tension properly. If you’re outfitting an Outdoor Banner Frame - The Banner Bar, that measurement discipline matters even more, since the frame’s adjustable rails leave less forgiveness than a fixed-size stand.
TL;DR:
- Measure the visible opening at the mounting point and add one to two inches of clearance to ensure proper tension and fit.
- The printed panel is often larger than the visible graphic due to feed areas, so design accordingly and verify actual dimensions before printing.
- Use the manufacturer’s template or build your file at full size with CMYK color mode and 100-150 DPI resolution to prevent distortion and color shifts.
- Select appropriate materials like scrim vinyl for indoor or durable outdoor use, and confirm pocket depths or grommet placement to match your hardware.
- Always verify measurements twice, photograph your setup, and request proofs to avoid common errors like designing to the frame edge or overlooking hidden feed areas.
Table of Contents
- How to measure the banner bar and surrounding space
- How banner bars and retractable stands shrink your visible printable area
- Design and file-setup checklist for a print-ready banner
- Choosing materials and mounting finishes for your bar
- Ordering checklist and proof-review steps before production
- Common mistakes and quick fixes before you finalize your order
- Publisher perspective: how Arrowhead approaches fitting banners to custom bars
- The Banner Bar: sized right the first time, shipped fast
- Recommended reference links for size charts and DPI checks
- Sources
- FAQ
How to measure the banner bar and surrounding space
Grab a tape measure, a notepad, and your phone camera before you touch any design software. Every sizing mistake we see traces back to skipping this step or eyeballing it instead of measuring twice.
Start with the visible opening, the actual gap where your graphic will show once it’s mounted. That’s different from the bar’s total footprint, which includes rails, hardware, and any frame edges that overlap the print.
- Measure the visible width at the height where the banner will actually hang, not at the base. Bars taper slightly on some models, so a measurement taken at the bottom can read narrower than the top.
- Measure the visible height the same way, top edge of the opening to bottom edge, and write down the number immediately. Trust the tape, not your memory.
- Record both measurements twice, ideally on different days or with a second person confirming. A quarter inch of error compounds fast once you’re cutting vinyl.
- Identify your mounting points. Grommet spacing matters if your bar uses hooks or bungees; pocket depth matters if it uses a pole-pocket rail system; note whether there’s a bottom return (a lip the banner wraps around) that eats into visible height.
- Check for a top rail slot. Many banner bars slide the graphic into a channel at the top, which typically needs 1 to 3 inches of extra material folded over, depending on the rail’s depth.
- Add a practical tolerance. As a rule of thumb, build in a half inch to one inch of clearance around the visible opening so the finished banner isn’t fighting the frame on installation day. Larger installations, anything spanning 6 feet or more, often need more, closer to 2 inches, because rail flex and thermal expansion in outdoor settings become real factors.
- Photograph everything. Take a shot of the bar with the tape measure still in frame, and a second photo showing distance to the nearest obstruction (a wall, a table, another display) so your printer can flag anything that might interfere with installation.
Send those photos and both sets of measurements with your order. A supplier working blind from a single number has no way to catch a transposed digit or a pocket depth you forgot to mention. Arrowhead Sign Company - Signs, Banners and Trade Show Displays asks for exactly this kind of documentation because it shortens the back and forth before proofing even starts.
How banner bars and retractable stands shrink your visible printable area
The printed panel you order is almost never the same size as what people actually see once it’s mounted. That gap trips up more first-time buyers than any other part of the process.
On a retractable stand, the base cassette feeds the bottom edge of the banner into the mechanism, and that feed swallows several inches of material. Standard retractable graphics run around 33 by 79 inches visible, with widths commonly ranging from 24 to 47 inches, but the printed panel supplied to the stand is taller than that visible window because the base hides part of it. If your logo or headline sits too low, it disappears behind the cassette the moment the banner is installed.
- Printed panel is the full physical piece of material you receive from the printer.
- Visible graphic is what a passerby actually sees once the banner is mounted, minus any hidden feed or overlap.
- Stand height varies by model, which is why a “standard” retractable size still needs to be checked against your specific unit before you finalize a file.
Pole pockets and rail systems eat into your printable area a different way. A pocket sewn along the top or side typically consumes 2 to 4 inches of material width or height, folded back and stitched, so that fabric never shows as graphic content. Rail systems built into a bar like The Banner Bar clamp the edge instead, which usually costs less visible space, but you still need to confirm pocket depth with whoever is producing your file.
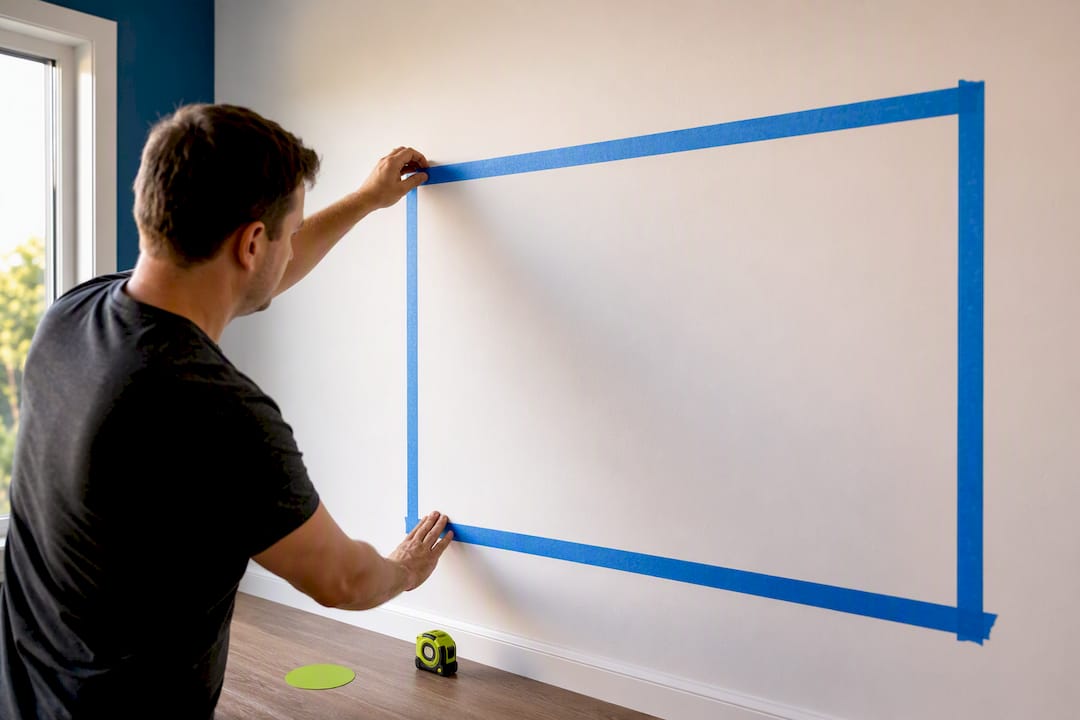
Before you commit to a final layout, mock up the visible window with painter’s tape on a wall at the same dimensions you measured. Stand back, look at where your headline lands, and check whether anything important falls inside the last few inches at top or bottom. This five-minute test catches more layout problems than any amount of staring at a screen, and it’s the same reason retractable banner design best practices always start with the visible window, not the printed sheet.
Design and file-setup checklist for a print-ready banner
Once your measurements are locked, the file itself needs to match them exactly, at the right resolution, in the right color mode, with margins that account for what the mounting hardware will cover.
Work directly inside the printer’s template whenever one is offered, built to the exact scale of your visible opening plus allowance. If no template exists, build your file at full size or at a precise fraction (10 percent, 25 percent) so nothing gets distorted on export. Set your document to CMYK color mode, since RGB files shift color unpredictably once they hit a large-format printer, and embed or outline every font so text doesn’t reflow on someone else’s machine.
- Build files at 100 to 150 DPI at full size, or 300 DPI at 10 percent scale if your software struggles with a banner-sized canvas.
- Run any placed photo through a DPI calculator before final export. A phone photo that looks sharp on screen can print blurry at 6 feet wide.
- Keep body text and logos out of the top third danger zone on retractables (design high, since the base often hides the bottom third once installed) and clear of the hidden feed strip at the very bottom edge.
- Leave a side margin equal to whatever your rail or pocket depth requires, confirmed against the measurements from your bar.
- Export as PDF/X whenever your printer accepts it, since it locks fonts, color, and bleed settings into one predictable file.
- Label your file with the final dimensions in the name itself, something like
banner_33x79_visible_35x81_pocket.pdf, so nobody downstream has to guess which version is current. - Add a short note on upload flagging anything unusual: an odd pocket depth, a bottom return, a rush deadline.
Pro Tip: Print a scaled version on regular paper, tape the sheets together at actual size, and hold it up to the bar before you approve anything. It sounds low-tech, but it catches spacing errors no screen preview will show you.
Standard banner sizing guidelines also apply a legibility rule worth knowing here: roughly 1 inch of letter height for every 10 feet of intended viewing distance. If your bar sits at the entrance to a booth where people read it from 15 feet away, headline text smaller than about 1.5 inches tends to disappear into the background noise of a trade show floor.
Choosing materials and mounting finishes for your bar
Not every banner material behaves the same way once it’s stretched across a bar, and the wrong choice shows up as sagging, wrinkling, or a torn grommet within the first hour of an event.
For most fixed indoor and outdoor displays, 13 oz scrim vinyl remains the standard workhorse: durable, opaque, and rigid enough to hold a crisp image without a lot of give. It’s the right default for a banner bar under 8 feet wide in typical conditions.
- Mesh vinyl becomes the better call once you’re spanning a large area outdoors, since perforated mesh lets wind pass through the material instead of catching it like a sail. Past roughly 4 by 8 feet, a solid vinyl banner on an exposed frame becomes a real wind-load risk.
- Fabric suits indoor backdrops and step-and-repeat walls where you want a matte, wrinkle-resistant look and don’t need to worry about rain or gusts.
- Grommets work well with bungee or hook mounting and add roughly a half inch of dead space around the edge where the eyelet sits.
- Hems (folded, reinforced edges) are standard on most vinyl orders and typically consume an inch or so per side, which should already be baked into your allowance.
- Pole pockets need their depth confirmed against your specific bar, since a pocket cut too shallow won’t slide onto the rail, and one cut too deep leaves excess fabric bunching at the ends.
Reinforcement matters more as size climbs. Larger banners or anything staying outdoors for weeks at a time benefit from welded seams instead of stitched ones, and from wind slits cut into mesh sections to relieve pressure during gusts. Guidance on outdoor event signage consistently points to the same conclusion: match the material to how long it stays up and how exposed it is, not just to what looks best in a proof.
Ordering checklist and proof-review steps before production
A clean order form saves everyone a round of emails. Before you submit, confirm every one of these fields is filled in and matches the measurements you took at the bar itself.
- Final dimensions, listed as both the visible opening size and the total size including your mounting allowance, so nothing gets misread as one or the other.
- Material choice, vinyl, mesh, or fabric, based on where and how long the banner will be displayed.
- Hem or finish type, grommets, pole pocket, or rail-compatible hem, matched to your specific bar’s hardware.
- Grommet spacing or pocket depth, called out explicitly rather than assumed from a standard template.
- Quantity and shipping date, especially if you’re coordinating delivery to a venue rather than an office.
Once your proof comes back, don’t just glance at the colors. Confirm the visible window lines up with what you measured, check that any placed image still reads sharp at full size, and verify where the hidden feed or pocket will sit relative to your text. A pre-production scaled PDF proof catches most of these problems before a single square foot of vinyl gets printed.
Lead times vary by supplier and order complexity, so ask directly about rush options if your event date is close. Arrowhead Sign Company - Signs, Banners and Trade Show Displays ships most orders within two business days of proof approval, and Arizona clients can request direct delivery straight to the venue instead of routing through an office first.
Common mistakes and quick fixes before you finalize your order
The single most frequent error is designing to the outer edge of the frame instead of the visible opening, then wondering why the banner won’t tension without wrinkling or why the logo vanishes behind a rail. The fix is simple: always measure the opening itself, add your allowance on top, and never assume the frame’s listed size equals the printable area.
- Run the masking-tape mock-up described earlier before you approve any file, not after.
- Print a scaled test on standard paper and hold it against the actual bar if you’re unsure about placement.
- Request an extra proof or an on-site check if you’re outfitting a bar you’ve never used before, especially with an unfamiliar pocket or rail style.
- Don’t try to fix a wind problem by resizing down. If a large mesh banner is still flapping or straining seams, the issue is usually reinforcement or material choice, not dimensions.
Pro Tip: If you inherited a banner bar without documentation, measure it yourself rather than trusting a manufacturer’s spec sheet found online. Hardware gets swapped, replaced, or modified more often than people admit.
Publisher perspective: how Arrowhead approaches fitting banners to custom bars
Every sizing disaster we’ve seen traces back to the same root cause: someone designed to a number that wasn’t the visible opening. That’s why measurement always comes before design, never the other way around, no matter how good the artwork is. Arrowhead Sign Company - Signs, Banners and Trade Show Displays builds its proofing step around catching exactly that gap, and most orders still ship within two business days once a proof is approved. Arizona clients get direct venue delivery on top of that, which removes one more place for a measurement to get lost between order and installation.
— Dan
The Banner Bar: sized right the first time, shipped fast
Arrowhead Sign Company - Signs, Banners and Trade Show Displays built the Outdoor Banner Frame - The Banner Bar specifically to remove the guesswork covered above. Its adjustable rails come in 6-foot and 8-foot configurations with published frame dimensions, so instead of measuring an unfamiliar setup from scratch, you’re matching your order to a known, documented spec from the start.

Send over your preferred colors, fonts, and any design inspiration when you place your order, the same practical approach independent sellers recommend when starting a custom banner request, and a proof comes back scaled to the exact frame you’re using. Rush production is available for tight event timelines, and Arizona clients can schedule direct delivery straight to the venue instead of waiting on a shipping carrier. Head to the Outdoor Banner Frame product page to check current frame sizing and start your order today.
Recommended reference links for size charts and DPI checks
A few outside resources are worth bookmarking alongside your order. The roll-up banner size chart breaks down standard retractable dimensions if you’re comparing against a stand rather than a wall-mounted bar. The typical banner size guide covers common event sizes from 2x4 feet up through large-format spans. For file prep, the print-ready file guide walks through DPI math and color mode in more depth than fits here, and for mounting context outside the banner category, types of promotional displays shows how similar sizing logic applies to retail and restaurant fixtures.
Sources
- Roll-Up Banner Sizes (2026): Standard Retractable Dimensions
- Typical Banner Sizes for Print and Digital
- Banner to Print: Complete Guide for Print-Ready Files - Custom 101 Prints
- How to order custom banners at The Banner Bar
FAQ
Where can I order custom banners sized to fit a specific bar?
Order directly from a large-format print supplier that accepts custom dimensions rather than only stocking preset sizes; Arrowhead Sign Company - Signs, Banners and Trade Show Displays takes exact measurements and ships most orders within two business days.
What are the standard sizes for banners?
Common fixed-banner sizes run 2x4, 3x6, and 4x8 feet, while retractable stands typically use a 33 by 79 inch visible graphic, though your specific bar may need a custom size outside those standards.
How much do custom banners typically cost?
Pricing depends on size, material, and finish, with mesh and reinforced outdoor banners generally costing more per square foot than standard vinyl due to the added material and seam work.
What size does a print shop need to make my banner?
Provide the visible opening’s width and height plus your mounting allowance, not the total frame size, since most print shops build the file to whatever dimensions you submit on the order form.
Can mesh banners work on a standard banner bar system?
Yes, mesh banners work well on a bar-mounted display, especially outdoors, since the perforated material resists wind load far better than solid vinyl at larger sizes.