

2 Feet Per Person: Pick Step and Repeat Size for Event Photographers
Posted by Deeder Dandenhorf on Sep 7th 2026
2 Feet Per Person: Pick Step and Repeat Size for Event Photographers
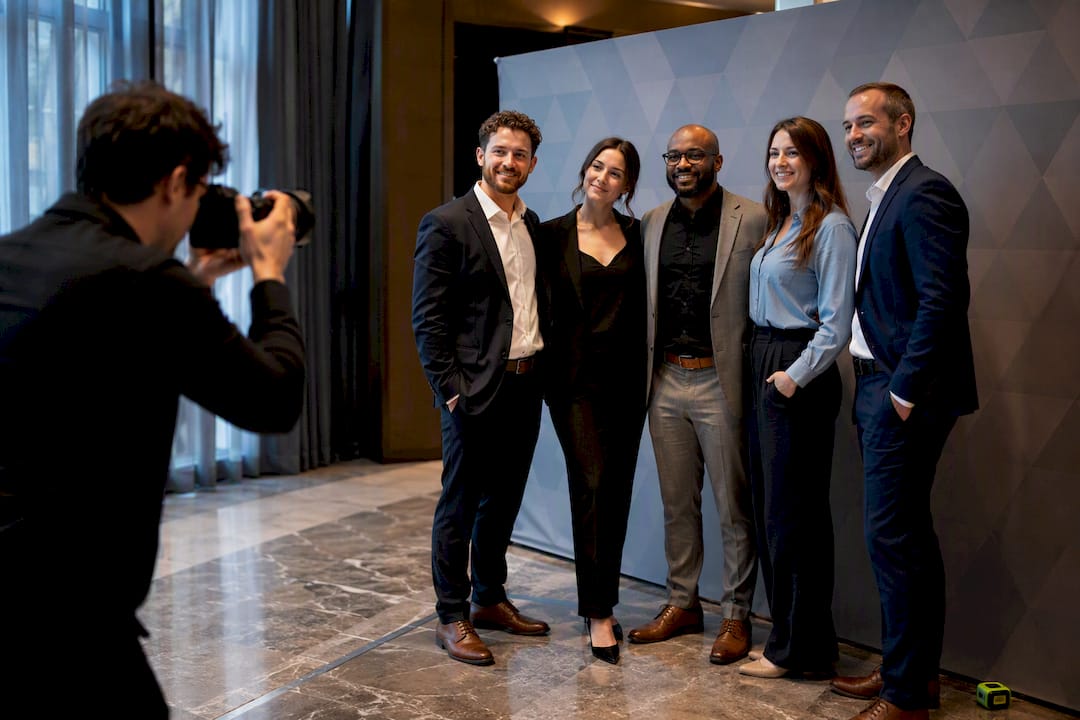
The standard step and repeat size is 8’ x 8’, built to fit one to three people and match the telescopic frames most event venues already carry. Common alternates run 8’x5’ for solo portraits, 8’x10’ and 8’x12’ for small groups and press lines, and 10’x20’ hero walls for red-carpet moments. Your real decision rule: count the people who need to fit in one shot and let that number set your width.
TL;DR:
- An 8x8 foot backdrop fits up to four people comfortably, but larger groups or press lines require 8x10 or 8x12 options for proper framing.
- Use the 2 feet per person guideline to determine the necessary width based on group size, avoiding awkward cropping or crowding.
- For outdoor or multi-day events, consider fabric or hard-frame backdrops, with sizes dictated by venue constraints, storage space, and transportation needs.
- Logo sizes should be between 8 to 18 inches depending on the number of sponsors and overall design, with layered spacing to maintain clarity.
- Fast turnaround suppliers and durable outdoor frames enable quick, reliable setup, especially when size and delivery are coordinated via direct communication with photographers and vendors.
Table of Contents
- How Do Standard Step and Repeat Sizes Match Different Group Sizes?
- How Do You Choose the Right Step and Repeat Size?
- What Size Should Logos Be on a Step and Repeat?
- What Frame Types Work With Different Step and Repeat Sizes?
- How Long Does Step and Repeat Production Take, and What Does It Cost?
- Which Material Works Best for Step and Repeat Photography?
- How Should You Transport and Store a Step and Repeat Banner?
- What Arrowhead Sign Company Brings to Your Sizing Decision
- Why Most Sizing Advice Skips the One Question That Matters
- Ready to Order Your Step and Repeat Backdrop?
- Sources
- FAQ
How Do Standard Step and Repeat Sizes Match Different Group Sizes?
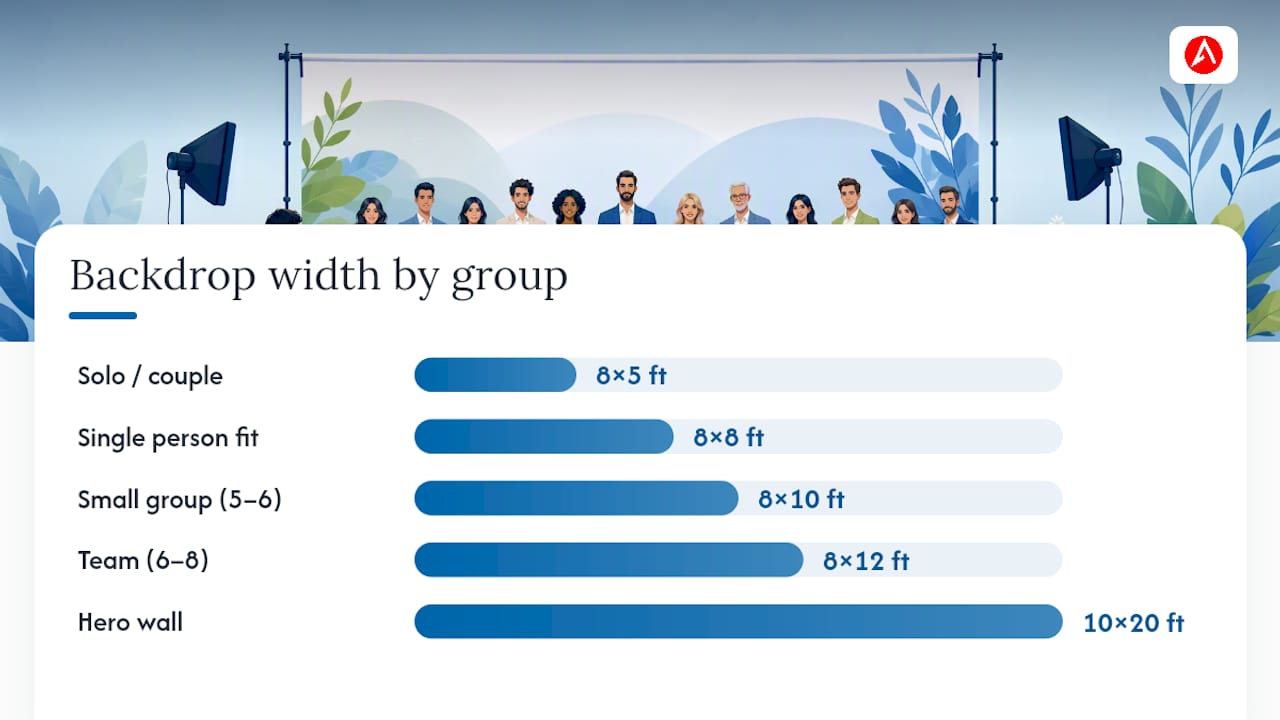
Once you know roughly how many people need to fit in frame, picking a width gets a lot less complicated. The industry leans on a simple math trick: budget about 2 feet of width per subject and then round up to the nearest standard size so you’re not custom-ordering something a printer has to build from scratch. That 2-feet-per-person guideline keeps people from getting cropped at the shoulders or crowding off the edge of the banner.
Here’s how that math plays out across the sizes you’ll actually see quoted by printers and rental companies:
- 6’x8’: A tight fit for one person, best for a check-in station or a small sponsor activation where space is genuinely limited.
- 8’x5’: A portrait orientation suited to solo shots or a couple standing close, popular for step-and-repeat setups tucked into hallways or lobby corners.
- 8’x8’: The everyday default. It comfortably holds one to four people and lines up with the most commonly stocked frame size in the industry, which keeps both cost and lead time down.
- 8’x10’: A step-up for small groups, five to six people, or press interviews where a reporter and a boom mic need to share the frame with the talent.
- 8’x12’: Built for larger groups, six to eight people, or sponsor lineups where you want extra room on either side for branding.
- 10’x20’: The hero or press-line wall, the kind you see at film premieres and major press events where a dozen or more people rotate through over the course of an evening.
The tradeoff running underneath every one of these choices is portability versus presence. An 8’x8’ setup packs into a single carrying case, sets up in minutes, and travels easily between events. A 10’x20’ hero wall makes a much bigger visual statement in photos and on social media, but it needs a larger vehicle, more setup time, and usually a second person to help with installation. If your event calendar has you moving between three trade shows in a month, that portability difference matters as much as the visual impact.
Groups also behave differently than individuals in front of a camera, and integrating QR codes on digital signage can maximize marketing ROI by adding interactive elements to your backdrop. Photographers shooting a solo portrait usually stand closer, which means less of the banner actually appears in the final crop. Group shots pull the camera back, which means more of the backdrop, and more of your sponsor logos, end up visible in the frame. That’s one more reason the “how many people” question comes before the “how much space do I have” question.
How Do You Choose the Right Step and Repeat Size?
Sizing a backdrop correctly comes down to answering four questions in order, before you ever look at a price sheet. Skip the order and you risk ordering a banner that looks great on paper but crops awkwardly in every photo from the event.
- Define the shot first. Decide whether most photos will be vertical phone crops for social media or horizontal frames for press photography. A vertical crop shows less width, so you can often go a size smaller than you’d think. A horizontal press frame shows more of the banner, which argues for a wider option like 8’x10’ or 8’x12’.
- Confirm the photographer’s working distance. Ask your photographer or check with the venue’s media team how far back they’ll typically stand. A tighter working distance means less of the banner appears behind subjects, which can let you save money on width without sacrificing coverage in the photos that matter.
- Measure the venue before you order anything. Walk the actual space, note the ceiling height, and check for chandeliers, sprinkler heads, or low archways that could interfere with a tall frame. Assume 8 feet of height as your baseline since that’s what most telescopic frames are built for, and only plan for a taller custom build if the venue specifically calls for it.
- Translate your headcount into a width. One person or a couple fits comfortably on 8’x5’ or 8’x8’. Small groups of five or six lean toward 8’x10’. Teams of six to eight need 8’x12’. A press line with a dozen or more rotating through calls for a 10’x20’ hero wall.
Once you’ve got a size in mind, run it against a short tradeoff checklist: how easily does this size travel between venues, what does shipping and handling cost for a banner this wide, and how much install complexity are you willing to manage on event day. A single-person setup can usually handle an 8’x8’ frame solo. A 10’x20’ hero wall almost always needs two people and extra time.
Pro Tip: Text your photographer a photo of the venue wall and ask them to eyeball their working distance before you finalize your order. A five-minute phone call can save you from ordering a size that’s technically correct but doesn’t match how the shots will actually be framed.
What Size Should Logos Be on a Step and Repeat?
Logo size on a step and repeat depends entirely on how many brands are sharing the wall. For a single-sponsor backdrop, 12 to 18 inches wide keeps a logo legible in most photo crops without overwhelming the design. Once you’re stacking multiple sponsors into a repeat pattern, drop each logo down to 8 to 14 inches so the overall layout doesn’t feel cluttered.
Spacing matters just as much as size. The standard rules that keep a repeat pattern readable:
- Leave 6 to 12 inches of horizontal gap between each logo in the row.
- Offset every other row by roughly 50% so logos don’t stack directly on top of each other vertically.
- Aim for two to three full logo impressions to land inside a typical vertical phone crop, since that’s the shot most guests will actually take and share.
That row offset does more than look better on the print file. It keeps a person standing in front of the banner from blocking an entire vertical line of the same logo, which is exactly what happens when rows repeat in a straight grid instead of a staggered one. If you’ve got a long sponsor list, consider printing two complementary banners and rotating them across different photo zones rather than cramming every logo onto one wall. Packing in too many sponsors past a certain point actually hurts everyone’s visibility, since no single logo gets a clean, uncropped impression.
What Frame Types Work With Different Step and Repeat Sizes?
Most step and repeat backdrops land at exactly 8 feet tall for a practical reason: telescopic frames are built around that height, and it clears typical venue ceiling fixtures without triggering rigging or freight considerations that come with taller builds.
The hardware you choose shapes what’s actually possible at each size:
- Pipe-and-drape setups are fast to assemble and budget-friendly, a solid match for 8’x5’ through 8’x10’ backdrops at smaller events.
- Tension-fabric (SEG) frames hold the fabric taut across the whole panel, resist wrinkling, and give a cleaner photographic surface, which makes them a strong fit for 8’x10’ and 8’x12’ walls that need to look sharp in press photos.
- Hard-frame builds trade portability for durability, standing up to multi-day trade shows and larger hero walls where the backdrop stays up for several days straight.
Wide walls, especially 10’x20’ hero setups, usually need panel joins where two or more sections meet, which sometimes calls for center supports to keep the whole structure from bowing. Before you order any size, walk through a quick venue checklist: measure doorways and hallways the crated frame has to pass through, check the freight elevator dimensions if you’re above ground level, note any low-hanging fixtures, and confirm your actual floor footprint against the frame’s base measurements.
How Long Does Step and Repeat Production Take, and What Does It Cost?
Printed fabric and tension-fabric backdrops typically ship in 7 to 14 business days, while fully fabricated hard-frame walls often run multiple weeks once you factor in proofing time. That gap between fabric and fabricated builds is the single biggest lever you have over your production timeline.
Cost follows a similar pattern in three rough tiers. A budget printed fabric banner sits at the low end of the range. A mid-tier tension-fabric print paired with a reusable frame costs more upfront but pays off across repeat events. A premium hard-frame build sits at the top, justified for backdrops that need to survive multiple setups and takedowns over a multi-day trade show run.
A few practical moves shrink your timeline without sacrificing quality:
- Stick to standard sizes like 8’x8’ or 8’x10’ rather than custom dimensions, since common frames and materials stay in stock and skip the custom fabrication queue.
- Turn around your proof approval within 24 hours instead of letting it sit in an inbox.
- Ask about expedited shipping or local direct delivery if your event is close enough to skip freight altogether.
Which Material Works Best for Step and Repeat Photography?
Matte fabric photographs better than glossy vinyl for most step and repeat setups. It cuts down on glare and flash hotspots, and tension fabric in particular resists the wrinkles that show up as distracting shadows in close-up event photography.
Vinyl still has a place for short-term outdoor events where durability against weather matters more than a perfectly smooth surface, but watch for flash hotspots showing up as bright blown-out patches in photos taken up close. For bright outdoor conditions, ask about blockout or backing options that keep sunlight from bleeding through the print and washing out your colors.
- Choose matte tension fabric as your default for indoor press events and step and repeat photography.
- Reserve glossy vinyl for brief outdoor activations where weather resistance outweighs photo quality.
- Add blockout backing if your event sits under direct sun for more than an hour or two.
Pro Tip: If you’re not sure which finish a vendor is quoting you, ask directly whether it’s matte or gloss. The terminology varies between suppliers, and it’s the single detail most likely to get lost in an email chain.
How Should You Transport and Store a Step and Repeat Banner?
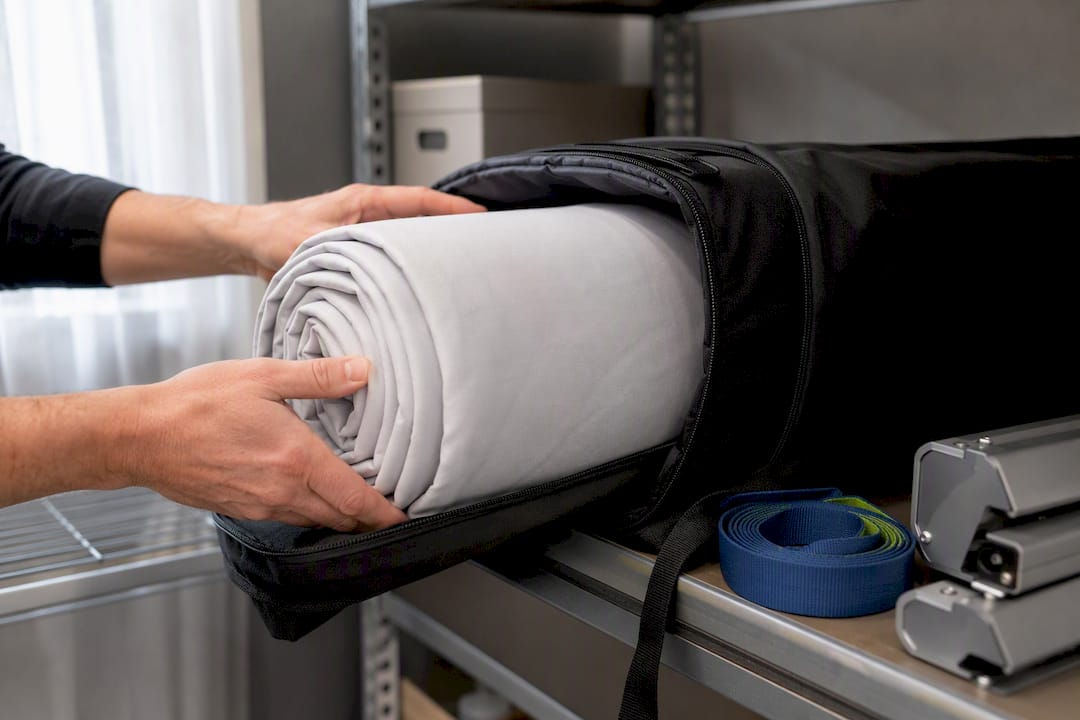
Size drives everything about how a backdrop travels between events. An 8’x5’ or 8’x8’ fabric print rolls into a compact carrying tube or soft case that fits in a car trunk, which makes it the practical choice if you’re running the same booth at three different trade shows in a month. Wider setups like 8’x12’ or a 10’x20’ hero wall usually ship in a hard case or crate, and that means budgeting for a larger vehicle or a freight service between venues.
Frame components add their own storage math. Telescopic frames collapse down small and stack easily in a closet or storage unit, but hard-frame builds for multi-day trade shows take up more permanent space and often need a dedicated shelf or rack to avoid warping the panels. If you’re storing a tension-fabric print, roll it rather than fold it. Folding creates crease lines that show up as shadows in photos even after the fabric has been hung back up for a day.
Humidity and temperature matter more than most planners expect. Fabric prints stored in a garage or uncontrolled storage unit can pick up moisture that leads to mildew spotting over several months, so a climate-controlled closet is worth the extra effort if you’re reusing the same banner across a full event season. Vinyl holds up better against humidity but is more prone to cracking if stored folded in cold conditions.
Whatever size you land on, label the case clearly with the banner’s dimensions and material. It sounds minor until you’re pulling three different backdrops out of storage the night before an event and can’t remember which case holds the 8’x10’.
What Arrowhead Sign Company Brings to Your Sizing Decision
Getting the size right on paper is only half the job. The other half is finding a supplier who can actually deliver it on your timeline, and that’s where fulfillment speed becomes as important as the dimensions themselves. Many suppliers ship most products within two business days, which can significantly reduce the typical 7 to 14 day lead time for event organizers working against a tight date.
Some suppliers offer direct delivery to the venue for local clients, removing a layer of logistics and simplifying freight coordination and timing concerns. On the hardware side, the Outdoor Banner Frame, known as The Banner Bar, gives planners a frame option built specifically for outdoor step and repeat setups where wind and weather are real concerns, not just a checkbox on a venue form.
That combination, standard sizes in stock, fast shipping, and a frame built for outdoor durability, means the sizing decisions covered throughout this guide translate directly into something you can order this week rather than something you have to wait a month to see.
Why Most Sizing Advice Skips the One Question That Matters
Most step and repeat guides start with dimensions and work backward toward use case. I’d argue that’s exactly the wrong order. The width you need is a function of how many people the photographer needs to fit and how tight or wide their crop will be, and everything else, frame type, material, even budget, is a downstream decision from that one answer.
What gets underestimated is how much the “standard” 8’x8’ size has become a default less because it’s ideal and more because it’s what frame manufacturers and printers already stock. That’s not a knock on the size itself; it genuinely fits the majority of event scenarios. But event organizers who blindly default to 8’x8’ because it’s the “normal” size sometimes end up cropping their VIPs at the elbow during a five-person group shot, when an 8’x10’ would have solved the problem for a marginal cost difference.
The other overlooked piece is logo fatigue. Sponsors love seeing their brand on a step and repeat, but cramming twelve logos onto one 8’x8’ wall in the name of keeping everyone happy usually means nobody’s logo photographs clearly. A rotated pair of banners, or a slightly wider wall with fewer, larger logos, delivers more actual sponsor visibility than the crowded version most planners default to under pressure.
If there’s one habit worth building into your event planning process, it’s this: text your photographer before you order your backdrop, not after. Their answer about working distance and crop style will tell you more about the right size than any chart, including the one in this article.
— Dan
Ready to Order Your Step and Repeat Backdrop?
After settling on a size, you can find suppliers offering fast turnaround times and direct delivery services for local clients, reducing freight and scheduling uncertainties.

Beyond the fabric prints themselves, the Outdoor Banner Frame gives you a durable frame option built for outdoor step and repeat setups, whether you’re running an 8’x8’ entrance backdrop or a wider press-line wall. If your next event needs a size chart translated into an actual order, browse standard sizes and starting points and get a quote out the door today.
Sources
- Guide to Step-and-Repeat Banner Sizes
- Step and Repeat Banners, Size Does Matter!
- Step-and-Repeat Banner Sizes: A Complete Guide for Branded Photo Walls
FAQ
What Is the Typical Size of a Step and Repeat?
The typical size is 8’ x 8’, which fits one to four people and matches the most commonly stocked frames in the industry. Wider options like 8’x10’ and 8’x12’ suit small groups and press interviews.
What Size Should Logos Be on a Step and Repeat?
Single-brand backdrops typically use logos 12 to 18 inches wide, while multi-brand layouts drop to 8 to 14 inches with 6 to 12 inches of horizontal spacing between each one.
What Is the Standard Size for a Backdrop?
The standard height for nearly all step and repeat backdrops is 8 feet, since that matches typical telescopic frames and clears most venue ceiling fixtures. Width varies by group size, ranging from 8’x5’ for solo shots up to 10’x20’ for hero walls.
How Big Is a 2x3 Ft Banner?
A 2x3 ft banner is a compact vertical or horizontal sign, far smaller than a full step and repeat backdrop, and it’s typically used for tabletop signage or directional signs rather than photo backdrops. For group photos, you’ll need a size closer to 8’x8’ or larger to actually fit people in frame.
How Do I Know if I Need an 8x8 Step and Repeat or Something Wider?
Count how many people typically need to fit in one shot, then apply the roughly 2-feet-per-person guideline; if your answer comes out to four people or fewer, an 8x8 step and repeat should work fine. Anything beyond that, especially press lines or team photos, calls for 8’x10’ or wider.