


Venue Signage Placement Checklist for Trade Shows
Posted by Deeder Dandenhorf on Jul 24th 2026
Venue Signage Placement Checklist for Trade Shows

Placing your booth signage correctly is the single fastest way to pull more visitors off the aisle and into a conversation. Your venue signage placement checklist starts here: keep headline signs at 54–66 inches above the floor, assign each sign exactly one job, and build your layout around natural traffic flow. Get those three things right, and everything else falls into place.
- Height: Position headline text at 54–66 inches above the floor to match natural eye level for most attendees.
- One purpose per sign: Each sign should either attract attention, build credibility, or direct action. Never all three at once.
- Sightlines first: Plan your booth layout before you finalize sign placement, not after.
- Materials matter: Match your sign type to the venue. Fabric backwalls travel well and look clean under hall lighting; rigid panels suit demo zones.
- Directional signage: Use clear arrows and labels to guide attendees, especially in large or crowded halls.
- Brand consistency: Match colors, fonts, and logos across every sign to build recognition and trust.
- Lighting: Spotlights or LED strips on key signs improve readability in dim or complex venue lighting.
- Compliance: Confirm venue regulations on adhesives, rigging, and electrical before you print anything.
Table of Contents
- Your step-by-step venue signage placement checklist
- Getting your signs up without the headaches
- Why signage placement makes or breaks your trade show results
- Key Takeaways
- What the conventional wisdom on trade show signage gets wrong
- Ready to outfit your next booth with signage that actually works?
Your step-by-step venue signage placement checklist
Follow this sequence from planning through installation to avoid the costly mistakes that trip up first-time exhibitors.
-
Define your signage goal. Decide whether each sign’s job is to attract from a distance, prove credibility up close, or prompt a next step. A three-layer approach — promise, proof, action — keeps your booth readable and clutter-free.
-
Draw your booth layout to scale. Map signage zones before you order anything. Identify where attendees enter, where they naturally pause, and where your demo or meeting area sits. Your signage should follow that path, not fight it.
-
Select sign types by function. Fabric backwalls work for your main booth promise. Rigid panels handle demo labels and product details. Retractable banners support sponsor areas or secondary messaging. Floor graphics guide traffic when the venue approves adhesive use.
-
Set headline signs at 54–66 inches above the floor. Large signs above the booth capture attention from across the hall; smaller, detail-rich signs placed at 54–66 inches engage attendees as they approach. Layer both heights for maximum reach.
-
Apply the one-job rule. A hanging sign should not carry a paragraph. A counter sign should not repeat the logo the visitor already saw twice. Assign one job per sign and cut everything else. This single discipline does more for visitor comprehension than any design upgrade.
-
Add directional signage around the booth. Place directional signs at decision points — aisle intersections, hall entrances, and any turn a visitor must make to reach you. Clear, simple arrows outperform elaborate graphics every time.
-
Plan your lighting. Spotlights or LED strips on your main signage improve readability and draw the eye in crowded, brightly lit halls. Order electrical service from the show organizer early; it sells out.
-
Check digital signage placement. Monitors and looping displays work best in demo zones where motion adds context. Position screens at eye level, confirm brightness settings for the hall, and design all content for silent viewing.
-
Confirm venue regulations. Rigging, adhesive floor graphics, and electrical all require advance approval at most venues. Get written confirmation before you finalize your sign order.
-
Lock copy and files early. Final copy and print files should be ready at least 2–3 weeks before freight pickup for standard signs, earlier for hanging signs or complex installs. Late decisions turn into rush fees and avoidable quality problems.
Pro Tip: Verify your signage is readable at 30 feet, 15 feet, and 3 feet before you approve the final file. Each distance serves a different visitor, and a sign that works at 3 feet often fails at 30.
Getting your signs up without the headaches
Good installation starts before you leave for the show. Pack mounting hardware, zip ties, and a level in a separate carry-on bag, not buried in the freight crate. When you arrive at the venue, walk the booth space before unboxing anything. Check ceiling height, lighting position, and aisle orientation, because the floor plan rarely matches reality perfectly.
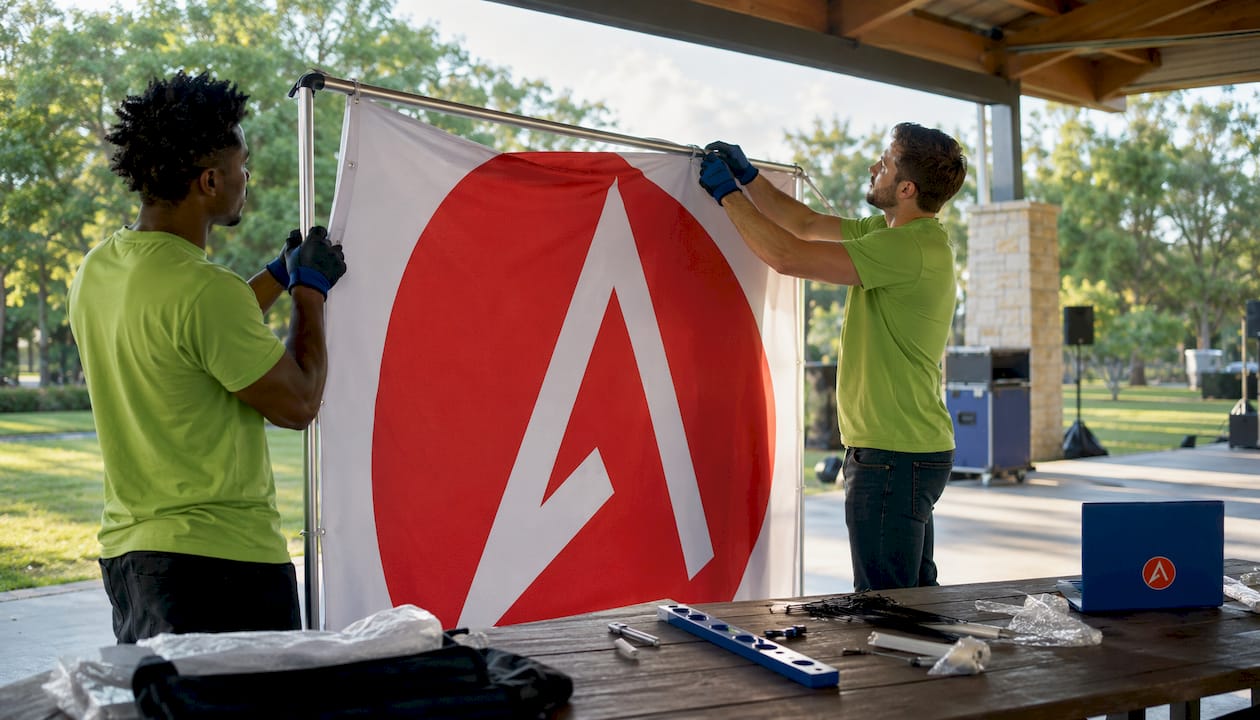
Fabric backwalls typically use a tension frame that two people can assemble in under 20 minutes. Rigid panels need the correct mounting brackets confirmed in advance. For an outdoor banner frame like The Banner Bar, stake or weight the base according to the venue’s surface type, and always account for wind if the event has any outdoor exposure.
The Signicade Deluxe A-Frame Sidewalk Sign is one of the fastest directional signs to deploy. Set it at the nearest aisle intersection to your booth, angled toward foot traffic, and swap the printed insert if your messaging changes between show days.
Why signage placement makes or breaks your trade show results
Most booths that underperform do not have a design problem. They have a placement problem. Signs positioned too low get blocked by attendees. Signs that try to say everything communicate nothing. The one-job-per-sign principle accelerates buyer comprehension by removing the mental work of sorting out what a booth actually offers.
Poor placement also damages brand perception in ways that are hard to recover from during a single show day. A cluttered booth signals disorganization, and attendees make that judgment in seconds. Consistent branding across every sign, from your backwall to your counter card, builds the kind of trust that makes a stranger willing to stop and talk.
Hanging signs add real value in large, crowded halls, but only when they carry a clear category promise showcased at Archive Events by U LA LA Creative Production & Events. When they simply repeat a logo the visitor has already seen, they consume budget without improving comprehension. Spend that money on better lighting or a sharper proof sign instead.
| Product category | Typical use | Lead time |
|---|---|---|
| Fabric backwall displays | Main booth promise, 10x10 booths | Ships within 2 business days |
| Retractable banner stands | Secondary messaging, sponsor areas | Ships within 2 business days |
| A-frame sidewalk signs | Directional, entry-point guidance | Ships within 2 business days |
| Outdoor banner frames | Exterior booth perimeter, wind-rated | Ships within 2 business days |
| Custom printed tents | Outdoor events, full-coverage branding | Contact for lead time |
Arrowhead Sign Company - Signs, Banners and Trade Show Displays also offers direct venue delivery for Arizona clients, which removes one more logistics variable from your pre-show checklist.
Key Takeaways
Effective trade show signage requires placing headline signs at natural eye level, assigning each sign a single purpose, and confirming venue regulations before you print.
| Point | Details |
|---|---|
| Headline sign height | Position at 54–66 inches above the floor to match natural attendee eye level. |
| One purpose per sign | Assign each sign one role: attract, prove, or direct. Never combine all three. |
| Layout before placement | Map booth sightlines and traffic flow before finalizing any sign position. |
| Materials and lighting | Use fabric backwalls for main promises; add LED lighting to improve readability. |
| Arrowhead Sign Company | Ships most trade show signage within two business days to keep your schedule on track. |
What the conventional wisdom on trade show signage gets wrong
Most advice focuses on design: better fonts, bolder colors, sharper graphics. That matters, but it is downstream of placement. A beautifully designed sign at table height, blocked by a crowd, does nothing. The placement decision happens before the design brief, not after.
The other thing people underestimate is the cost of clutter. Adding more signs feels like adding more chances to connect. It actually does the opposite. Every extra sign your visitor has to read is a fraction of a second they spend confused rather than engaged. The booths that consistently pull the best traffic tend to have fewer signs, not more, each one doing its job with complete clarity.
Ready to outfit your next booth with signage that actually works?
Arrowhead Sign Company - Signs, Banners and Trade Show Displays gives small businesses a faster path from approved artwork to show-ready signage. Most products ship within two business days, which means you can finalize your booth design closer to the show date without paying rush fees elsewhere.

The 10 ft stretch fabric display is a strong starting point for any 10x10 booth. It travels flat, sets up in minutes, and delivers the clean, high-contrast backwall your headline sign needs to perform at distance. Browse the full range of trade show displays and get your order in before your next show deadline.
Recommended
- Signs Every Small Business Needs for Trade Shows - Arrowhead Sign Company
- Trade Show Brand Visibility Checklist for Exhibitors - Arrowhead Sign Company
- Trade Show Display Checklist for Small Business Success - Arrowhead Sign Company
- How Event Signage Is Installed: A Practical Guide - Arrowhead Sign Company