

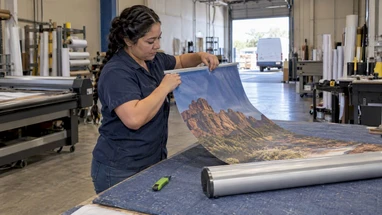
Fast Banner Stand Replacement Graphics: $35 Arrowhead Layout, $10 Rush
Posted by Deeder Dandenhorf on Oct 2nd 2026
Fast Banner Stand Replacement Graphics: $35 Arrowhead Layout, $10 Rush

Yes, you can replace your banner stand graphic quickly and usually for a fraction of the cost of new hardware. The two most common materials are vinyl and polyester fabric, and your immediate next step is simple: measure your stand, grab the vendor template, and order your new graphic or reach out to a trusted printer like Arrowhead Sign Company.
TL;DR:
- Vinyl remains the most durable and water-resistant option for outdoor or high-traffic environments, while polyester fabric offers a glare-free finish ideal for trade shows.
- Accurate measurement of stand components, especially the top rail width and leader strip length, is crucial to ensure the replacement graphic fits properly and functions smoothly.
- Prioritize file specifications such as 300 DPI resolution, CMYK color mode, and vector logos to prevent costly reprints and meet production deadlines.
- Compatible graphics are often brand-specific; measure or confirm hardware dimensions before ordering to avoid sizing mismatches that can inhibit proper installation.
- Quick fulfillment options like Next Day Air are available from many vendors, but investment in quality hardware reduces long-term replacement and setup costs.
Table of Contents
- Replacement graphic materials and when to choose each
- Standard banner stand sizes and measuring correctly
- Step-by-step: remove the old graphic and install a replacement
- How to order replacement graphics: artwork specs and proofing checklist
- Turnaround and cost expectations for replacement graphics
- Arrowhead Sign Company: quick fulfillment, local service, and what to expect ordering
- Compatibility considerations: ensuring replacement graphics fit specific banner stand models
- Tips for selecting high-quality printing services and providers
- Maintenance and storage tips to prolong the life of replacement graphics
- Environmental and usage factors affecting material and graphic durability
- What the quick-refresh approach gets right, and where it falls short
- Get your replacement graphic shipped fast with Arrowhead
- Sources
- FAQ
Replacement graphic materials and when to choose each
Picking the right material changes how your display looks and how long it lasts. Vinyl, usually a 13-ounce poly film, is the workhorse choice because it resists water and holds up to repeated handling, which makes it a smart pick for general-purpose use and short outdoor stints. Polyester fabric, on the other hand, gives you a matte, glare-free finish that photographs beautifully under trade show lighting, and it is often dye-sublimated so colors stay vibrant without a plastic sheen.
If you are rotating campaigns often, fabric graphics also resist the curling and glare issues that laminated vinyl can develop over time, according to sizing and material guidance from an industry resource on retractable banners. Some events also call for fire-retardant finishes, particularly convention centers with strict safety codes, so check your venue’s requirements before you order.
Quick matches for common scenarios:
- Trade show booth with professional lighting: polyester fabric for its matte and glare-free finish.
- Retail pop-up or storefront: 13-ounce vinyl for durability and cost efficiency.
- Outdoor event or sidewalk promotion: vinyl rated for water resistance, paired with a fire-retardant finish if required by the venue.
Standard banner stand sizes and measuring correctly
Before you order anything, confirm the exact dimensions your stand requires. According to the same retractable banner guide, standard widths commonly include options suitable for tight spaces, general use, and maximum visual impact, with heights typically fitting the usual ranges for banner stands.
A mismatch of even an inch or two can mean your graphic will not seat properly in the top rail or leader strip, so measuring carefully matters more than it might seem.
- Measure the top rail width from end to end, not just the visible graphic area.
- Measure the leader strip length at the base, since this is what holds the bottom of your banner in place.
- Check the roller depth inside the base to confirm your new graphic will roll and retract smoothly.
- Always use the manufacturer or vendor template when one is available, since it accounts for hardware quirks you cannot measure by eye.
Premium stands with heavier-gauge metal and stronger internal springs are built with graphic swaps in mind, which is part of why investing in solid hardware upfront tends to save money over the life of your display.
Step-by-step: remove the old graphic and install a replacement
Swapping a banner graphic is a straightforward job once you have the right setup. Before you start, gather a flat work surface, 1-inch double-sided tape, packing tape, an Allen or hex wrench, and a steady hand for the retraction step.
- Loosen the set screws on the top rail with your hex wrench and slide the rod out.
- Attach the rod to your new banner using double-sided tape, keeping the edge straight to avoid a skewed roll.
- Reinsert the rod into the top rail and retighten the set screws.
- Extend the leader strip at the base and tape the banner corners to keep them aligned.
- Apply double-sided tape to the leader strip and attach the bottom edge of the new banner.
- Keep the retaining pin in place until the banner is securely attached, then remove it carefully.
- Guide the banner into the base slot and test the retraction with both hands to confirm smooth movement.
A manufacturer PDF on replacing retractable graphics walks through this same sequence and stresses one safety point above the rest: never remove the retaining pin before the new banner is fully attached, since that is when accidental retraction injuries happen.
Separate set-up instructions from another manufacturer describe blocking the pulled graphic with the Allen key itself while you slide it into the top profile, which keeps tension off the fabric and prevents it from snapping back while your hands are busy. Keep that Allen key on hand for future changes, since you will need it every time you refresh your graphic.
Pro Tip: Lay the banner flat and smooth out any creases before attaching the rod. A wrinkle at this stage becomes a permanent crease once the banner is under tension.
For a deeper walkthrough on getting the hardware itself assembled correctly, see our guide on assembling retractable banner stands.
How to order replacement graphics: artwork specs and proofing checklist
Getting your file specs right the first time saves you a reprint and a missed event deadline. Most printers ask for 300 DPI resolution at final print size, CMYK color mode, and vector versions of your logo whenever possible so edges stay crisp at any scale.
- Submit print-ready PDFs when you can, since they preserve bleed and color settings best; AI or EPS files work as a second choice.
- Use high-resolution TIFF or PNG files for any raster images or photography in your design.
- Follow the template’s bleed, trim, and safe area margins, and keep important text well clear of the edges.
- Review your proof at 100% scale and confirm the color and finish match what you expect before approving.
A print-ready design-spec template lays out exact bleed and safe area measurements, which removes most of the guesswork before you hit submit. For more on avoiding common artwork mistakes, our post on retractable banner design best practices covers layout pitfalls worth knowing before you finalize your file.
Turnaround and cost expectations for replacement graphics
Replacing just the graphic almost always costs less than buying a new stand, since you are paying for print and material rather than aluminum, springs, and a case. Pricing depends on size, material, and finishing choices like lamination, grommets, or eyelets, and artwork fixes can add both cost and a day or two to your timeline.
Quick-ship or rush options, including next-day or two-day shipping, are available from many printers and typically carry an added fee, so budget for that if your event is close. Arrowhead Sign Company, for example, lists Next Day Air as a 10 dollar add-on for rush orders.
- Standard turnaround runs longer than rush service but costs less overall.
- Lamination and specialty finishes extend both price and lead time slightly.
- Larger formats and premium fabric options generally cost more than standard vinyl at the same size.
Arrowhead Sign Company: quick fulfillment, local service, and what to expect ordering
Some sign companies ship products within a few business days and may offer local delivery options in certain regions. When you order replacement graphics, you can expect access to artwork templates, proofing before print, installation guidance, and rush shipping options when your timeline is tight.
Compatibility considerations: ensuring replacement graphics fit specific banner stand models
Not every replacement graphic fits every stand, even within the same general size category. Hardware varies by manufacturer in ways that are not always obvious from the outside: top rail channel width, leader strip thickness, and roller depth can all differ slightly between brands, even when the advertised banner size looks identical.

The safest approach is to order from the same brand or line as your existing hardware whenever possible, since that guarantees the rod and leader dimensions match. When that is not an option, measure your stand’s top rail opening and leader strip length directly rather than relying on the advertised stand size alone, since a 33-inch stand from one manufacturer can have slightly different internal clearances than a 33 inch stand from another.
Pay attention to a few details before ordering:
- Rod diameter and length, since a rod that is too thick will not slide into the top rail.
- Leader strip width, which needs to match the base slot exactly for smooth retraction.
- Overall banner height, since even a half-inch mismatch can leave your graphic sitting crooked in the base.
If you are ever unsure, checking the manufacturer’s original set-up documentation or contacting the printer directly before you order is the cheapest insurance against a graphic that does not fit. Retaining your original packaging or model information when you first bought the stand also makes this process faster the next time you need a refresh.
Tips for selecting high-quality printing services and providers
Not all print shops handle large-format banner work the same way, and the difference shows up fast once your graphic is hanging in front of customers. Look for a provider that offers a physical or digital proof before printing, since catching a color or scaling issue on a proof costs nothing compared to catching it on a finished banner.
Ask whether the provider supplies downloadable templates for your specific stand model. A good template accounts for bleed, safe area, and exact rod or leader placement, which removes most of the guesswork from your file setup. Providers that publish clear specifications for materials, such as vinyl weight or fabric type, tend to be more transparent about what you are actually paying for.
Turnaround time is worth confirming upfront, especially if you are working against an event date. A provider offering next-day or two-day shipping options gives you flexibility when plans change at the last minute. Finally, local service matters more than people expect: a printer that can deliver directly to your venue, rather than leaving you to track a shipment through a general carrier, removes one more thing that can go wrong on event day.
Maintenance and storage tips to prolong the life of replacement graphics
A little care after installation extends the life of your graphic well beyond its first event. Always retract your banner slowly and evenly, using both hands to guide it back into the base rather than letting it snap shut, since sudden retraction stresses the fabric or vinyl at the fold point.
Store your stand in its carrying case when it is not in use, ideally somewhere dry and out of direct sunlight. UV exposure and humidity are the two biggest threats to printed graphics over time, and a case designed for the stand protects against both during transport and storage.
Wipe down vinyl graphics with a soft, damp cloth rather than harsh cleaners, which can strip lamination or dull colors over repeated use. Fabric graphics generally tolerate light spot cleaning but should never be machine washed, since that can distort the print and the material’s fit on the frame.
Check the top rail and leader strip periodically for dust or debris buildup, since grit in the track can scratch your graphic every time you retract or extend it. A quick wipe of the hardware before each event keeps both the stand and the graphic in better shape longer.
Environmental and usage factors affecting material and graphic durability
Where and how often you use your banner changes which material makes sense and how long it will last. Outdoor use exposes graphics to UV rays, wind, and moisture, all of which degrade standard materials faster than indoor display ever would. Vinyl’s water resistance makes it the better outdoor choice, though even vinyl benefits from a protective laminate if it will face regular sun exposure.
Indoor trade shows bring a different set of stresses: repeated setup and breakdown, handling during transport, and exposure to bright overhead lighting that can wash out glossy finishes. This is where polyester fabric’s matte surface earns its reputation, since it holds up visually under lighting that would create glare on a laminated vinyl print.
Frequency of use matters just as much as location. A banner used at a single annual event will outlast one that travels to a show every month, simply because repeated rolling and unrolling puts cumulative stress on the fold line near the top rail. If you know you will be swapping graphics often for seasonal promotions or rotating campaigns, fabric’s resistance to curling becomes a practical advantage rather than just a visual preference.
What the quick-refresh approach gets right, and where it falls short
The conventional advice on this topic treats graphic replacement as a purely mechanical task: measure, order, swap, done. That is mostly right, and it is genuinely the fastest way to refresh a tired display without a full hardware purchase. Where that advice falls short is in treating all replacement graphics as interchangeable once the size matches.
The real variable readers underestimate is fit tolerance. A graphic that is technically the right width can still sit wrong if the leader strip or rod dimensions differ even slightly from the original manufacturer’s specs, and that mismatch does not show up until you are already mid-installation at a venue. Readers should prioritize confirming hardware compatibility before they spend time agonizing over finish options like matte versus gloss, since a graphic that will not seat properly makes the finish question irrelevant.
The other overlooked priority is file prep. A rushed proof approval causes more reprints than a bad material choice ever does. Measure twice, check your proof at full scale once, and the rest of the process tends to take care of itself.
— Dan
Get your replacement graphic shipped fast with Arrowhead
Ordering a replacement graphic should not mean comparing five vendors and hoping one ships on time. Some companies ship products quickly, and customers in certain regions may arrange direct delivery to their venue instead of waiting on a general carrier.

Ordering follows a simple path:
- Measure your existing stand using the top rail, leader strip, and height guidance above.
- Choose vinyl or polyester fabric based on where and how often you will use the display.
- Upload your artwork following the print-ready specs, or request a standard banner layout for 35 dollars through Printed Banners.
- Approve your proof, then pick standard or Next Day Air shipping depending on your event date.
If you are also considering new hardware alongside a graphic refresh, browse Banner Stands for options built to make future graphic swaps easier.
Sources
- What Is a Retractable Banner? Sizes, Cost & Uses - CLIMB
- Replacing Retractable Graphic Banners (manufacturer PDF)
- REPLACING THE GRAPHIC (manufacturer setup instructions)
FAQ
Can you replace the banner in a retractable banner stand?
Yes, most retractable banner stands are designed so the graphic can be removed and swapped without replacing the frame. You loosen the top rail’s set screws, slide out the old banner, attach a new one with double-sided tape, and reattach the leader strip at the base.
How much does a 20x20 banner cost?
Pricing for banner graphics varies by material, finish, and provider, and is best confirmed directly with your printer since published rates differ widely. Arrowhead Sign Company offers a standard banner layout service for 35 dollars plus the cost of printing, with Next Day Air shipping available for 10 dollars if you need it fast.
What are those stand-up banners called?
These displays are commonly called retractable banners, roll-up banners, or pull-up banners, and they all refer to the same spring-loaded stand that retracts the graphic into a base for storage. The terminology varies by region and vendor, but the mechanism is the same across brands.
What are the different types of banner stands?
Common types include retractable or roll-up stands, X-frame and L-frame stands, outdoor banner frames, and tension fabric displays like a 10 ft stretch fabric display. Outdoor-rated options such as an outdoor banner frame and sidewalk options like a Signicade Deluxe A-Frame Sidewalk Sign round out the category for businesses needing visibility outside a trade show floor.