

How Design Files Affect Print Cost for Exhibitors
Posted by Deeder Dandenhorf on Aug 1st 2026
How Design Files Affect Print Cost for Exhibitors
Your design file is the single biggest variable in what you pay to print trade-show signage. Missing bleed, low-resolution images, RGB color mode, non-outlined fonts, complex transparencies, incorrect dielines, and unnecessary spot colors are the file issues most likely to trigger art fees, production delays, or costly reprints. Arrowhead Sign Company - Signs, Banners and Trade Show Displays follows the industry’s standard a short prepress time rule for minor fixes: minor fixes under a short time threshold are typically absorbed; more extensive work is quoted as art time. Supplying a PDF/X file in CMYK with proper bleed is the fastest way to skip those charges entirely.
File issue → typical cost impact at a glance:
- Low-res image (under 150 DPI at print size): art fee to source replacement, or reprint risk
- RGB color mode: color shift on press; conversion fee or proof required
- Missing bleed: white trim lines on finished piece; reprint likely
- Fonts not outlined/embedded: font substitution; hold for client or art fee
- Complex transparencies: manual flattening required; 30–90 minutes quoted time
- Incorrect dieline: miscut hardware; reprint or remounting charge
- Unnecessary spot colors: extra ink station; added press cost
Table of Contents
- How your design file changes what the print shop must do
- Concrete file problems and what each one costs you
- What printers actually charge beyond the base price
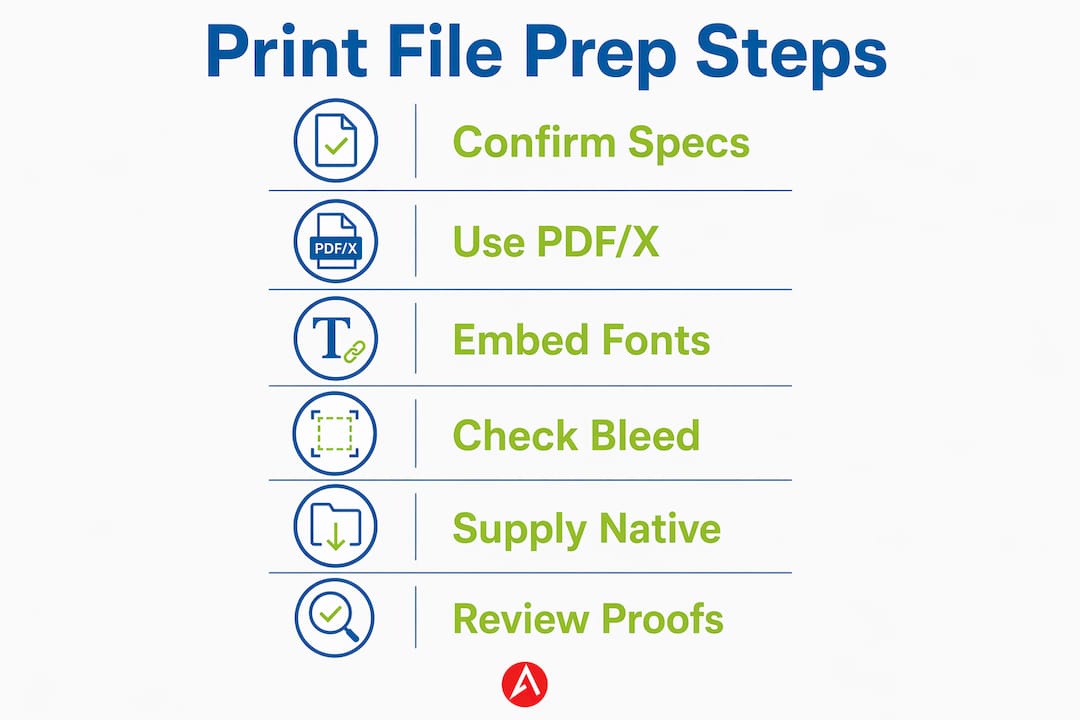
- The exact file-prep checklist to avoid extra charges
- When to pay for art services vs. prepare files yourself
- How Arrowhead Sign Company handles your files and what to expect
- Key Takeaways
- The file mistake that costs exhibitors the most
- Get your trade-show files right the first time with Arrowhead Sign Company
- Useful sources and where to learn more
How your design file changes what the print shop must do
Printers charge for time and risk. A clean file moves straight from preflight to RIP processing to press to finishing with no human intervention. A problem file inserts manual labor at every stage.
Here is where bad files create extra steps:
- Preflight catches missing bleeds, wrong color modes, and low-res images. A clean file passes in seconds; a flagged file goes to a technician.
- RIP processing converts your artwork to press-ready data. Transparency effects and complex vector blends can cause RIP errors or unexpected color shifts that require manual flattening.
- Proof stage may require an additional physical proof if color accuracy is critical or if a dieline needs verification.
- Press/finishing is where dieline errors and lamination mismatches become expensive, because the problem only appears on the physical piece.
Prepress technicians evaluate files against physical tolerances, not how artwork looks on a monitor. A file labeled “print-ready” is a starting point; shops still run manual preflight and may need to outline fonts, rebuild vector paths, or separate colors before the job can run.
The event-deadline risk is real. Problematic files create a triage bottleneck that can push your job to a slower production slot. If your banner needs to ship in two days and your file spends four hours in prepress, you may miss the window.
Pro Tip: Call your printer before uploading to confirm hardware specs (frame reveal, panel seams, grommet positions). Getting those dimensions wrong means a file that looks perfect on screen but doesn’t fit the physical display.

Concrete file problems and what each one costs you
About 67% of all print production errors trace back to prepress issues. Here is how the most common problems map to shop responses and time-to-fix estimates:
- Wrong DPI / low-res image: Cause: raster image too small for output size. Response: hold for client to supply replacement. Time: 5–15 min if replacement is ready; hours if not.
- RGB color mode: Cause: file built for screen, not press. Response: quick conversion (often absorbed) but color accuracy not guaranteed without a proof. Time: 5–10 min.
- Missing bleed: Cause: artwork stops at trim edge. Response: extend background or flag for client. Time: 10–30 min depending on complexity.
- Fonts not outlined: Cause: font missing on shop’s system. Response: hold for client or substitute. Time: 5–15 min if font is available; longer if not.
- Transparency effects / complex blends: Cause: layered effects that RIP unpredictably. Response: manual flattening and color recheck. Time: 30–90 minutes, quoted.
- Rasterized or low-res logos: Cause: logo saved as JPEG instead of vector. Response: vectorization or client hold. Time: 30–60 min for simple shapes.
- Incorrect dieline: Cause: cut path doesn’t match physical template. Response: rebuild or client correction. Time: 30–90 min; reprint if caught post-press.
- Layered PSD with live effects: Cause: unflattened Photoshop file. Response: flatten and proof. Time: 15–45 min.
- Untagged spot colors: Cause: Pantone swatches without ink station assignment. Response: convert or quote extra ink. Time: 10–20 min; added press cost if spot ink runs.
- Consumer tool exports (Canva, etc.): Consumer design tools frequently produce files without proper color profiles, native vector objects, or correct bleeds, requiring extra prepress work or upcharges.
Pro Tip: Ask your designer to supply the native AI or EPS file alongside the PDF. If the PDF has a problem, the native file lets the shop fix it in minutes instead of rebuilding from scratch.
Finishing and hardware add another layer. Die-cut complexity, lamination type, and grommet placement all carry tolerances. Providing explicit hardware specs up front avoids late-stage cutting or remounting charges when art doesn’t match the physical assembly.
What printers actually charge beyond the base price
Understanding the line items on a print invoice helps you see exactly which ones your file quality controls.
- Art/setup fee: Charged when prepress work exceeds the shop’s absorbed threshold. Typically hourly or flat per task.
- Digital UV setup: Low setup cost, well-suited for short runs. Setup costs for digital UV range from roughly $50–$200, while flexo plates run $200–$800 and litho-lam plates $800–$2,500.
- Color proofs: Required when color accuracy is critical or when a dieline needs physical verification. Each proof round adds time and cost.
- Pantone/spot color matching: Extra ink station on press; avoid by converting to CMYK process unless brand standards require exact Pantone.
- Specialty inks (white, metallic): Fixed added cost per job; not avoidable if the design requires them, but unnecessary use inflates price.
- Finishing (lamination, die-cut): Die-cut complexity directly affects finishing time. Simple straight cuts cost less than intricate contour cuts.
- Hardware (frames, stands): Frame reveal and panel seam tolerances must match the art file. Mismatches trigger remounting charges.
- Rush fees: When a file problem delays production, your job may miss the standard queue and incur a rush surcharge to recover the timeline.
Pro Tip: Tell your printer the exact finish and hardware you’ve ordered before submitting art. A banner finish guide can help you match lamination and grommet specs to your file setup.
The exact file-prep checklist to avoid extra charges
Exporting one correct file saves time and money. Use these settings before you upload.
Mandatory steps:
- Export as PDF/X-1a or PDF/X-4 with an embedded ICC profile. PDF/X specs with CMYK, 300 DPI, 1/8" bleed, and embedded fonts work on both digital and offset presses.
- Set color mode to CMYK. If brand colors require exact matching, supply Pantone numbers alongside.
- Outline all fonts before export. In Adobe Illustrator: Type > Create Outlines. In InDesign: export with “Subset fonts below 100%” unchecked, or outline in Illustrator first.
- Add bleed. Use 1/8" (0.125") minimum; 1/4" for products with hardware frames or finishing that shifts during production.
- Include crop marks set outside the bleed area.
- Supply dielines on a separate layer, clearly labeled, in a spot color named “Dieline” or “Cut.”
- Embed all linked images at 300 DPI for close-viewing pieces; 150–200 DPI is acceptable for large-format displays viewed from 10+ feet.
- Supply vector logos as AI or EPS files alongside the PDF.
Recommended steps:
- Flatten transparency before export for spot-color jobs.
- Include a flattened proof PDF so the shop can compare intent vs. output.
- Name your file with product name, size, and version (e.g.,
BannerBar_36x96_v2_FINAL.pdf).
Pro Tip: Pack an “art bundle”: a folder with the outlined-font PDF, linked images, the dieline file, and a readme listing trim, bleed, and safe-area dimensions. This single habit eliminates most back-and-forth on multi-product orders.
For Adobe Illustrator: use the PDF/X-1a preset under Save As > Adobe PDF, select your CMYK ICC profile (U.S. Web Coated SWOP v2 is standard), and set downsampling to 300 DPI for color images. For InDesign: File > Export > Adobe PDF (Print), choose the PDF/X-4 preset, and confirm bleed values match your product spec.
Quick self-check before uploading: open the PDF, zoom to 100%, and verify bleed extends past the trim line, no font substitution warnings appear, and image edges look sharp (not pixelated).
When to pay for art services vs. prepare files yourself
Do it yourself for quick fixes and final exports. Pay for art services when rebuilding or color-critical work is required.
Decision criteria:
- Complexity: Outlining fonts and adding bleed takes 10 minutes in Illustrator. Rebuilding a rasterized logo from scratch takes 30–60 minutes and requires vector skills.
- Designer availability: If your in-house designer is unavailable the week before the event, outsourcing art services is cheaper than a missed deadline.
- Event turnaround: Rush order timelines compress every stage. A file problem that costs $40 to fix on a standard order can cost $80 on a rush job and still delay shipping.
- Cost of a wrong print at the event: A $300 fabric display reprinted at rush rates costs far more than a $60 art service fee paid upfront.
Ballpark art service fees and turnaround:
- Simple vectorization or color separation: $30–$60, 24–48 hour turnaround
- Complex rebuild or multi-color separation: $75–$250+, 2–4 days
- Emergency rush art fee: typically 1.5x–2x standard rate
Pro Tip: When ordering multiple products (fabric display, retractable banner, and hardware), bundle art services once and ask the shop to store your production files. Reorders then skip the art fee entirely.
How Arrowhead Sign Company handles your files and what to expect
Arrowhead Sign Company - Signs, Banners and Trade Show Displays accepts imperfect files and applies a clear policy: minor fixes under the shop’s 15–20 minute threshold are absorbed; larger rebuilds are quoted as art time before work begins, so there are no invoice surprises.
Most products ship within two business days, and Arizona customers can receive direct venue delivery, which means a clean file submitted today can be on your booth floor before the weekend.
For the Shasta 10 ft straight stretch fabric display, fabric printing requires wrap bleed that accounts for the frame reveal and sewn edges. A standard 1/8" bleed is not enough; the shop will specify the exact wrap allowance, and supplying a file without it means the art team must extend backgrounds before production can start.
For the Outdoor Banner Frame - The Banner Bar, trim accuracy and grommet placement are critical. The frame’s hardware tolerances are tight, and a dieline that doesn’t match the physical template creates a misaligned finished piece. Supplying the correct dieline on its own layer eliminates that risk.
Stored production files mean that once your artwork is approved and on file, reorders ship without repeat art fees, which is a real advantage when you exhibit at multiple events per year.
Key Takeaways
Your design file directly controls whether you pay only the base print price or add art fees, proofs, and rush charges on top of it.
| Point | Details |
|---|---|
| Export PDF/X with CMYK | PDF/X-1a or PDF/X-4 with CMYK and embedded fonts works on both digital and offset presses. |
| Add correct bleed | Use at least 1/8" bleed; fabric displays need additional wrap allowance per hardware specs. |
| Outline fonts and embed images | Missing fonts trigger holds; images need 300 DPI for close-view pieces, 150–200 DPI for large-format. |
| 15–20 minute rule | Fixes under this threshold are often absorbed; larger rebuilds are quoted before work starts. |
| Arrowhead Sign Company | Ships most products within two business days and stores approved files to eliminate repeat art fees. |
The file mistake that costs exhibitors the most
The error I see cause the most last-minute panic is not a missing bleed or an RGB file. Those get caught in preflight. The real problem is a dieline that looks correct on screen but doesn’t match the physical hardware template. It passes every digital check, clears preflight, and only surfaces when the finished piece goes into the frame and the graphic is off by half an inch.
The fix is simple: request the vendor’s dieline template before you start designing, not after. For fabric displays, ask for the exact wrap and bleed spec including the sewn-edge allowance. For framed outdoor banners, confirm grommet positions against the hardware. One email before you open the design file saves a reprint, a rush fee, and the stress of arriving at your event with a display that doesn’t fit.
Get your trade-show files right the first time with Arrowhead Sign Company
When your event is days away and your files need a fast review, Arrowhead Sign Company - Signs, Banners and Trade Show Displays offers same-day art triage for rush jobs alongside nationwide shipping and direct venue delivery across Arizona. Most products ship within two business days, so a clean file submitted today keeps your event timeline intact.

The Shasta 10 ft straight stretch fabric display and the Outdoor Banner Frame - The Banner Bar are two of the most popular products for trade-show exhibitors, and both have specific file requirements (fabric wrap bleed and frame-matched dielines) where art support pays for itself. Once your files are approved and stored, reorders skip the art fee entirely. Visit Arrowhead Sign Company - Signs, Banners and Trade Show Displays to upload your files, request art services, or place your order today.
Useful sources and where to learn more
- Under the Hood: How Print Shops Handle Garbage Artwork (WhatTheyThink) — Firsthand prepress operator accounts of the most common file problems and how shops triage them.
- Why Prepress Files Get Rejected (AlphaBPO) — Covers the 67% prepress error stat and the hidden costs of post-press failures.
- Display Printing & Finishing Guide (Leader Display) — Technical breakdown of setup costs by printing method and vector file requirements.
- Artwork Guidelines for Custom Printing (Arnold Prints) — Art fee ranges, turnaround benchmarks, and the case for bundling art services.
- How to Prepare a PDF for Commercial Print (PDF Press) — Authoritative PDF/X export checklist with ICC profile and downsampling guidance.
- How Trade Show Printing Works (Arrowhead Sign Company) — Vendor-specific production steps, timelines, and hardware specs for trade-show displays.
- Proofing Custom Promotional Signage (Arrowhead Sign Company) — Step-by-step proof review checklist to catch errors before they become reprints.
Recommended
- How Booth Graphics Get Printed: A Planner’s Guide - Arrowhead Sign Company
- How Exhibitors Prepare Display Materials: Small Team Guide - Arrowhead Sign Company
- How Trade Show Printing Works: A Planner’s Guide - Arrowhead Sign Company
- Budget Trade Show Materials List for Small Businesses - Arrowhead Sign Company