


Why Early Setup Benefits Exhibitors: A Practical Guide
Posted by Deeder Dandenhorf on Aug 3rd 2026
Why Early Setup Benefits Exhibitors: A Practical Guide
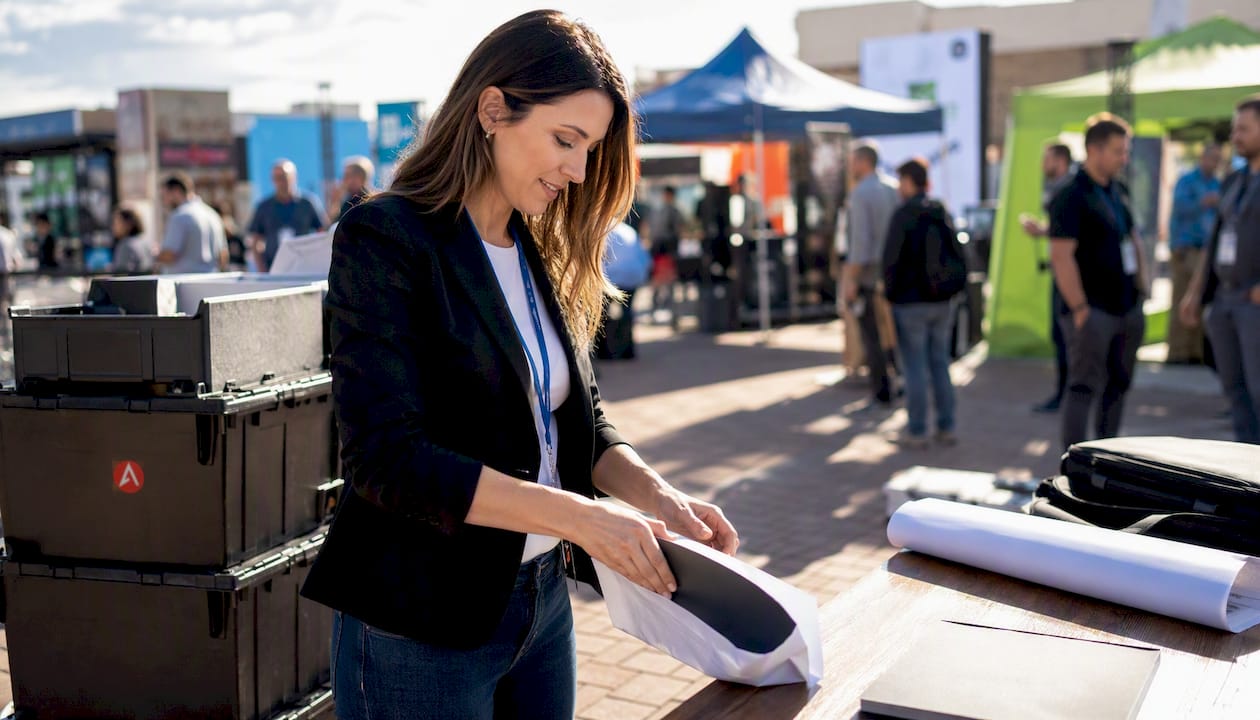
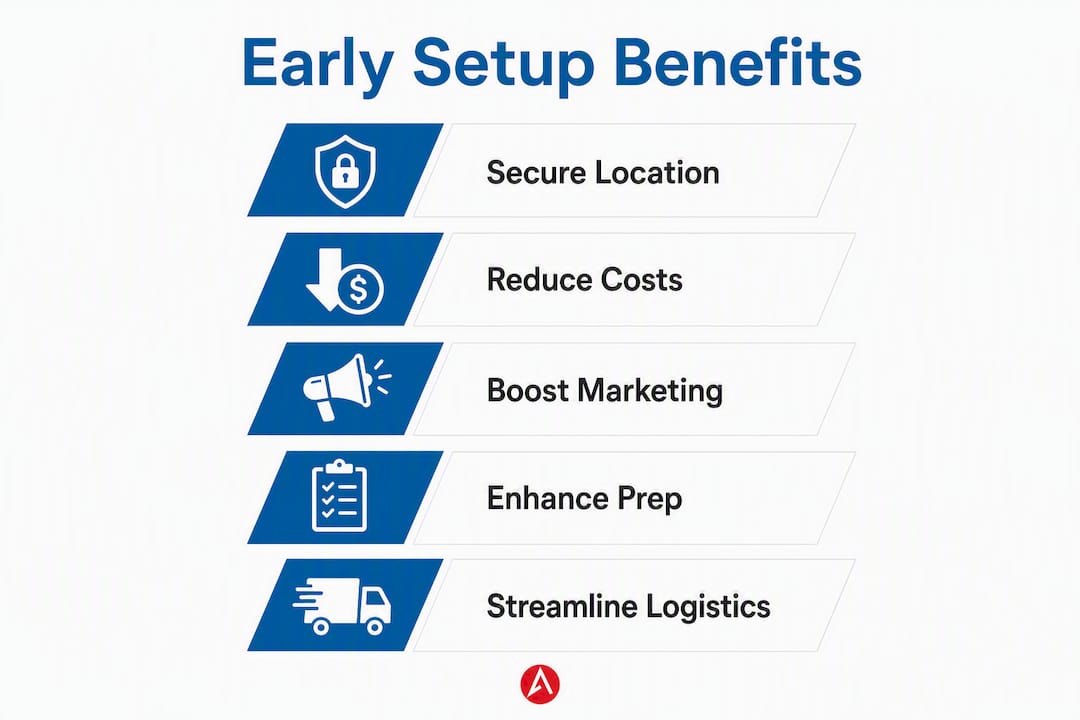
Early setup delivers three concrete advantages for exhibitors: better booth locations, measurable cost savings, and more time to prepare everything that drives results on the show floor. Those three benefits connect directly to your return on investment — a prime location brings more foot traffic, lower costs free up budget for better displays, and extra preparation time means your staff and demos are ready to convert visitors into leads.
Here is what early commitment unlocks for you:
- Prime booth placement. Organizers assign spaces on a first-come, first-served or priority basis. Early registration puts you at the front of that line.
- Lower costs. Advance rates for drayage, electrical, and print orders are consistently cheaper than on-site pricing. Ordering signage early also eliminates rush shipping fees.
- More design and production time. Proofing graphics, testing AV, and training staff all require lead time you simply cannot manufacture at the last minute.
- Pre-show marketing inclusion. Early-listed exhibitors appear in show apps, e-blasts, and floor maps that drive attendee traffic before the doors open.
- Smoother logistics. Booking freight, labor, and venue services early means better scheduling windows and fewer on-site surprises.
Trade show exhibiting is a significant investment. Getting the most from that investment starts weeks, sometimes months, before move-in day.
Table of Contents
- Why does booth location make or break your trade show results?
- How early ordering cuts your trade show costs
- How early commitment amplifies your pre-show marketing
- Why extra prep time improves your booth, your team, and your demos
- How early planning improves your logistics and vendor coordination
- What late planning actually costs you on the show floor
- Your milestone-based timeline and checklist from 12 months to day-of
- How fast fulfillment and direct delivery amplify your early-setup advantage
- Key Takeaways
- The one thing most exhibitors get wrong about early setup
- Ready to order your displays before the deadline?
- Useful sources for deeper planning and procurement
Why does booth location make or break your trade show results?
Location on a trade show floor is not just a preference — it is a performance variable. Booths positioned at main aisle intersections, near entrances, or at endcaps of high-traffic rows consistently draw more visitors than booths tucked into interior corners. Attendees follow natural walking patterns, and the exhibitors who understand those patterns register early enough to influence where they land.
Organizers typically allocate space through one of three mechanisms: seniority-based priority (returning exhibitors get first pick), sponsorship tiers (sponsors receive premium placement as part of their package), or straight first-come, first-served registration. In all three cases, the earlier you commit, the more leverage you have. Waiting until two months before the show often means choosing from whatever remains after priority exhibitors have claimed the corners and endcaps.
Pro Tip: Walk the floor during setup at your next show — before the crowds arrive. Note which aisles get the most foot traffic from the entrance, where the food and restroom corridors are, and which columns block sightlines. Photograph your assigned space from multiple angles and confirm the exact dimensions with the show manager before you finalize your display order.
When you review your assigned space, run through this checklist:
- Aisle width and whether neighboring booths will encroach on your frontage
- Proximity to high-traffic anchors (keynote halls, food stations, restrooms)
- Column or beam positions that could block your backwall or overhead signage
- Sightlines from the main entrance and cross-aisles
- Electrical drop locations relative to your planned AV setup
Securing a better location is not just about prestige. Trade show displays generate leads most effectively when attendees can actually find you — and that starts with where you are on the map.
How early ordering cuts your trade show costs
Exhibitor budgets face pressure from multiple directions, and the costs that hurt most are the ones that spike when you order late. Drayage (material handling at the venue), on-site electrical and rigging, expedited print production, and rush freight all carry premium pricing for late orders. Advance rates, by contrast, reward exhibitors who plan ahead.

The table below shows where early ordering typically changes the fee structure. Venue-specific rates vary, so treat these as planning benchmarks and confirm exact figures in your exhibitor manual.
| Cost Category | Advance Rate Timing | On-Site / Rush Premium | Planning Note |
|---|---|---|---|
| Drayage / material handling | Submit before advance warehouse cutoff | Significantly higher per hundredweight | Consolidate crates to reduce billable weight |
| Electrical services | Order via exhibitor portal before deadline | On-site orders carry a surcharge | Order early even if you adjust later |
| Rigging and labor | Book through show contractor in advance | Overtime rates apply during compressed windows | Sequence installs to avoid crews waiting |
| Print and graphics | 4–6 weeks before show | Rush production fees plus expedited shipping | Build in one proof cycle minimum |
| Freight / shipping | Book carrier 6–8 weeks out | Last-minute carrier rates spike | Advance warehouse reduces delivery-window risk |
Budget rule of thumb: Build a logistics contingency on top of your total exhibit services estimate. Drayage in particular is difficult to predict precisely, and a small overage in crate weight or an extra handling move can add up quickly. Consolidating shipments into fewer, well-labeled crates is one of the most practical ways to keep that line item in check.
Understanding print lead times is especially useful here. Graphics that arrive with time for a proof cycle cost less and look better than graphics rushed through production the week before the show. The savings from advance ordering on a single show can meaningfully offset the cost of a higher-quality display.
How early commitment amplifies your pre-show marketing
Signing up early does not just affect your booth location and budget — it puts you in front of attendees before the show even opens. Organizers build their marketing calendar around confirmed exhibitors, and the earlier your name appears on the list, the more opportunities you have to be included in that promotion.
Marketing inventory that organizers typically assign or sell early includes:
- Show floor map listings in the printed program and digital show app
- E-blast inclusions sent to registered attendees in the weeks before the event
- Exhibitor spotlight features on the show’s website or social media channels
- Press release mentions in pre-show media outreach
- Sponsor callouts in signage, stage announcements, and opening materials
Exhibitors who coordinate pre-show marketing programs generate materially more booth visits than those who rely entirely on walk-up traffic. Getting your name into the show app and the pre-event e-blast is essentially free advertising to an already-qualified audience.
To make the most of that exposure, prepare these assets well before submission deadlines:
- A high-resolution booth image or product photo
- A 50-word exhibitor bio and a 150-word company description
- Two or three product one-liners for the show app listing
- A social media content calendar tied to show hashtags and dates
- A show-specific offer or giveaway that gives attendees a reason to visit
Promotion deadlines in the exhibitor manual are firm. Most shows close their program and app listings several weeks before opening day. Missing that window means your competitors appear in attendee inboxes and you do not. Pairing your early registration with a solid brand visibility checklist keeps those deadlines from sneaking up on you.
For exhibitors running paid digital campaigns alongside their show presence, aligning your digital ad campaign timing with the show’s pre-event marketing calendar multiplies the impact of both.
Why extra prep time improves your booth, your team, and your demos
Production quality and staff readiness both depend on lead time. Rushing either one produces results that show — literally — on the floor. The good news is that a clear production schedule, built backward from your move-in date, makes the difference between a polished booth and one that looks like it was assembled the night before.
Here are the key tasks that need lead time, in the order you should lock them down:
- Finalize booth design and layout (8–10 weeks out). Lock dimensions, traffic flow, and display positions before any production begins.
- Submit graphics for proofing (6–8 weeks out). Finalizing design at eight weeks gives you time for at least one revision cycle without rush fees.
- Order display hardware and fabric prints (6 weeks out). Fabric backwalls, retractable banners, and A-frame signs all have production lead times that compound with shipping.
- Book freight and submit venue service orders (6 weeks out). Electrical, rigging, and internet orders submitted early carry advance pricing.
- Confirm install labor (4 weeks out). Match crew size to build complexity — underestimating labor is one of the fastest ways to blow a move-in window.
- Complete AV content and run a full offsite test (3–4 weeks out). Test every video, loop, and interactive element on the actual hardware you are bringing to the show.
- Finish staff training and demo rehearsals (2 weeks out). Run at least one full walk-through with your team so everyone knows their role and talking points.
- Final staff briefing and travel logistics (1 week out). Confirm hotel, travel, and on-site contact details for every team member.
Pro Tip: Pack a labeled install kit that travels with your booth: approved drawings, the show manual, freight and labor order confirmations, key contact numbers, a basic tool bag, and spare fasteners. A well-prepared install kit turns small on-site problems into two-minute fixes instead of hour-long delays.
For a small inline booth, this entire sequence fits comfortably into an eight-week window. A multi-day custom island build with rigging and AV integration needs twelve weeks or more, with vendor coordination starting even earlier.
How early planning improves your logistics and vendor coordination
Logistics is where late planning does the most damage. Freight carriers, drayage contractors, electrical crews, and AV vendors all operate on schedules. The exhibitors who book early get the time slots and rates they want; the ones who wait get whatever is left, often at overtime pricing.

Advance warehouse delivery is worth understanding here. Shipping to the advance warehouse means your materials are in your booth space before you arrive, giving you a predictable starting point on move-in day. Direct-to-site delivery saves the storage fee but ties you to a delivery window you do not fully control — a delayed truck on a compressed move-in schedule can cost you hours of labor time.
Vendor coordination steps to complete early:
- Book your freight carrier and confirm pickup and delivery windows
- Submit drayage estimates and advance warehouse shipping labels
- Order electrical, rigging, and internet services through the exhibitor portal
- Book union or contracted labor through the show’s official labor contractor
- Confirm AV equipment rentals and schedule delivery with the venue’s AV team
- Order any plumbing or compressed air if your demo requires it
Consolidating crates, weighing and labeling them accurately, and keeping a photographic packing manifest reduces both drayage costs and handling time. A packing manifest with photos is one of the simplest but most overlooked tools for ensuring crates are repacked correctly after the show, avoiding extra material-handling charges on the way out.
Designate a single point of contact on-site who owns all vendor decisions. Chain-of-command uncertainty during a compressed install window creates delays that cascade through the entire build sequence.
What late planning actually costs you on the show floor
Late planning does not just feel stressful — it produces concrete, measurable failures. The most common ones follow a predictable pattern.
Typical late-planning failures include:
- Missed electrical drops. Ordering electrical on-site means you get whatever is available, not what your layout requires. Crews may need to reroute, and overtime labor rates apply.
- Incorrect crate counts or missing materials. Without a photographic packing manifest, items get left behind or packed in the wrong crate. Discovering a missing graphic panel on move-in morning means a local print shop and a rushed install.
- AV failures on the floor. Content that was never tested on the actual hardware fails in front of attendees. Fixing it during show hours means distracted staff and a booth that looks unfinished.
- Graphics that arrive late or wrong. Rush production compresses the proof cycle. Errors that would have been caught in a normal review get missed, and reprints are not possible in 48 hours.
Red flags that your schedule is at risk:
- No order confirmation numbers for electrical, rigging, or labor
- No freight carrier booked with a confirmed pickup date
- Graphics not yet submitted for proofing with less than four weeks to go
- No advance warehouse shipping labels generated
- Staff training not yet scheduled
If you find yourself behind, prioritize in this order: call your vendor account representatives directly (not the general line), confirm what can still be submitted at advance rates, identify what must be compressed, and budget for overtime labor rather than hoping the timeline will self-correct. Cutting corners on labor sequencing is what turns a manageable delay into a full move-in crisis.
Your milestone-based timeline and checklist from 12 months to day-of
The table below gives you a ready-to-use planning schedule. Copy it into your project plan and work backward from your move-in date.
| Milestone | Key Actions |
|---|---|
| 12 months out | Research shows, compare booth costs, set budget with 10% logistics contingency |
| 6 months out | Register for the show, request preferred booth location, confirm space dimensions |
| 3 months out | Finalize booth design, begin graphics production, submit marketing assets to organizer |
| 6 weeks out | Book freight carrier, submit advance warehouse labels, order electrical/rigging/internet |
| 4 weeks out | Confirm install labor, complete graphics proofing, finalize AV content |
| 2 weeks out | Run full AV test offsite, complete staff training and demo rehearsals, confirm travel |
| Week of show | Final staff briefing, confirm freight ETA, verify advance warehouse receipt |
| Move-in day | Check in with labor crew, verify electrical drops, unpack per photographic manifest |
| Post-show | Repack per manifest, photograph crate contents, submit outbound freight paperwork |
For a small inline booth (10 ft × 10 ft), the critical path compresses to about six to eight weeks for most tasks. For a multi-day custom island build, start vendor coordination at twelve weeks and expect a multi-day install sequence with structure, electrical, AV, and graphics each requiring their own crew window.
Here is a numbered sequence for the critical pre-show weeks:
- Confirm booth space assignment and photograph the floor plan coordinates.
- Submit all venue service orders (electrical, rigging, internet, plumbing) through the exhibitor portal.
- Place signage and display orders with enough lead time for one proof cycle.
- Generate advance warehouse shipping labels and book freight pickup.
- Confirm labor crew size and install sequence with your contractor.
- Complete AV content, run a full offsite test, and pack the install kit.
- Brief your full team on roles, talking points, and the demo flow.
- Verify freight delivery confirmation to the advance warehouse.
Critical exhibitor-manual deadlines to add to your calendar: advance warehouse cutoff date, electrical and rigging order deadline, marketing submission deadline for the show app and program, and the outbound freight paperwork deadline for post-show pickup.
How fast fulfillment and direct delivery amplify your early-setup advantage
Ordering your signage and displays early gives you something that no amount of on-site scrambling can replicate: time to get it right. A team that orders a fabric backwall and a retractable banner six weeks before move-in can review a proof, request a correction, and still receive the final product with days to spare for AV testing and a full rehearsal. A team that orders two weeks out is hoping nothing goes wrong.
Arrowhead Sign Company - Signs, Banners and Trade Show Displays ships most products within two business days, which means even exhibitors working with tighter timelines have a realistic path to a polished booth. For Arizona-based exhibitors, direct venue delivery removes the drayage variable entirely — your displays arrive at the venue without passing through a warehouse or a freight carrier’s schedule.
Three products that fit naturally into an early-setup timeline:
- 10 ft stretch fabric display. A fabric backwall ordered at the four-to-six-week mark gives you a full proof cycle and time to test how the graphic reads under venue lighting. Fabric displays are also lighter than traditional panel systems, which reduces drayage costs.
- Signicade Deluxe A-Frame Sidewalk Sign. An A-frame placed at your booth entrance or in the aisle directs foot traffic and reinforces your brand message at eye level. Order early and you have time to test two different graphic options before committing.
- Outdoor Banner Frame - The Banner Bar. For outdoor events or perimeter signage, an adjustable banner frame ordered well in advance can be tested for wind resistance and banner tension before the show day.
Pro Tip: When shipping displays for direct venue delivery, label every crate with the show name, booth number, exhibitor name, and the advance warehouse address on all four sides. Include a copy of the order confirmation inside the crate. Clear labeling speeds drayage handling and reduces the chance of a misdirected shipment.
For more display ideas that benefit from early production, the 2026 trade show trend display ideas guide shows what is working on the floor right now.
Key Takeaways
Early setup is the single most reliable way for exhibitors to secure better locations, control costs, and arrive at the show floor fully prepared rather than scrambling.
| Point | Details |
|---|---|
| Register early for prime placement | Booth spaces are assigned by priority or first-come order; early registration gives you the best selection. |
| Order signage with a proof cycle built in | Place display orders well in advance to allow proofing, corrections, and on-time delivery without rush fees. |
| Lock vendors before advance deadlines | Electrical, drayage, and labor all carry lower rates when ordered before the exhibitor-manual cutoff dates. |
| Prepare staff and demos with lead time | Run at least one full rehearsal two weeks before the show so your team is confident and your AV is tested. |
| Arrowhead Sign Company for fast fulfillment | Arrowhead Sign Company - Signs, Banners and Trade Show Displays ships most displays within two business days, with direct venue delivery available in Arizona. |
The one thing most exhibitors get wrong about early setup
Most exhibitors think of early setup as a logistics exercise. Get the crates labeled, book the freight, submit the electrical order. Those steps matter, but they miss the deeper advantage: early setup is a competitive positioning decision.
The exhibitors who register six months out are not just getting better booth locations. They are getting into the show app before attendees build their visit schedule. They are getting their graphics proofed without pressure, which means their booth looks intentional rather than assembled. They are running demo rehearsals with their actual hardware, which means their staff is confident instead of improvising. Every one of those advantages compounds on the show floor, where the difference between a busy booth and a quiet one often comes down to preparation that happened weeks earlier.
The conventional wisdom says to start planning “as early as possible.” That framing is too vague to act on. A more useful rule: plan your install backward from the moment the doors open to attendees. Every task on your list has a deadline that is determined by that moment, not by your internal calendar. When you work backward, the real deadlines become obvious, and the tasks that feel optional suddenly look like the ones that determine whether your show is a success.
If you have not started yet, the most valuable thing you can do this week is request your exhibitor manual and add every deadline in it to your project calendar. That one action surfaces the constraints that everything else must fit around.
Ready to order your displays before the deadline?
Exhibitors who act early deserve a fulfillment partner that keeps pace with their planning. Arrowhead Sign Company - Signs, Banners and Trade Show Displays ships most display products within two business days, so you can order with confidence even when your timeline is tighter than you would like. For Arizona-based exhibitors, direct venue delivery means your displays arrive at the show without the freight and drayage variables that create last-minute stress.

Whether you need a 10 ft stretch fabric display for your backwall, an Outdoor Banner Frame - The Banner Bar for perimeter signage, or a Signicade Deluxe A-Frame Sidewalk Sign to direct foot traffic at your entrance, Arrowhead Sign Company - Signs, Banners and Trade Show Displays has the products and the fulfillment speed to support your early-setup plan. Browse the full catalog at arrowheadsigncompany.com and place your order with enough lead time to proof, adjust, and arrive at the show floor ready.
Useful sources for deeper planning and procurement
These resources support the claims and checklists in this article and give you practical next steps for each phase of your pre-show preparation.
- Trade Show Booth Setup Guide — Practical milestone windows for design, freight, labor, and graphics, with notes on modular vs. custom island builds.
- Trade Show Display Checklist for Small Business Success — A checklist-style internal resource for small exhibitors covering display selection, setup, and post-show steps.
- How Exhibitors Prepare Display Materials — Operational tips for small teams managing display production and logistics with limited staff.
- Portable Display Options for Marketing Events — A guide to fast-deploy display formats that ship efficiently and set up without specialized labor.
Recommended
- How Exhibitors Prepare Display Materials: Small Team Guide - Arrowhead Sign Company
- Trade Show Booth Setup Fast: Your 2026 Buyer’s Guide - Arrowhead Sign Company
- What Is a Trade Show Kit? Your 2026 Exhibitor Guide - Arrowhead Sign Company
- Trade Show Display Checklist for Small Business Success - Arrowhead Sign Company