


What Does Print Ready Mean? A File Checklist for Exhibitors
Posted by Deeder Dandenhorf on Aug 5th 2026
What Does Print Ready Mean? A File Checklist for Exhibitors

A print-ready file is one that meets every mechanical and prepress requirement a commercial printer needs to reproduce your design accurately, without any manual fixes before it goes to the RIP (Raster Image Processor) or press. If your file isn’t print-ready, production stops while someone at the print shop corrects it — and that delay costs you time, money, and sometimes your event deadline.
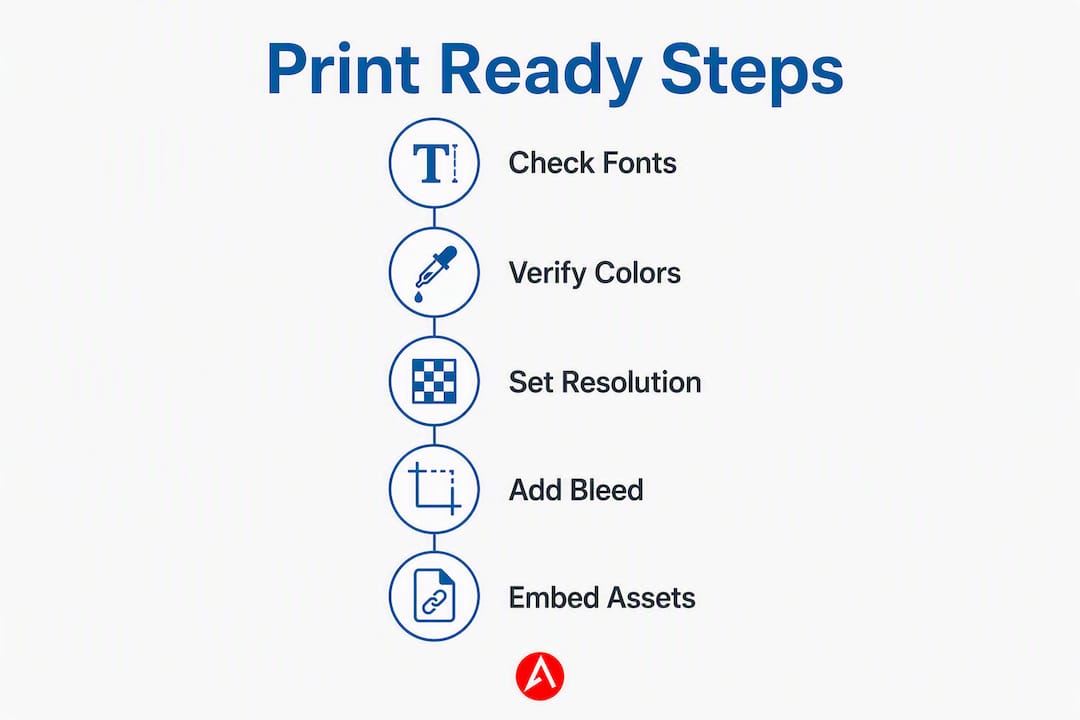
Here’s the TL;DR checklist of what makes a file print-ready:
- File format: PDF/X-1a or PDF/X-4 (ISO 15930 compliant)
- Color mode: CMYK with an embedded ICC profile
- Resolution: 300 DPI at final print size
- Bleed: a small standard extension beyond the trim line on all sides
- Safe zone: a small margin inside the trim line to keep critical content safe from trimming
- Fonts: embedded or converted to outlines
- Crop marks: included and offset from the bleed edge
- Transparency: flattened (PDF/X-1a) or live (PDF/X-4, if supported)
- Spot/Pantone colors: defined and named correctly
Get all nine right, and your file moves straight to production. Miss even one, and you’re likely getting a call from prepress.
Table of Contents
- What does “print ready” actually mean to a printer?
- Which file formats should you send, and when?
- Color mode, ICC profiles, and image resolution rules
- Bleed, trim, safe area, and crop marks: the exact values
- How to export a print-ready PDF from InDesign, Illustrator, and Photoshop
- How to verify your PDF is truly print-ready
- Common submission mistakes and how to fix them
- Why printers insist on these specs: RIP, PDF/X, and ISO standards
- Key Takeaways
- The spec that most exhibitors get wrong
- Your files are ready — now get them printed fast
- Useful sources and further reading
What does “print ready” actually mean to a printer?
Most people assume a file is print-ready if it looks sharp on their monitor. Printers define it differently. A print-ready PDF is a file that can be sent directly to plate-making or press output without manual modification — meaning the RIP can process it predictably, the colors will separate correctly, and no human has to open your file to fix anything.

The gap between “looks good on screen” and “mechanically ready for press” is where most problems live. Your monitor displays color in RGB, which has a wider gamut than the CMYK inks a press uses. A layered InDesign file with unembedded fonts may render perfectly on your machine and fail completely on a printer’s RIP that can’t locate those fonts. A PDF exported at screen resolution looks fine at 100% zoom but prints as a blurry mess at 18" × 24".
The RIP converts your file into the dot patterns that drive inkjet heads or laser exposure units. It expects specific inputs: defined color spaces, embedded resources, and predictable transparency handling. When those inputs are missing or wrong, the RIP either substitutes defaults (which rarely match your intent) or throws an error that halts the job.
Pro Tip: Ask your printer to send you their preflight report template before you submit. Most shops use Acrobat Pro or Callas pdfToolbox and can share a settings file you can run yourself — catching errors on your end before they catch them on theirs.
Which file formats should you send, and when?
PDF is the preferred format for commercial printing, with PDF/X-1a and PDF/X-4 being the two most widely accepted variants. Both enforce embedded fonts and color profiles, which is exactly why printers prefer them over native application files.
PDF/X-1a requires flattened transparency and a single color space (CMYK or spot). It’s the safer choice for offset and traditional print workflows where the RIP doesn’t support live transparency. PDF/X-4 preserves live transparency and layers, making it better suited to modern digital workflows. When in doubt, ask your printer which variant their workflow supports.
Other accepted formats include:
- AI (Adobe Illustrator): acceptable when the printer needs to make finishing adjustments, but all linked images must be embedded and fonts outlined
- PSD (Photoshop): typically used for image-heavy files; save at full resolution with a flattened composite
- EPS: an older format still accepted by many shops, but PDF/X has largely replaced it
- TIFF: ideal for photographic or raster-only artwork placed into a layout
Sending native files without packaging linked assets is one of the most common submission errors. If you send an InDesign file, use File → Package to collect all fonts and linked images into a single folder before handing it off.
Pro Tip: Version your filenames with the date and spec: “TradeshowBanner_24x36_CMYK_bleed_2026-05-01.pdf”. Include a plain-text job spec in the same folder listing trim size, bleed, substrate, and finish — it takes two minutes and eliminates most back-and-forth with prepress.
Color mode, ICC profiles, and image resolution rules
CMYK vs. RGB: why the conversion matters
Some printers will accept RGB files and convert them to CMYK internally, but that conversion can shift colors unpredictably. Blues often shift purple; vibrant oranges can go muddy. Converting to CMYK yourself — using the correct ICC profile for the intended substrate — gives you control over how those shifts happen. For trade-show fabric displays, coated stock, and vinyl banners, the profiles differ, so confirm the correct profile with your printer before you convert.
Spot colors (Pantone) require special handling in a PDF/X workflow. Define them by their official Pantone name in your swatch panel, and confirm with your printer whether they’ll print as a true spot separation or convert to CMYK process. Misnamed spot colors can output as unexpected process builds.
Resolution by print type
The industry baseline is 300 DPI at final print size. Large-format prints are an exception: because viewers stand farther away, lower effective DPI is acceptable. Scaling an image up in your layout reduces its effective DPI — a 300 DPI source scaled to 200% becomes 150 DPI at output.
| Print Type | Recommended DPI | Notes |
|---|---|---|
| Business cards, brochures | 300 DPI | Minimum at final size |
| Posters (up to 24") | 300 DPI | Check effective DPI after scaling |
| Trade-show banners (24") | 150–200 DPI | Viewed at 3–6 ft distance |
| Large-format backdrops (8 ft+) | 100–150 DPI | Viewed at 6+ ft distance |
Check effective resolution in Illustrator via Document Info → Linked Images, or in InDesign via the Links panel. If effective DPI is below the threshold, re-source the image at a higher native resolution rather than upsampling — upsampling adds pixels but not real detail.
Pro Tip: For outdoor banner frames and large stretch fabric displays, always set up your document at 1:1 scale. Designing at a reduced scale (say, 1:4) and then scaling up at export is a reliable way to accidentally submit a 75 DPI file.
Bleed, trim, safe area, and crop marks: the exact values
These four elements work together to protect your artwork through the cutting and finishing process.
- Crop marks: — thin lines placed outside the bleed area showing the cutter where to cut. Set them at least 0.125" offset from the bleed edge so they don’t print on the finished piece.
Adding bleed, safety margins, and crop marks prevents unintended white edges and protects critical content from being trimmed. For a standard 24" × 36" banner, your document setup should be 24.25" × 36.25" with bleed marks, and your live content should stay within 23.75" × 35.75".
When working with two-page spreads, set up facing pages with the gutter accounted for separately — don’t rely on the printer to split a spread file. For pieces with grommets or pole pockets, note the placement in a separate instructions file or on a non-printing layer, and link to your banner finishing guide for substrate-specific requirements.
Pro Tip: Full-bleed images that run edge to edge are the most common source of white-edge complaints. Extend the background image all the way to the bleed edge — not just to the trim line — and you’ll never see a sliver of white on the finished print.
How to export a print-ready PDF from InDesign, Illustrator, and Photoshop
InDesign
- Go to File → Package to collect all fonts and linked images.
- Open File → Export → Adobe PDF (Print).
- Select the PDF/X-1a or PDF/X-4 preset from the Standards dropdown.
- Under Marks and Bleeds, check Crop Marks and enter 0.125" bleed on all sides.
- Under Output, set Color Conversion to “Convert to Destination” and select your ICC profile.
- Click Export.
Illustrator
- Convert all text to outlines (Type → Create Outlines) or confirm fonts are embedded.
- Set the artboard to your trim size; add 0.125" bleed in Document Setup.
- Go to File → Save As → Adobe PDF.
- Select PDF/X-1a or PDF/X-4 and check “Use Document Bleed Settings.”
- Under Output, embed the ICC profile.
Photoshop
- Set Image Size to final print dimensions at 300 DPI (or the appropriate large-format DPI).
- Convert to CMYK via Image → Mode → CMYK Color.
- Flatten the image (Layer → Flatten Image).
- Save as TIFF for placement in a layout, or export as PDF via File → Save As → Photoshop PDF with “Preserve Photoshop Editing Capabilities” unchecked for a press-ready flat file.
Pro Tip: Keep your layered master file separate from the export. Flatten only the press PDF — never the working file. When a client requests a last-minute copy change, you’ll be glad you didn’t flatten the only version you had.
This booth graphics production guide covers how these exported files move through production once they reach the print shop.
How to verify your PDF is truly print-ready
A preflight check runs through your PDF and flags anything that doesn’t meet the target spec. Here’s what a thorough preflight covers:
- Correct page size and orientation
- Bleed present on all sides
- Fonts embedded or outlined
- All images in CMYK (or correct ICC profile); no unintended RGB objects
- Effective image resolution at or above the required DPI
- Spot colors defined and named correctly
- Transparent objects handled per the PDF/X variant
- Correct page order for multi-page documents
A printer’s preflight routine checks incoming files for ICC profile usage, correct color separations, resolution, and intended substrate. Running the same checks yourself before submission is the single most reliable way to avoid a production hold.
| Check Type | Acrobat Pro Preflight | Callas pdfToolbox | Printer Preflight |
|---|---|---|---|
| Font embedding | ✓ | ✓ | ✓ |
| Color space / ICC | ✓ | ✓ | ✓ |
| Image resolution | ✓ | ✓ | ✓ |
| Bleed / page size | ✓ | ✓ | ✓ |
| PDF/X compliance | ✓ | ✓ | Varies |
| Detailed fix reports | Basic | Advanced | Varies |
Your submission package should include: the final press PDF, native files packaged with assets (if the printer requested them), a plain-text job spec with trim size, substrate, finish, and quantity, and a contact name for approval questions. For proofing best practices before final submission, the proofing guide for small businesses walks through the approval workflow in detail.
Common submission mistakes and how to fix them
These are the errors that most frequently delay production or force a reprint:
- Live transparencies in a PDF/X-1a file: — Flatten transparency before export, or switch to PDF/X-4 if your printer supports it.
Pro Tip: When you’re short on time, prioritize in this order: missing fonts, RGB color mode, and missing bleed. Those three cause the most reprints. Low-res images and minor transparency issues can sometimes be corrected by the printer without reprinting — but always confirm before assuming.
For tight deadlines, the quick-turnaround banner guide covers which file issues printers can work around and which ones will hold your job.
Why printers insist on these specs: RIP, PDF/X, and ISO standards
The RIP translates your PDF into the precise dot patterns that drive press output. It’s an automated system built for speed and consistency — and it performs best when every incoming file follows the same predictable structure. When a file deviates from that structure, the RIP either guesses or stops. Both outcomes cost money.
ISO standards such as ISO 12647-2 and the PDF/X family (ISO 15930) exist specifically to reduce manual correction and standardize color and file-handling requirements for reproducible results. Each manual fix a prepress operator makes introduces the possibility of human error — a wrong color profile applied, a font substituted, a bleed edge guessed. Standards remove those decision points from the workflow entirely.
Every manual intervention adds cost and risk. A file that requires prepress correction delays not just your job but every job queued behind it. Print shops that run high-volume production — trade-show graphics, event signage, retail displays — depend on files arriving ready to process. That’s why PDF/X compliance isn’t a preference; it’s a production requirement.
Pro Tip: When you submit a job, reference the PDF/X variant and ISO profile on your job ticket (“PDF/X-4, ISO Coated v2 300%”). It tells the prepress team exactly what to expect and speeds the approval step significantly.
Key Takeaways
A print-ready file meets every mechanical spec the printer’s RIP requires — format, color, resolution, bleed, and fonts — so your job moves straight to production without delays.
| Point | Details |
|---|---|
| Export as PDF/X | Use PDF/X-1a for traditional offset workflows or PDF/X-4 for modern digital presses. |
| Set CMYK and embed ICC profile | Convert images to CMYK before export to avoid unpredictable color shifts at the printer. |
| 300 DPI at final size | Check effective resolution after scaling; large-format prints may use 100–200 DPI. |
| Include 0.125" bleed | Extend artwork 0.125" beyond the trim line on all sides and keep critical content 0.125" inside the trim. |
| Arrowhead Sign Company support | Arrowhead Sign Company - Signs, Banners and Trade Show Displays offers preflight support and fast fulfillment for trade-show signage nationwide. |
The spec that most exhibitors get wrong
Most print-ready guides focus on what to set. What they rarely explain is why the order of operations matters. Color conversion is the step most exhibitors skip or defer — and it’s the one that causes the most visible reprints.
Converting to CMYK at the end of your workflow, after all your design decisions are made in RGB, is a fundamentally different result than designing in CMYK from the start. The gamut difference isn’t theoretical. Vibrant screen blues, neon greens, and rich reds all compress when they hit CMYK ink limits. If you’ve built your brand identity around a specific Pantone color and you’re printing on vinyl or fabric, the ICC profile for that substrate matters as much as the color mode itself.
The other underestimated issue is effective resolution on large-format pieces. Designers routinely set up a 10 ft backdrop at 1:4 scale, work at 300 DPI in that reduced document, and export assuming the resolution scales up with the artwork. It doesn’t. The file arrives at 75 DPI and the printer either holds the job or prints it soft. Setting up at 1:1 scale and working at 100–150 DPI from the start is the correct approach for large-format, and it’s a habit worth building before your next trade-show deadline.
The specs exist because automation requires predictability. The more your file matches what the RIP expects, the faster and more accurately your signage gets produced.
Your files are ready — now get them printed fast
Once your artwork is print-ready, Arrowhead Sign Company - Signs, Banners and Trade Show Displays makes the production step straightforward. Most orders ship within two business days, and Arizona-based customers can get direct venue delivery for trade shows and events. Whether you’re producing a 10 ft stretch fabric display for a booth backdrop, a Signicade Deluxe A-Frame Sidewalk Sign for a retail promotion, or an outdoor banner frame for an event entrance, the product range covers the full spectrum of trade-show and event signage.

If you’re not sure whether your file will pass preflight, the team at Arrowhead Sign Company - Signs, Banners and Trade Show Displays can review your artwork before production begins. Submit your files at arrowheadsigncompany.com and get your signage moving toward the press today.
Useful sources and further reading
These are the authoritative references behind the technical guidance in this article:
- General Print-Ready File Specifications | Jukebox Help Center — Accepted formats, bleed and safe-zone values, and PDF/X recommendations from a commercial print shop.
- Adding printing bleed, safety margins, and crop marks | Publishing Xpress — Clear explanation of why bleed and safety margins protect finished artwork from cutting tolerances.
- Part 1: Document Preparation and Prepress | Digital Dots — Technical guidance on ICC profile usage, color separations, and preflight routines from a prepress standards perspective.
- Print & Graphic Design Services | Expedition — A design partner for teams that need professional file preparation or artwork built to print-ready spec from the ground up.
- How Design Files Affect Print Cost | Arrowhead Sign Company — How file setup decisions directly affect production cost for exhibitors and event marketers.
Recommended
- How Design Files Affect Print Cost for Exhibitors - Arrowhead Sign Company
- How Booth Graphics Get Printed: A Planner’s Guide - Arrowhead Sign Company
- How Exhibitors Prepare Display Materials: Small Team Guide - Arrowhead Sign Company
- How Trade Show Printing Works: A Planner’s Guide - Arrowhead Sign Company